JSNSD Course Notes
- 1 - Introduction
- 2 - Setting up
- 3 - Creating a web server
- 4 - Serving Web Content
- 5 - Creating RESTful JSON Services
- 6 - Manipulating Data with RESTful Services
- 7 - Consuming and Aggregating Services
- 8 - Proxying HTTP Requests
- 9 - Web Security: Handling User Input
- 10 - Web Security: Mitigating Attacks
- 11 - Course Completion
- Quizzes
1 - Introduction
- Resources for this course can be found online. Making updates to this course takes time. Therefore, if there are any changes in between updates, you can always access course updates, as well as the course resources online: Go to the Linux Foundation training website to obtain Course Resources. The user ID is LFtraining and the password is Penguin2014.
- One great way to interact with peers taking this course is via the Class Forum. The forum can be used in the following ways:
- To introduce yourself to other peers taking this course.
- To discuss concepts, tools and technologies presented in this course, or related to the topics discussed in the course materials.
- To ask questions or report issues with labs or course content.
- To share resources and ideas related to Node.js.
2 - Setting up
How not to install Node
Often Node.js can be installed with a particular Operating System's official or unofficial package manager. For instance apt-get on Debian/Ubuntu, Brew on macOs, Chocolatey on Windows. It is strongly recommended against using this approach to install Node. Package managers tend to lag behind the faster Node.js release cycle. Additionally the placement of binary and config files and folders isn't standardized across OS package managers and can cause compatibility issues.
Another significant issue with installing Node.js via an OS package manager is that installing global modules with Node's module installer (npm) tends to require the use of sudo (a command which grants root privileges) on non-Windows systems. This is not an ideal setup for a developer machine and granting root privileges to the install process of third-party libraries is not a good security practice.
Node can also be installed directly from the Node.js website. Again on macOS and Linux it predicates the use of sudo for installing global libraries. Whether Windows, macOS or Linux, in the following sections we'll present a better way to install Node using a version manager.
It's strongly recommended that if Node is installed via an Operating System package manager or directly via the website, that it be completely uninstalled before proceeding to the following sections.
Installing Node.js on macOS and Linux
The recommended way to install Node.js on macOS and Linux is by using a Node version manager, in particular nvm. See https://github.com/nvm-sh/nvm for full details. The current nvm version is v0.39.1 (as of January 2022), so the install process will contain this version in the URL, if a greater version is out at time of reading, replace v0.39.1 with the current nvm version. For this installation process we assume that Bash, Sh, or Zsh is the shell being used, Fish is not supported but see the nvm readme for alternatives. The way to install nvm is via the install script at https://github.com/nvm-sh/nvm/blob/v0.39.1/install.sh. If curl is installed (it usually is) a single command can be used to install and setup nvm:
curl -o- https://raw.githubusercontent.com/nvm-sh/nvm/v0.39.1/install.sh | bash
If using zsh (e.g., on newer macOS releases) the bash part of the command can be replaced with zsh. Alternatively the file can be downloaded and saved, and then easily executed like so: cat install.sh | bash. Again bash can be replaced with zsh. To check that the installation was successful execute the following in the terminal: command -v nvm. It should output nvm. If this fails on Linux, close and reopen the terminal (or SSH session) and try running the command again. On macOS see https://github.com/nvm-sh/nvm#troubleshooting-on-macos for in depth troubleshooting. Now that we have a version manager, let's install the Node version we'll be using on this course: nvm install 16. This will install the latest version of Node 16. We can verify that Node is installed, and which version, with the following command: node -v.
3 - Creating a web server
Introduction
Chapter Overview
The focus of this course and the JSNSD examination centers on RESTful/HTTP services as key knowledge for almost every contemporary scenario involving Node.js and services. There is a great deal of overlap between an HTTP service and a web server. In order to make an HTTP-based service, the first step is to create an HTTP server. In this chapter we'll explore different approaches to creating a web server and perform a tour de force of selected web frameworks while we're at it. This chapter and indeed the entire course assumes prior knowledge of Node.js, including the module system and Node.js streams and Node CLI flags. See the Node.js Application Development (LFW211) course for instruction in these fundamentals.
Learning Objectives
By the end of this chapter, you should be able to:
- Create a minimal web server with Node core APIs.
- Create a minimal web server with the Express framework.
- Create a minimal web server with the Fastify framework.
Creating a Web Server
Creating a Web Server with Node Core (1)
Generally speaking, attempting to create a web server or service with just the Node core http (or https) module is not recommended. However, for learning purposes we'll put together a basic web server using the core http module in order to better understand the value that a web framework can bring and how a web framework is actually operating under the hood.
Let's define what we expect from a minimum viable web server:
- Responds to HTTP requests based on a given HTTP verb (for instance GET).
- Responds to requests based on a given route.
- Responds with 404 HTTP Status code if a route isn't found.
- Sets appropriate headers, such as Content-Type.
To meet this criteria we're going to take an iterative approach and build in layers.
Before getting started, be aware that we'll be stopping and starting servers a lot throughout this chapter and the entire course. Make sure that any previous processes from prior sections have been terminated, especially when attempting the exercises.
To get started, we can create a folder called http-web-server with the following commands:
node -e "fs.mkdirSync('http-web-server')"
cd http-web-server
Note, throughout this course node with the -e (evaluate) flag will be used for cross-platform/cross-shell administrative commands (like creating folders).
Now, let's create a file called server.js with the following initial code:
'use strict'
const http = require('http')
const PORT = process.env.PORT || 3000

const hello = `<html>
  <head>
    <style>
     body { background: #333; margin: 1.25rem }
     h1 { color: #EEE; font-family: sans-serif }
    </style>
  </head>
  <body>
    <h1>Hello World</h1>
  </body>
</html>`

const server = http.createServer((req, res) => {
  res.setHeader('Content-Type', 'text/html')
  res.end(hello)
})

server.listen(PORT)
This code can be executed with the following command:
node server.js
If we run this code the process will not exit by itself:
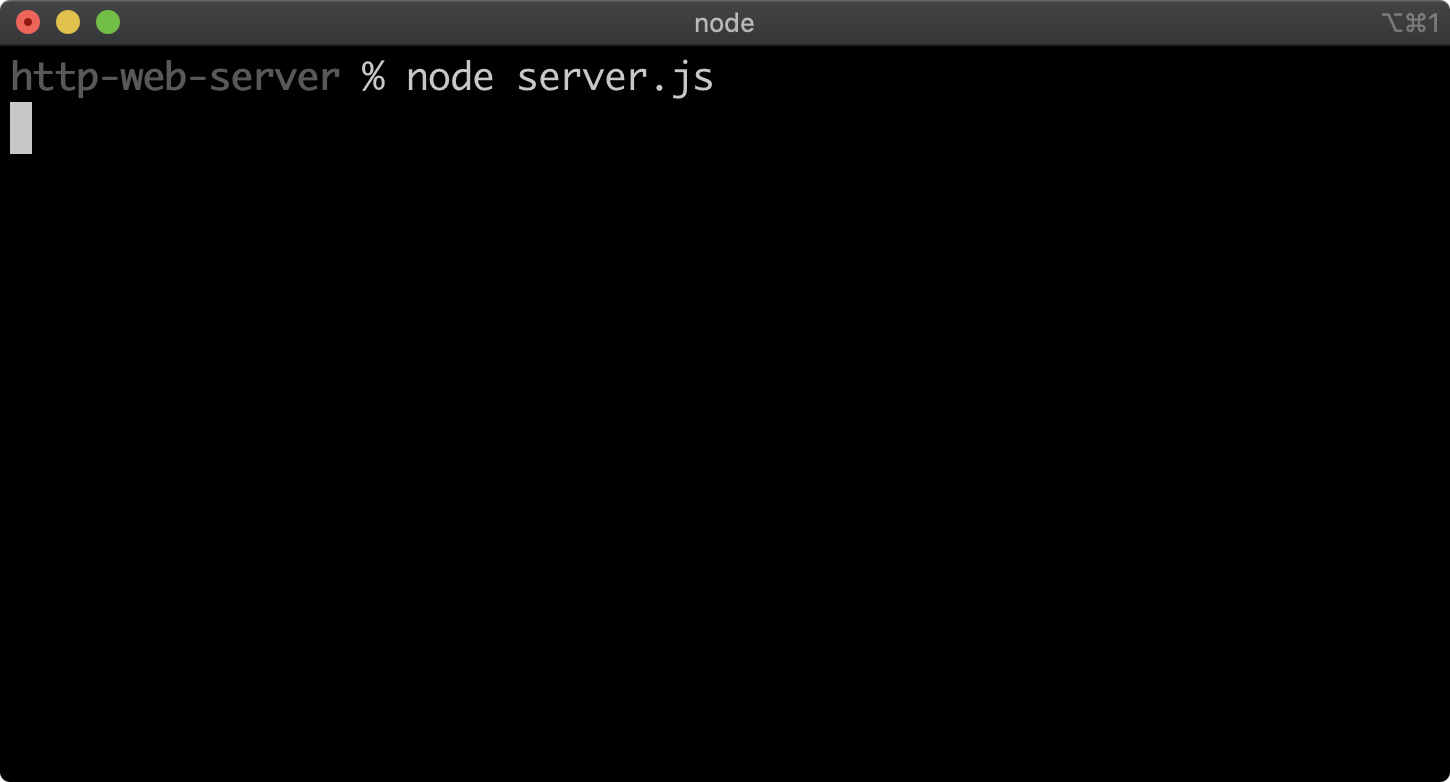
This is because the created server is keeping the process open.
If we then navigate in a browser to http://localhost:3000, we should see something like the following:

So far we've used the Node core http module to create a server with the createServer method. We've also observed that a function is passed to createServer. This function is called every time the HTTP server receives a request. The function passed to createServer is passed two objects: the request object and the response object. These objects are created for every request and then passed to the function we supply to createServer.
In the function we passed to createServer we use the setHeader and the end methods of the response object (res) to set the Content-Type header to text/html, and to send the string of HTML (assigned to the hello constant) while also closing the connection. The res object inherits from http.ServerResponse which in turn inherits from http.OutgoingMessage (a Node core internal constructor) which then inherits from stream.Stream. For all practical purposes the res object is a writable stream, which is why calling end writes our content and also closes the connection.
The createServer method also returns an object which represents the server. We use the listen method to bind to a port. In our case, by default, we bind to port 3000. Our server can instead bind to a different port by setting the PORT environment variable.
Creating a Web Server with Node Core (2)
Our implementation does not yet meet our criteria. We can navigate to any route and the response will be the same. For instance, http://localhost:3000/foo:

Regardless of whether we use a POST, GET or any other HTTP verb, we will always get the same response.
Let's update our server.js code to the following:
'use strict'
const url = require('url')
const http = require('http')
const PORT = process.env.PORT || 3000
const { STATUS_CODES } = http

const hello = `<html>
  <head>
    <style>
     body { background: #333; margin: 1.25rem }
     h1 { color: #EEE; font-family: sans-serif }
   </style>
  </head>
  <body>
    <h1>Hello World</h1>
  </body>
</html>`

const root = `<html>
<head>
  <style>
   body { background: #333; margin: 1.25rem }
   a { color: yellow; font-size: 2rem; font-family: sans-serif }
  </style>
</head>
<body>
  <a href='/hello'>Hello</a>
</body>
</html>
`

const server = http.createServer((req, res) => {
  res.setHeader('Content-Type', 'text/html')
  if (req.method !== 'GET') {
    res.statusCode = 405
    res.end(STATUS_CODES[res.statusCode] + '\r\n')
    return
  }
  const { pathname } = url.parse(req.url)
  if (pathname === '/') {
    res.end(root)
    return
  }
  if (pathname === '/hello') {
    res.end(hello)
    return
  }
  res.statusCode = 404
  res.end(STATUS_CODES[res.statusCode] + '\r\n')
})

server.listen(PORT)
We can stop the currently running server.js process with Ctrl+C and start our modified server.js file with the following command:
node server.js
Creating a Web Server with Node Core (3)
At the top of our server.js file we've added the additional Node core url module, and we've destructured the STATUS_CODES object, which contains key-values of status codes to HTTP status messages, from the http module. Just before creating our server we've also added a root constant which contains an HTML string with an anchor tag linking to the /hello route.
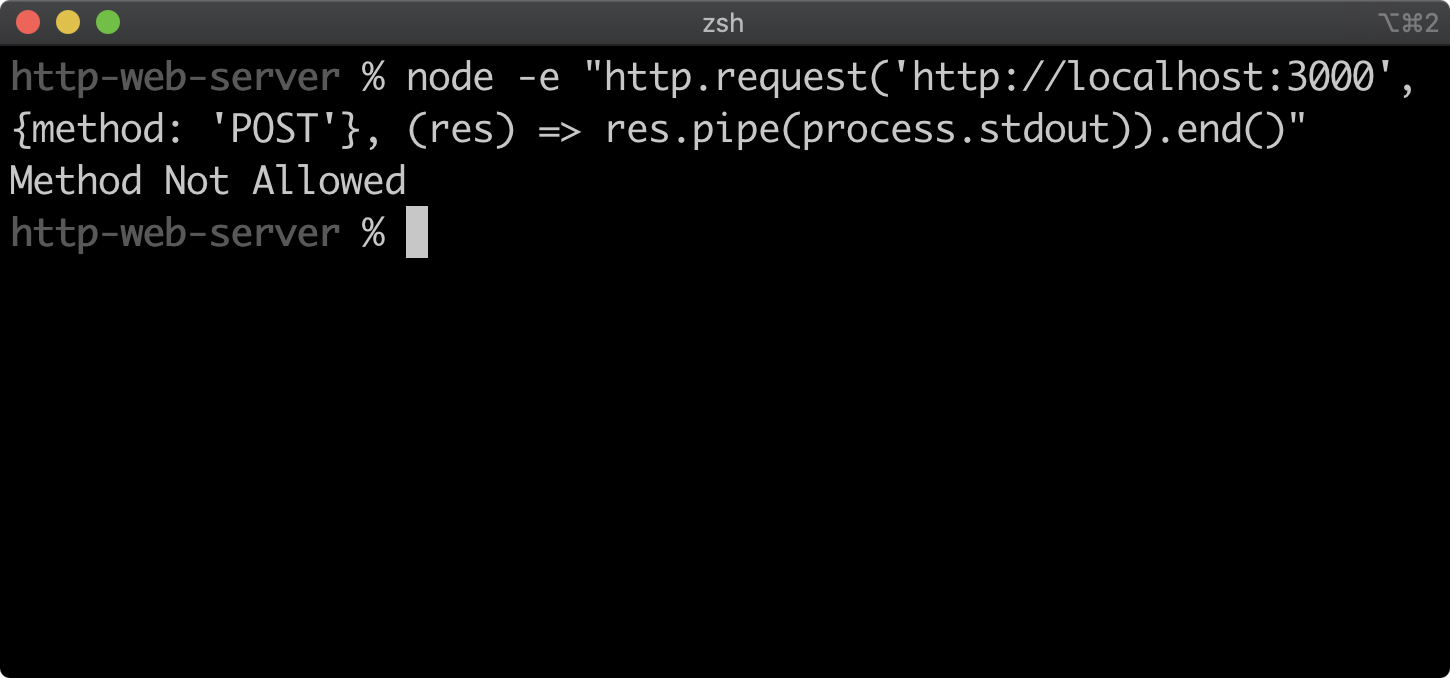
We've updated the function passed to createServer with some new logic. We check the incoming requests HTTP verb by accessing the req.method property. If this is not set to GET we set the statusCode of the res object to 405 (Method Not Allowed) and end the response with an appropriate status message.
We can check whether this works by running the following command in another terminal window:
node -e "http.request('http://localhost:3000', {method: 'POST'}, (res) => res.pipe(process.stdout)).end()"
This command uses the http module to submit a POST request to our server and then prints the result to the terminal:
The Node core url module has a parse method which turns a URL string into an object containing various segments of the URL, such as host, protocol and pathname. See the Node.js Documentation to learn more.
The req.url property has a slightly misleading name. It does not hold the entire URL of an incoming request, only the relative path after the host portion. For instance a request to http://localhost:3000/hello will result in a req.url of /hello. The reason we pass req.url to url.parse is to separate any potential query string from the URL. Now, let's consider a request to http://localhost:3000/hello?foo=1. It would result in a req.url value of /hello?foo=1. Passing such a string to url.parse will result in an object with a pathname property of /hello.
If the pathname is / then we end the response with the contents of root and exit the function early with a return keyword. In this case, there is no need to set res.statusCode because the default res.statusCode is 200 (OK).
For more information on status codes see the MDN web docs.
If we navigate to http://localhost:3000 in the browser we should see the following:

Creating a Web Server with Node Core (4)
If the pathname is /hello then we end the response with the contents of hello and exit the function. Again, no need to set the res.statusCode property.
In the browser, upon clicking the link or manually navigating to http://localhost/hello we should see the following:

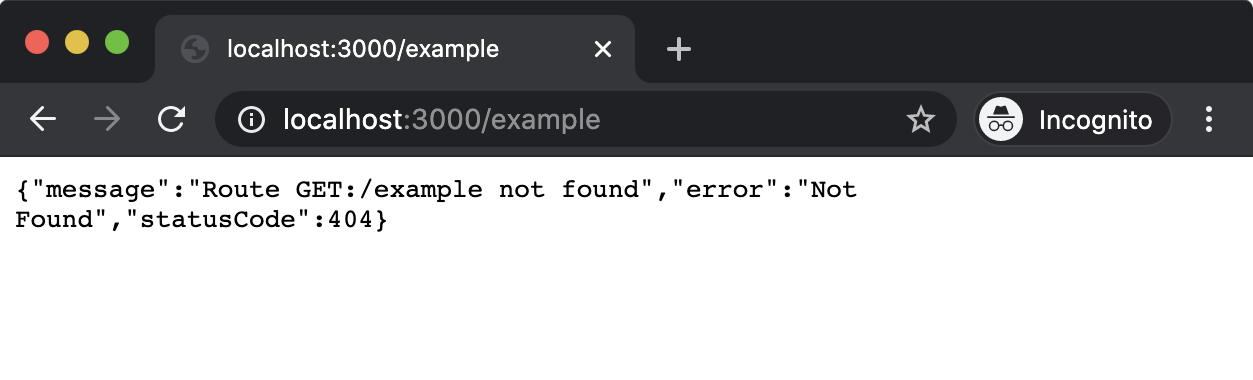
If pathname is neither /hello nor / the end of the function is reached, where the res.statusCode property is set to 404 and the response is ended with the corresponding status message (Not Found).
Navigating to http://localhost:3000/foo in the browser should result in the following:

We have now created a very basic web server. This procedural approach can become very rigid and unwieldy if we were to attempt to extend functionality over time. In the next sections we'll learn how to use the Express and Fastify frameworks to achieve the same results in a more flexible, declarative manner.
Creating a Web Server with Express (1)
Now that we understand what it takes to create a rudimentary web server using Node.js core http and url modules, let's turn our attention to expediting the process of creating, extending and maintaining Node.js web servers.
Express is one of the most widely used Node.js frameworks. More so when it comes to generating and delivering HTML dynamically, as opposed to delivering RESTful JSON content as a service.
The core development efforts of the Express project have been stagnant since around 2017. Despite renewed interest in modernizing the framework from the OSS community and technology industry circa 2020, it has remained in maintenance mode. In this course, we'll be focusing on Express 4, which, although it was first released 8 years ago, is the latest major version at the time of writing (February 2022).
Even after the release of the next major version (Express 5, last alpha was two years ago, ETA unknown), understanding version 4 is essential from a pragmatic perspective since so many legacy code bases have been built using Express 3 and 4, which are fairly similar to each other.
Let's explore Express 4. First, create:
- an
express-web-serverfolder with anapp.js file - a
routesfolder withindex.jsandhello.jsfiles, and - a
binfolder with awwwfile:
node -e "fs.mkdirSync('express-web-server')"
cd express-web-server
node -e "fs.mkdirSync('routes')"
node -e "fs.mkdirSync('bin')"
node -e "fs.openSync('app.js', 'w')"
cd routes
node -e "fs.openSync('index.js', 'w')"
node -e "fs.openSync('hello.js', 'w')"
cd ../bin
node -e "fs.openSync('www', 'w')"
cd ..
Next, we'll generate a package.json file for the project and then install Express and another package called http-errors:
npm init -y
npm install express@4 http-errors@2
The generated package.json file should look similar to the following:
{
  "name": "express-web-server",
  "version": "1.0.0",
  "description": "",
  "main": "app.js",
  "scripts": {
    "test": "echo \"Error: no test specified\" && exit 1"
  },
  "keywords": [],
  "author": "",
  "license": "ISC",
  "dependencies": {
    "express": "^4.17.2",
    "http-errors": "^2.0.0"
  }
}
We need to modify the scripts object in the package.json file to the following:
"scripts": {
  "test": "echo \"Error: no test specified\" && exit 1",
  "start": "node ./bin/www"
},
Here we've added a start script, so when we run npm start the bin/www file will be executed with Node.
We're using this folder structure for the sake of familiarity: it's a conventional Express structure. A tool called express-generator generates this structure with some other additions. We'll use the generator in the next chapter, for now we're concentrating on the bare bones to create the equivalent of our minimum viable web server that we implemented in the previous section.
Creating a Web Server with Express (2)
We're going to build the app.js file iteratively. For our first iteration app.js should look as follows:
'use strict'
const express = require('express')

const app = express()

module.exports = app
All we're doing here is instantiating an Express instance and exporting it from the app.js file as a module.
The bin/www file is the entry point for the application, and is responsible for starting the server. It should look as follows:
#!/usr/bin/env node
'use strict'

const app = require('../app')
const http = require('http')

const PORT = process.env.PORT || 3000

const server = http.createServer(app)

server.listen(PORT)
In the previous section we learned about the http.createServer method. It takes a function which is passed a request and response object. In bin/www we import the app.js file we just wrote, assign it to the app constant and then pass that to http.createServer. An Express instance on the other hand is actually a function that accepts a request object and a response object, that's why we pass the Express instance to http.createServer. In the next steps, we'll configure our Express app instance, and this will change how the function that is passed to http.createServer behaves.
We should now be able to get our server up and running with the following command:
npm start
This command will look up the package.json scripts.start field and then run the command (node ./bin/www). The bin/www file will create a server with the Node core http.createServer method, but use the app.js file to generate the function which is passed to createServer. Like our HTTP server in the previous section, once the process has started, it will not output anything.
If we navigate in a browser to http://localhost:3000, we should see the following output:
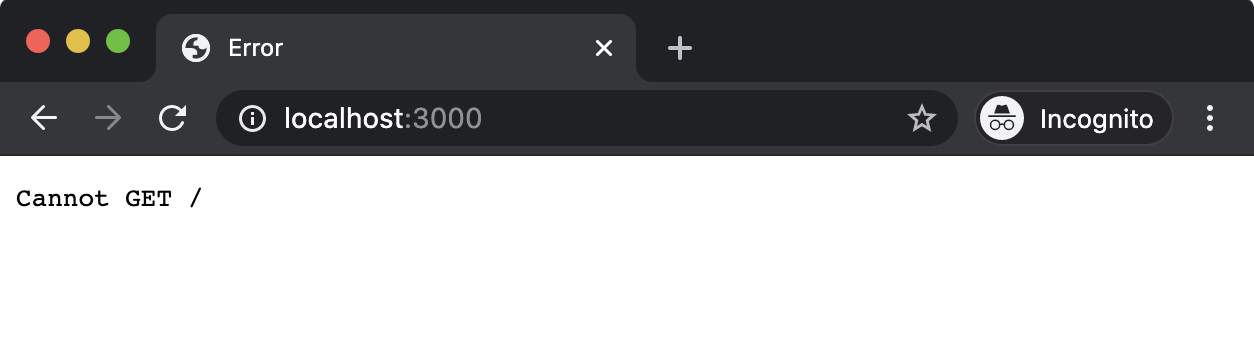
We haven't defined any routes, so the generated Express function will default to this behavior. Before we create our routes, let's align the error handling with our HTTP server from the previous section by modifying app.js to the following:
'use strict'
const express = require('express')
const createError = require('http-errors')

const app = express()

app.use((req, res, next) => {
  if (req.method !== 'GET') {
    next(createError(405))
    return
  }
  next(createError(404))
})

app.use((err, req, res, next) => {
  res.status(err.status || 500)
  res.send(err.message)
})

module.exports = app
Creating a Web Server with Express (3)
Configuring an Express servers' behavior is almost always performed with app.use (where app is the Express instance). The app.use method takes a function which is very similar to the function that is passed to http.createServer. The function will be called for every incoming request, and it will be passed a request object and a response object.
The difference between the function passed to app.use and the function passed to http.createServer is that it can also have a third parameter called next. This is an error-first callback function that is called when the function passed to app.use has completed any tasks and is ready to handover to the subsequent function registered via app.use. So this means that instead of passing one big function to http.createServer, multiple functions can be registered via app.use. They will be called in order of registration, each one handing over to the following one when it's done processing. If the next function is not called, then the request handling ends there and none of the ensuing registered functions are called for that request. This approach is known as the middleware pattern. The building blocks for configuring an Express server are middleware functions.
In our case we've configured two pieces of middleware. The first middleware function we registered should always be the second-to-last middleware. Essentially, if this middleware has been reached then we can assume that no routes were matched. Therefore we generate a 404 error using the http-errors module (part of the Express ecosystem). The http-errors module will generate an appropriate message for any HTTP status code passed to it. We then pass this error object as the first argument to the next callback function, which let’s Express know that an error has occurred. We may also pass a 405 (Method Not Allowed) error instead, if we find that the req.method property does not have the value of GET. This matches the functionality in our HTTP server implementation from the first section. Currently, we have no routes registered, so a 404 error is the default for any HTTP GET requests.
The very last piece of middleware in our modified app file should always be the final piece of middleware. This registered middleware specifies four parameters instead of the usual three. This makes Express recognize the middleware as the final error handling middleware and passes the error object that we pass to next in the prior middleware as the first argument of this special error-handling middleware function. From there we can grab the HTTP status code from the error object and use it to set the response status code. Notice that we use a res.status function instead of the res.statusCode property. Similarly, we can use res.send instead of res.end to write and end the response. This is another method added by Express that will detect the Content-Type from the input, and potentially perform additional operations. For instance, if an object was passed to res.send that object would be serialized to JSON and the response Content-Type would automatically be set to application/json.
Even though the req and res objects are generated by the http module and have all of the same functionality, Express decorates the req and res objects with additional functionality. We could not have used res.status or res.send in the previous section because these functions did not exist. Some, including this author, view Express' decorator approach on core APIs as a mistake. By conflating Node core APIs with Express APIs on the same objects the principles of least surprise and separation of concerns are violated, while also causing performance issues. However, so much legacy code has been written with Express it's important to understand its APIs.
Let's move onto creating our routes, the routes/index.js file should look as follows:
'use strict'
const { Router } = require('express')
const router = Router()

const root = `<html>
<head>
  <style>
   body { background: #333; margin: 1.25rem }
   a { color: yellow; font-size: 2rem; font-family: sans-serif }
  </style>
</head>
<body>
  <a href='/hello'>Hello</a>
</body>
</html>
`

router.get('/', (req, res) => {
  res.send(root)
})

module.exports = router
Note that inlining HTML like this is uncommon and it was used here only for demonstration purposes. Usually, HTML would be dynamically generated with a template language or maybe a Server Side Rendering of a frontend framework such as React. We'll look briefly at templates in the next chapter.
Creating a Web Server with Express (4)
To add a route we create an instance of the Express router, and then use its get method to define a GET route. The router supports all HTTP verbs (e.g. POST, PUT and so forth). In each case when a router HTTP verb method is called the first argument passed to it is a string declaring the path for the route. In this case we just use /, since this is our root route. The second argument is a route middleware function. In our case we simply send our HTML string (root) to the response. The router instance is exported from the routes/index.js file, and we'll later import it into app.js in order to register it with the Express application instance.
Now, let's create our /hello route. The routes/hello.js file should contain the following:
'use strict'
const { Router } = require('express')
const router = Router()

const hello = `<html>
  <head>
    <style>
     body { background: #333; margin: 1.25rem }
     h1 { color: #EEE; font-family: sans-serif }
    </style>
  </head>
  <body>
    <h1>Hello World</h1>
  </body>
</html>`

router.get('/', (req, res) => {
  res.send(hello)
})

module.exports = router
This is very similar to the root route. Note that we define the route path as / in this case as well, instead of /hello. This is because we'll be mounting this router at the /hello route path in app.js instead. This pattern allows for easy renaming of routes at the top level.
Finally, let's register our routes in app.js, by modifying app.js to the following:
'use strict'
const express = require('express')
const createError = require('http-errors')
const indexRoutes = require('./routes')
const helloRoutes = require('./routes/hello')

const app = express()

app.use('/', indexRoutes)
app.use('/hello', helloRoutes)

app.use((req, res, next) => {
  if (req.method !== 'GET') {
    next(createError(405))
    return
  }
  next(createError(404))
})

app.use((err, req, res, next) => {
  res.status(err.status || 500)
  res.send(err.message)
})

module.exports = app
Creating a Web Server with Express (5)
We imported both routes/index.js and routes/hello.js, and assigned them to indexRoutes and helloRoutes respectively. Then above our 404/405 error handler middleware, we registered the imported express.Router instances with app.use. The app.use function can optionally take a mount point, which is a string representing a route path. This means it will only apply the registered middleware (the express.Router instances are also middleware functions) when incoming requests match that path. We mount the indexRoutes at the / route path and the helloRoutes at the /hello route path.
We need to start a server with our new changes. If our server is still running, we can stop it with Ctrl+C and then start it again with the following command:
npm start
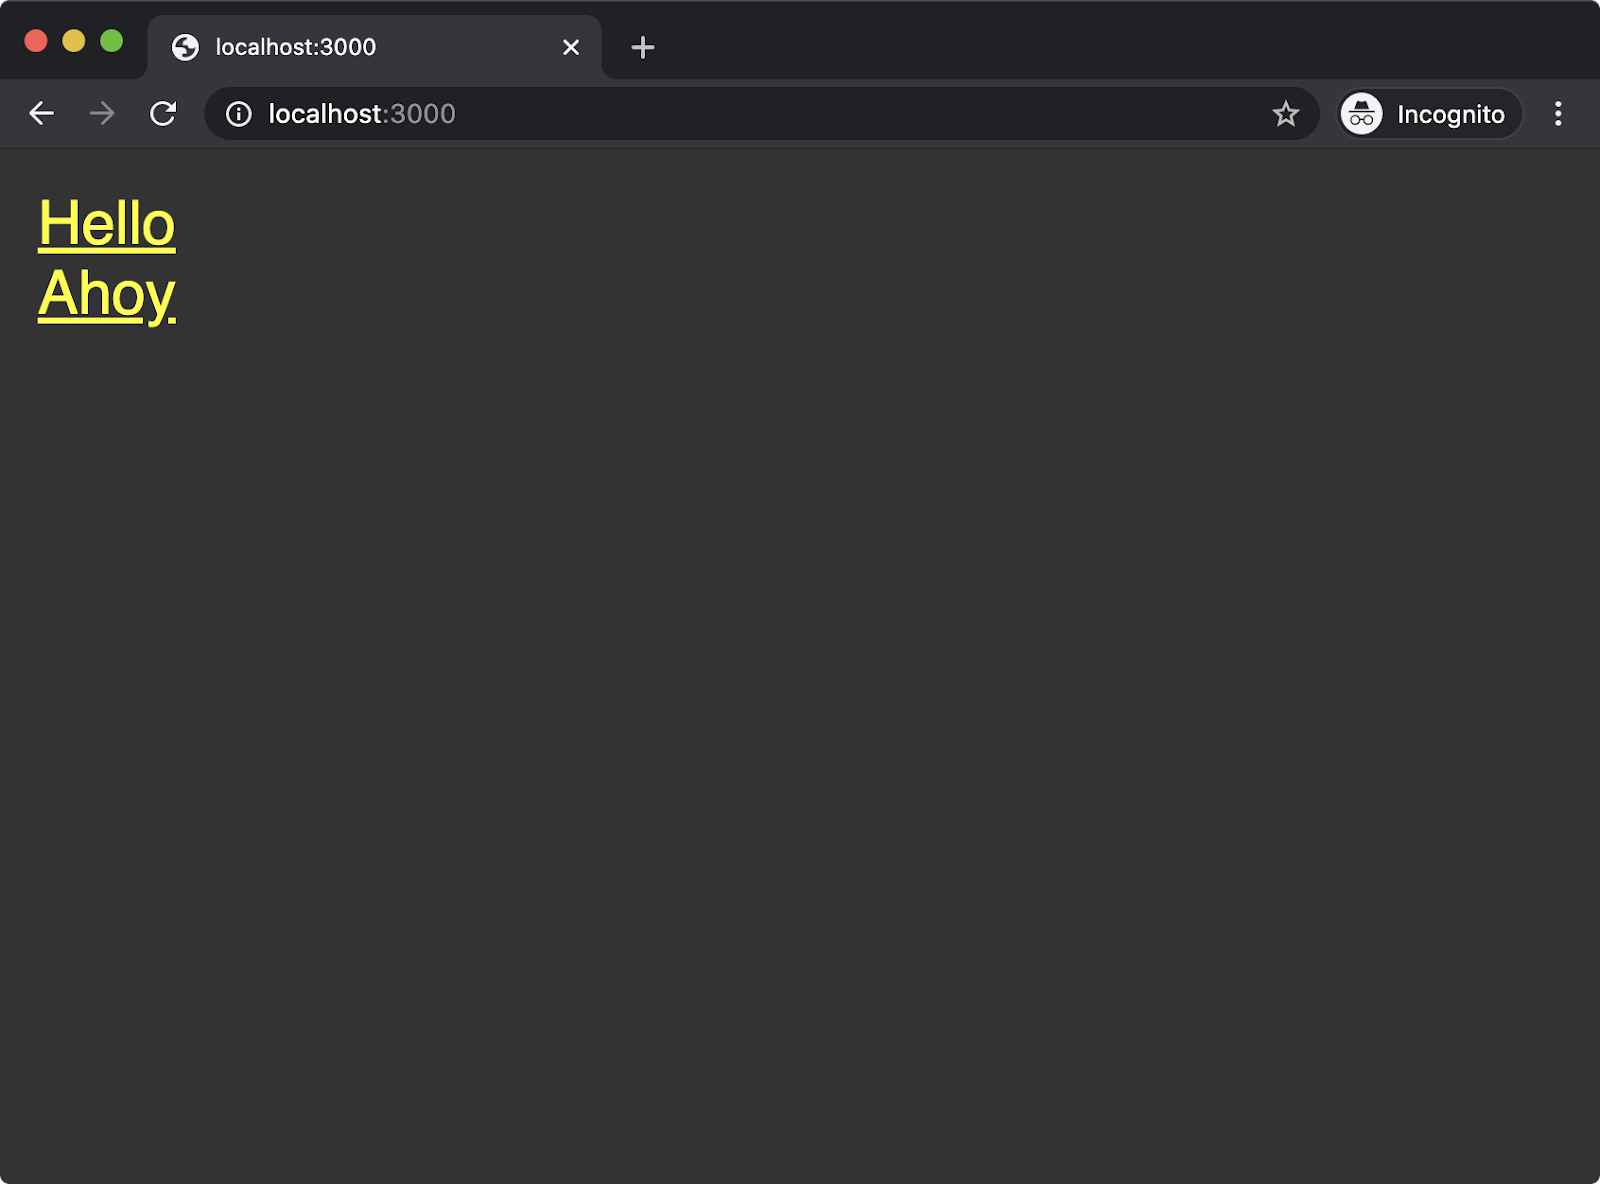
Now, if we navigate in a browser to http://localhost:3000, we should see the following:

If we click the link (or navigate to http://localhost:3000/hello), we should see the following:

If we navigate to a non-existent route, we should see the following:

This section has been a deep-end dive into Express fundamentals. Throughout the course we'll continue to explore Express and retrace key topics.
Creating a Web Server with Fastify (1)
Fastify is an up-and-coming framework in the Node.js ecosystem. It's specifically geared towards creating RESTful JSON services but can also be used for serving HTML as in our example implementation in the previous two sections.
Instead of middleware, Fastify supports a plugin-based pattern which provides full code isolation and encapsulation. We'll explore this more in this section.
Fastify explicitly supports newer language features (such as async/await), has a focus on modern developer experience and is the most performant framework in the Node.js ecosystem. Not only that but Fastify also provides full Express integration via the fastify-express plugin. This means that the vast Express ecosystem can be used with Fastify (often at higher requests per second than using the same middleware with Express!), and entire Express projects can be encapsulated in a Fastify plugin and used as part of a Fastify project.
In this section, however, we'll implement the same server created in the previous two sections but with Fastify. Let's start by making a folder:
node -e "fs.mkdirSync('fastify-web-server')"
cd fastify-web-server
Now, we can run the following command to bootstrap a Fastify project:
npm init fastify
It's important to ensure that this command is executed within the fastify-web-server folder otherwise files will be added to unintended locations.
This command should produce output similar to the following:
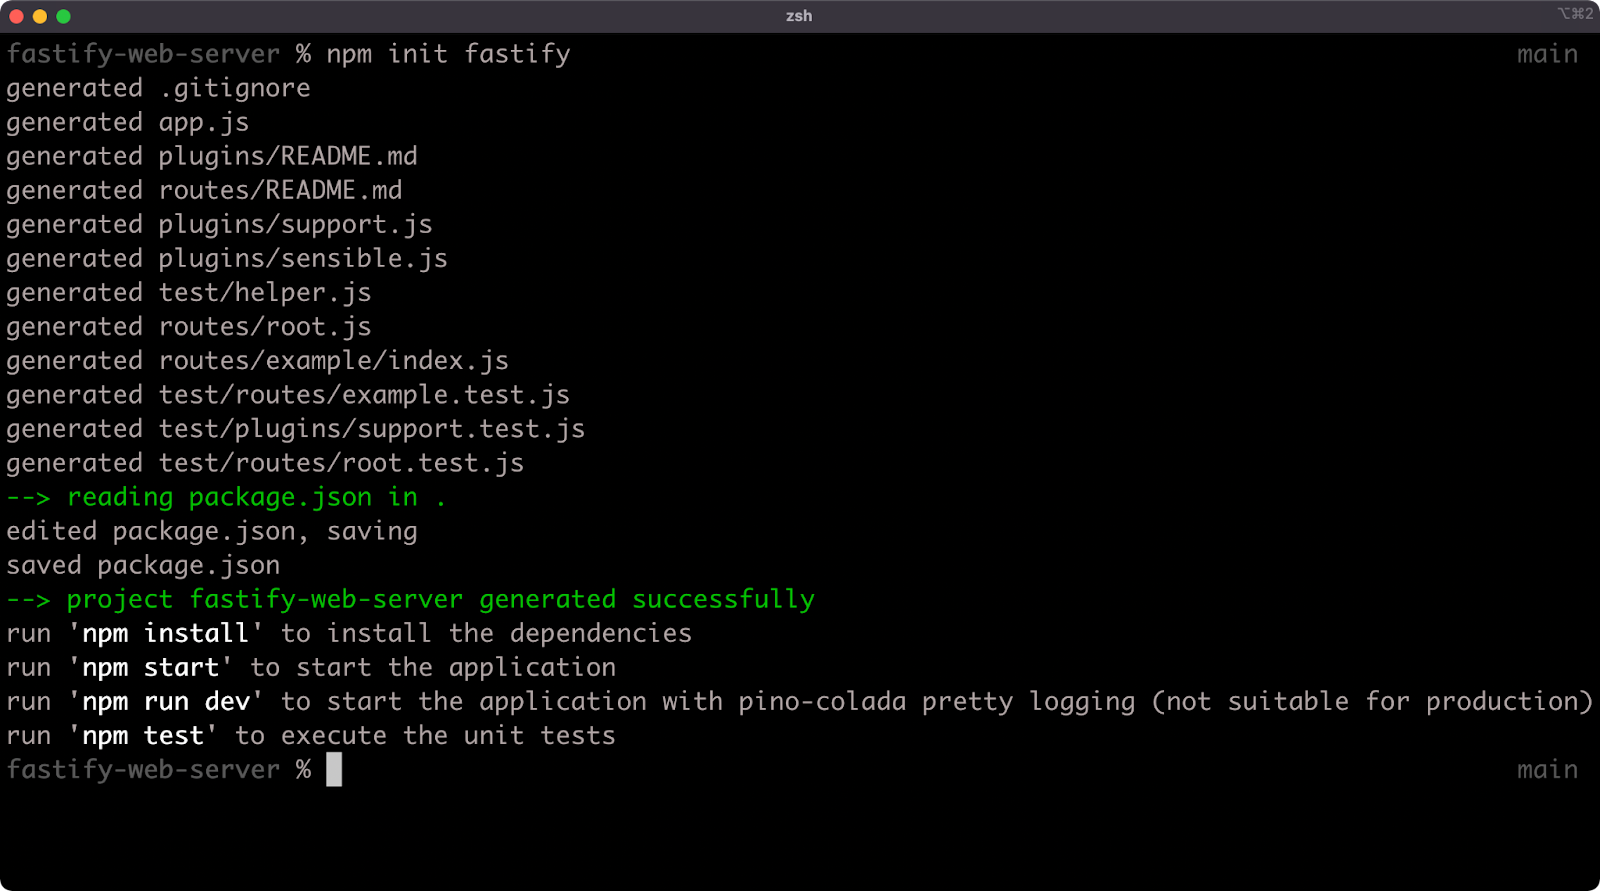
As we can see from the output, the npm init fastify command creates some files in the current working directory. The following files and folders are generated:
.gitignorepackage.jsonapp.jsplugins/README.mdtest/helper.jsroutes/README.mdplugins/support.jsroutes/root.jstest/routes/example.test.jstest/plugins/support.test.jsroutes/example/index.jstest/routes/root.test.js
We'll only need to edit the app.js, routes/root.js and routes/example/index.js files to create the same implementation as in the previous two sections.
Creating a Web Server with Fastify (2)
Before doing anything else, let's make sure that the project dependencies are installed. In the same folder, let's run the following command:
npm install
While that's running, let's take a look at the contents of the app.js file (any comments have been stripped):
'use strict'

const path = require('path')
const AutoLoad = require('fastify-autoload')

module.exports = async function (fastify, opts) {
  fastify.register(AutoLoad, {
    dir: path.join(__dirname, 'plugins'),
    options: Object.assign({}, opts)
  })

  fastify.register(AutoLoad, {
    dir: path.join(__dirname, 'routes'),
    options: Object.assign({}, opts)
  })
}
The app.js file is the entry-point for the project and exports an async function. A Fastify plugin is a function that accepts a server instance and options as parameters. It may accept a third parameter, a next callback or it may return a promise (which is what an async function does). So the app.js file is actually exporting a Fastify plugin.
The server instance that is passed as the first argument to this function is named fastify. Additional plugins are registered with the registered method. In this case, a single plugin is registered twice. The fastify-autoload plugin automatically loads folders of plugins, so all app.js is doing is setting up a convenient way for us to define and work with plugins and routes. In both cases where fastify.register is called, the fastify-autoload plugin (AutoLoad) is passed as the first parameter and an object is passed as the second parameter. This second parameter is the options for the AutoLoad plugin. The dir option in each case points the fastify-autoload plugin to a plugins folder and a routes folder. The options option in each case specifies options that would be passed to all plugins that are autoloaded. It's essentially shallow merging the options passed to the app.js plugin function with an empty object.
The package.json added by the npm init fastify command should look something like the following:
{
  "name": "bah",
  "version": "1.0.0",
  "description": "This project was bootstrapped with Fastify-CLI.",
  "main": "app.js",
  "directories": {
    "test": "test"
  },
  "scripts": {
    "test": "tap \"test/**/*.test.js\"",
    "start": "fastify start -l info app.js",
    "dev": "fastify start -w -l info -P app.js"
  },
  "keywords": [],
  "author": "",
  "license": "ISC",
  "dependencies": {
    "fastify": "^3.0.0",
    "fastify-autoload": "^3.10.0",
    "fastify-cli": "^2.15.0",
    "fastify-plugin": "^3.0.0",
    "fastify-sensible": "^3.1.2"
  },
  "devDependencies": {
    "tap": "^15.1.6"
  }
}
Creating a Web Server with Fastify (3)
In the scripts field of the package.json we can see a start field and a dev field. In each case the app.js file is booted with the fastify start command. This works because the fastify-cli dependency (which can be seen in the dependencies field of the package.json) provides a CLI named fastify which is accessible to npm when running package.json scripts. The fastify start command automatically starts the server (performing the same role as the bin/www file in the Express example). Notice we have no defined port, this is because fastify start defaults to port 3000, it could be configured with the -p flag (lowercase) if desired.
In the dev script there are two additional flags: -w and -P (uppercase). The -P flag means "prettify the log output", which would otherwise be newline delimited JSON logs. The -w flag means “watch and reload the project as we work on it”, so we can go ahead and run the following to start our server:
npm run dev
This should display something like the following:
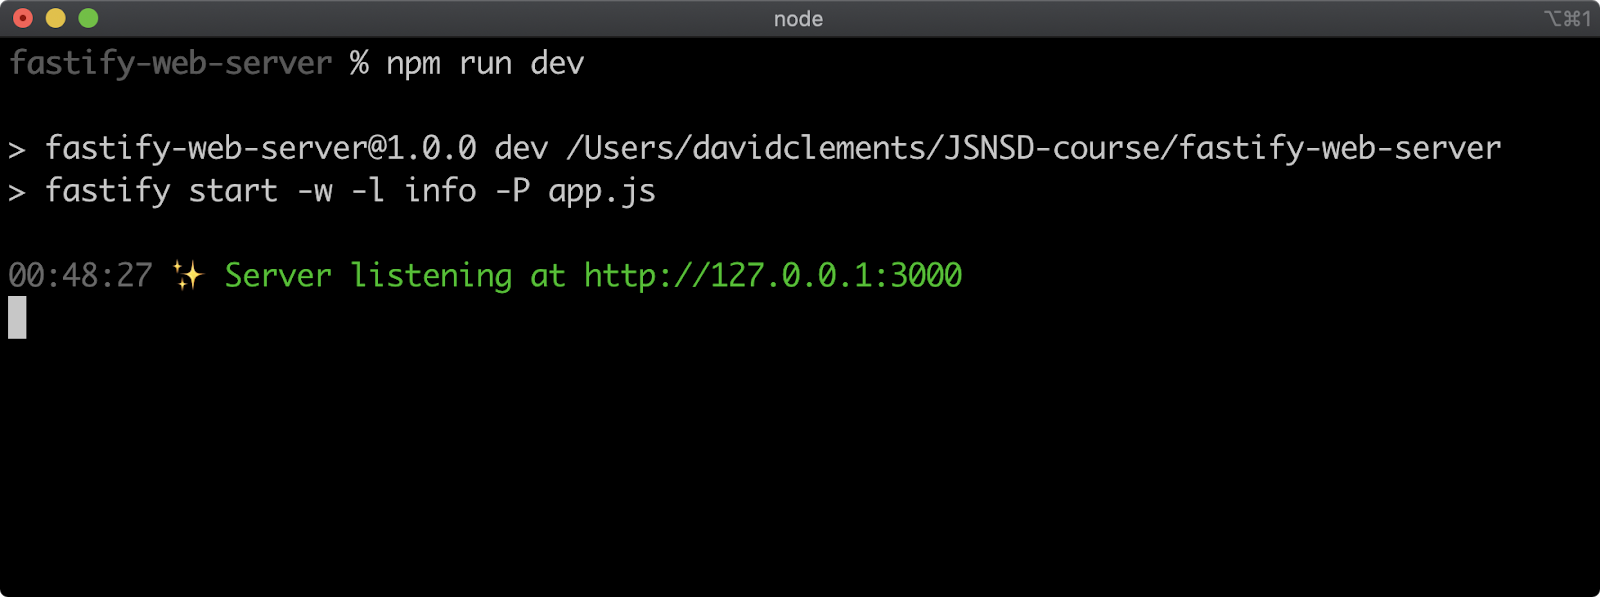
We shouldn't need to start and stop the server as we make changes, that will happen automatically.
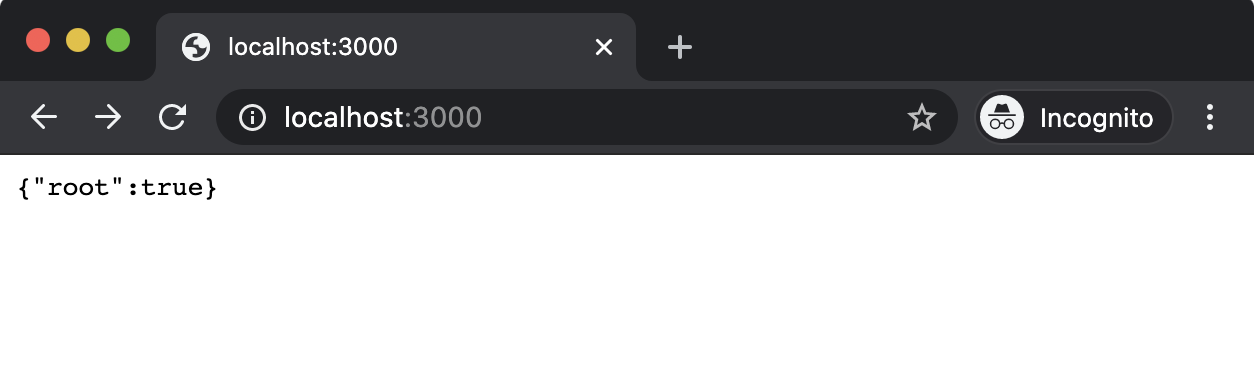
We can check the server is running correctly by navigating to http://localhost:3000 in the browser. We should see something like the following:
In Fastify, everything is a plugin. The distinction between plugins and routes is mostly convention-setting to help us reason about a server or service's functionality. The files in the routes folder are actually plugins (exported functions that return promises or use a next callback). The files in the plugins folder are also plugins, but they are more commonly de-encapsulated plugins, meaning that the functionality that they provide can be accessed by sibling plugins. Think of the plugins folder like a lib folder, but where a strict and enforceable common interface is used for every exported piece of functionality. Use of the plugins folder will be explored more in later sections. The entry point is a plugin. Routes are plugins. Plugins (local libraries) are plugins.
Creating a Web Server with Fastify (4)
A key difference between Express middleware and Fastify plugins is that Express middleware is executed for every request (if reachable) but Fastify plugins are called only at initialization time. Fastify plugins are always asynchronous (either with a callback or a returned promise) to allow for asynchronous initialization of every plugin.
Now, let's focus on the routes folder. We just saw that the root route (/) responds with {"root":true}. Let's take a look at the code in routes/root.js:
'use strict'

module.exports = async function (fastify, opts) {
  fastify.get('/', async function (request, reply) {
    return { root: true }
  })
}
The routes/root.js file exports an async function that accepts the fastify instance and an options argument. The routes/root.js file exports a Fastify plugin. A Fastify plugin is a function that takes the server instance (fastify).
Within the plugin function, fastify.get is called. This registers an HTTP GET route. The first argument is a string containing a forward slash (/), indicating that the route being registered is the root route (/). All HTTP verbs can be called as methods on the fastify instance (e.g. fastify.post, fastify.put and so on).
The second argument passed to fastify.get is an async function, the route handler, which accepts the request and reply objects. The request and reply objects have the same objective as the http and Express req and res objects but they have a different (and separate API). To learn more see the "Fastify: Request" and "Fastify: Reply" Documentation.
The fastify.get method can accept a normal synchronous function or an async function. Whatever is returned from the function or async function is automatically processed and sent as the content of the HTTP response.
Alternatively the reply.send method can be used (e.g. reply.send({root: true})), which is similar to the res.send method of Express. This can be useful when working with nested callback APIs.
Since an object is returned, Fastify converts it to a JSON payload before sending it as a response.
Let's edit the routes/root.js file to the following:
'use strict'

const root = `<html>
<head>
  <style>
   body { background: #333; margin: 1.25rem }
   a { color: yellow; font-size: 2rem; font-family: sans-serif }
  </style>
</head>
<body>
  <a href='/hello'>Hello</a>
</body>
</html>
`

module.exports = async function (fastify, opts) {
  fastify.get('/', async function (request, reply) {
    reply.type('text/html')
    return root
  })
}
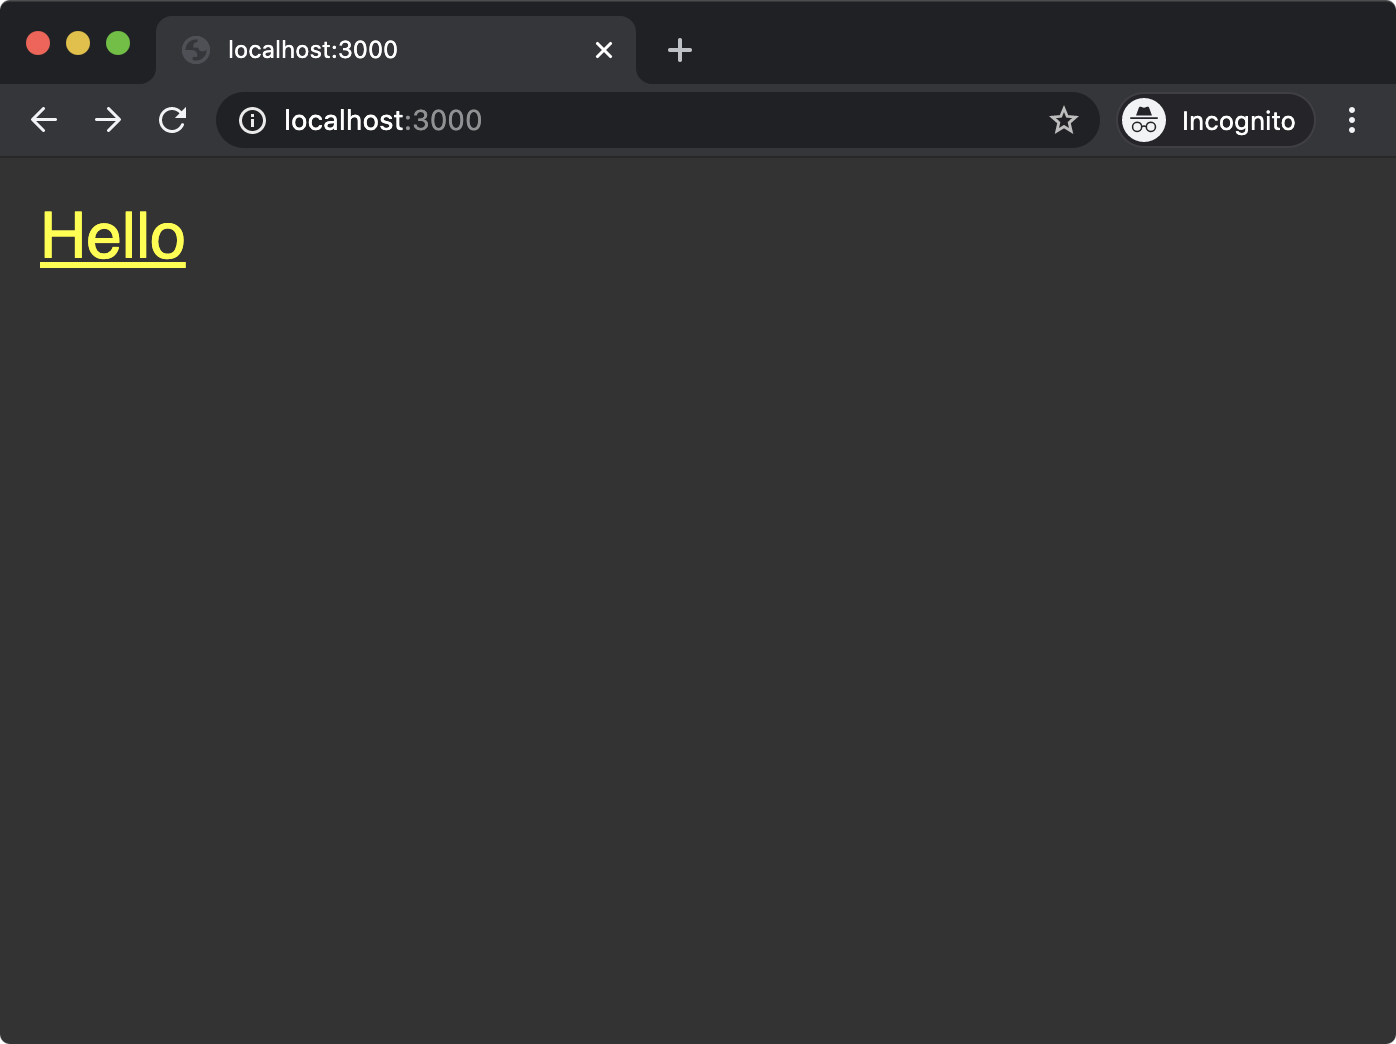
We've added the now familiar root string of HTML as a constant to the routes/root.js file and then we return root from the async function passed to fastify.get instead of returning an object. We've also used the Fastify API method reply.type to set the Content-Type header to text/html.
Creating a Web Server with Fastify (5)
If we now navigate in the browser to http://localhost:3000 we should see the following:
The other defined route is in routes/example/index.js, let's see what that looks like:
'use strict'

module.exports = async function (fastify, opts) {
  fastify.get('/', async function (request, reply) {
    return 'this is an example'
  })
}
This code is very similar to the original routes/root.js route. Again, we have an exported async function that accepts the server instance (fastify) and options (opts). And again fastify.get is used to register a route, where the second parameter is an async function that is passed request and reply objects representing the incoming request and the outgoing response. However notice that the defined route, the first argument passed to fastify.get, is also / (not /example).
Let's navigate to http://localhost:3000/example in the browser:
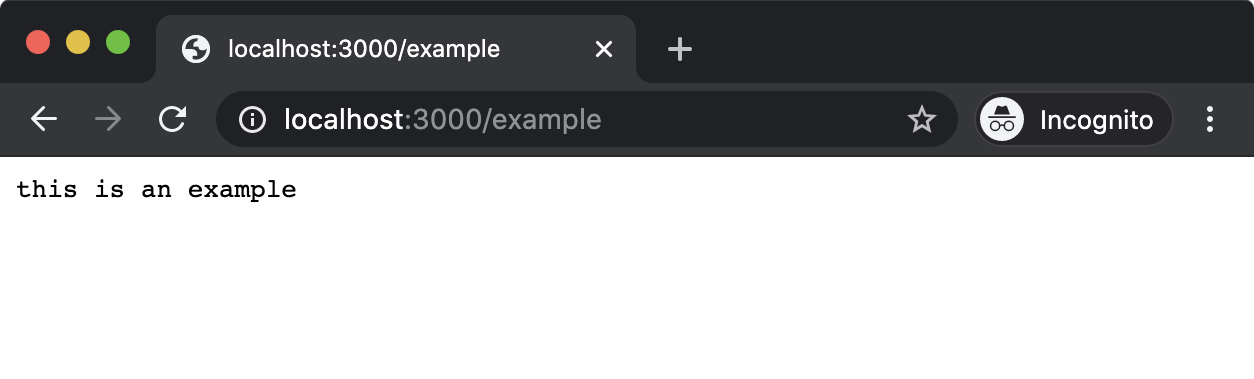
When a route is defined in a subfolder, by default, the fastify-autoload plugin will register that route prefixed with the name of the subfolder. So the example route is at routes/examples/index.js and registers a route at /. This causes fastify-autoload to register the server route at /example. If the route passed to fastify.get in routes/example/index.js had been /foo then fastify-autoload would have registered that route at /example/foo.
Creating a Web Server with Fastify (6)
We need a /hello route, so let's rename the routes/example folder to routes/hello. Leaving the npm run dev command running, use another terminal with the working directory set to our fastify-web-server folder to run the following:
cd routes
node -e "fs.renameSync('example', 'hello')"
cd ..
Attempting to load http://localhost:3000/example in the browser will now result in the following:
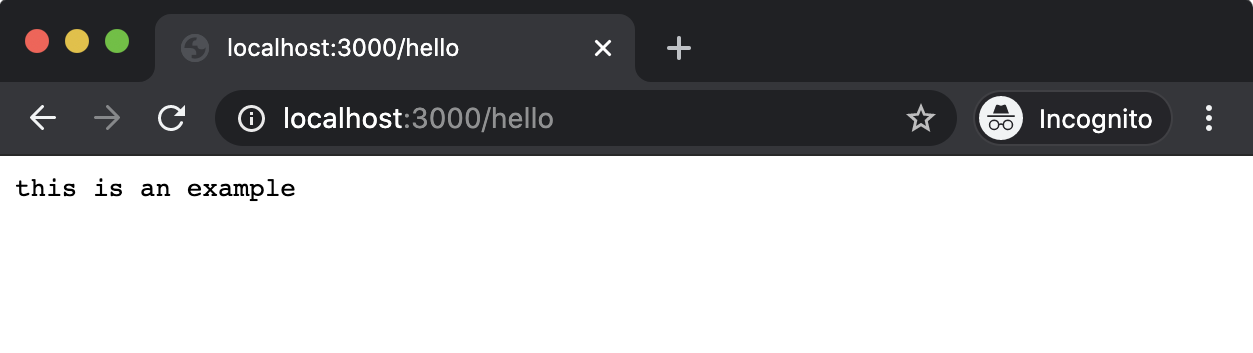
This is the default Fastify 404 handling behavior. We'll modify this later to align with our server implementations, but for now we can see that the /example route no longer exists. However, if we navigate to http://localhost:3000/hello, we should see the following:
Now, let's modify routes/hello/index.js to contain the following code:
'use strict'

const hello = `<html>
  <head>
    <style>
     body { background: #333; margin: 1.25rem }
     h1 { color: #EEE; font-family: sans-serif }
    </style>
  </head>
  <body>
    <h1>Hello World</h1>
  </body>
</html>`

module.exports = async function (fastify, opts) {
  fastify.get('/', async function (request, reply) {
    reply.type('text/html')
    return hello
  })
}
Creating a Web Server with Fastify (7)
Again, we see the familiar hello constant, which is returned from the route handler function passed as the second argument to fastify.get. At this point we can see that the code is somewhat repetitive. This is a good thing, Fastify is providing a strong declarative structure allowing us to focus on what we actually want to do instead of how to do it.
If we now navigate to http://localhost:3000/hello we should see the following:

Finally to fully align this implementation with the http and Express implementations we need to modify the Not Found and Method Not Allowed behavior by making our app.js file look as follows (comments have been stripped):
'use strict'

const path = require('path')
const AutoLoad = require('fastify-autoload')

module.exports = async function (fastify, opts) {

  fastify.register(AutoLoad, {
    dir: path.join(__dirname, 'plugins'),
    options: Object.assign({}, opts)
  })

  fastify.register(AutoLoad, {
    dir: path.join(__dirname, 'routes'),
    options: Object.assign({}, opts)
  })

  fastify.setNotFoundHandler((request, reply) => {
    if (request.method !== 'GET') {
      reply.status(405)
      return 'Method Not Allowed\n'
    }
    return 'Not Found\n'
  })

}
The only addition is the fastify.setNotFoundHandler method call. This method accepts a function with the same criteria as the route handler function passed to fastify.get (and fastify.post, fastify.put and so on). In our case, we use a normal function, inspect the HTTP method and if it is not GET we set the HTTP status code to 405 and then return the associated message (Method Not Allowed). Otherwise we return the 404 message (Not Found). Fastify will call this function and use its output in cases where a route cannot be found (which includes routes that haven't been registered with the requested HTTP verb).
This has been an intense primer on Fastify. In the following chapters we'll be using it more and learning more about it as we go forward.
Lab Exercises
Lab 3.1 - Deliver Data from a Library API
The labs-1 folder contains the following files:
data.jspackage.jsonvalidate.js
The data.js file contains the following:
'use strict'
const { promisify } = require('util')
const { randomBytes } = require('crypto')
const timeout = promisify(setTimeout)

async function data() {
  await timeout(50)
  return randomBytes(10).toString('base64')
}

module.exports = data
The data.js file exports a function that returns a promise (an async function) that resolves to a random BASE64 string. This function represents some kind of asynchronous data source.
The package.json file contains the following:
{
  "name": "labs-1",
  "scripts": {
    "start": "echo \"TODO: SET THE START SCRIPT\" && exit 1"
  }
}
Using any Node core library and/or web framework create an HTTP server that meets the following criteria:
- Listens on
localhost - Listens on port
3000 - Responds to HTTP GET requests to
/with data from the data function as exported from thedata.js - Responds with a 404 to GET requests to any other route
The package.json start script must contain a command to start the server.
Run the following command to check whether the created server meets the criteria:
node validate
If the server was correctly implemented, the output of this command should be as follows:
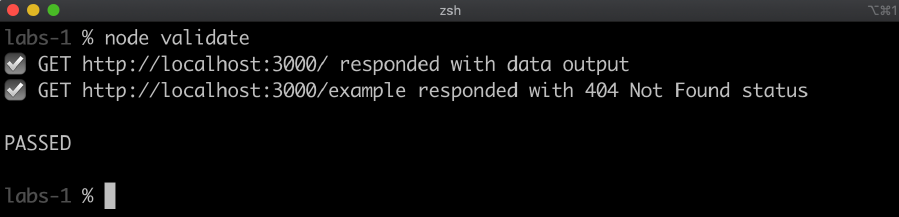
Lab 3.2 - Implement a Status Code Response
The labs-2 folder contains the following files:
package.jsonvalidate.js
The package.json file contains the following:
{
  "name": "labs-2",
  "scripts": {
    "start": "echo \"TODO: SET THE START SCRIPT\" && exit 1"
  }
}
Using any Node core library and/or web framework create an HTTP server that meets the following criteria:
- Listens on localhost
- Listens on port 3000
- Responds to HTTP GET requests to / with a 200 OK HTTP status, the content is irrelevant
- Responds to HTTP POST requests to / with a 405 Method Not Allowed HTTP status
The package.json start script must contain a command to start the server.
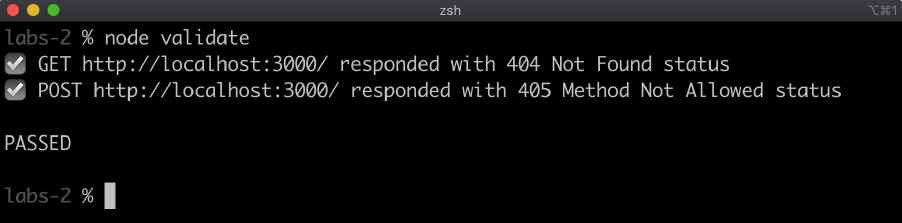
Run the following command to check whether the created server meets the criteria:
node validate
If the server was correctly implemented, the output of this command should be as follows:
4 - Serving Web Content
Introduction
Chapter Overview
Generally speaking, static assets (content that does not change very often) should not be served by Node. Static content should be delivered via a CDN and/or a caching reverse proxy that specializes in static content such as NGINX or Varnish. However, there are cases where serving static content with Node.js is useful. One case would be when working on a Node.js server locally without access to deployment infrastructure. Another is perhaps in independent development scenarios (as in "indie development") where investing time, effort and energy into additional infrastructure projects makes less sense than serving content from a Node.js process. At a stretch, Node.js could serve static content for applications with very small user bases that have a very low growth potential. In enterprise or scalable-startup scenarios, static content should be handled outside of Node.js. Where Node.js shines however, is dynamic content. Using Node.js as a mediator for gathering data from multiple sources and rendering some output is perfect for such an evented language and non-blocking I/O platform. In this chapter, we'll be exploring serving static content and dynamic content and also looking into streaming content with both Fastify and Express frameworks.
Learning Objectives
By the end of this chapter, you should be able to:
- Learn how to serve static content with Fastify and Express.
- Understand the benefits of streaming and how to use it with Fastify and Express.
- Generate dynamic content with template engines in Fastify and Express.
Serving Web Content
Serving Static Content with Fastify (1)
In the previous chapter, we created a Fastify server in the Creating a Web Server with Fastify section. In this section, we're going to work on the same code base as we left off in the last chapter.
Currently the package.json of our code looks as follows:
{
  "name": "bah",
  "version": "1.0.0",
  "description": "This project was bootstrapped with Fastify-CLI.",
  "main": "app.js",
  "directories": {
    "test": "test"
  },
  "scripts": {
    "test": "tap \"test/**/*.test.js\"",
    "start": "fastify start -l info app.js",
    "dev": "fastify start -w -l info -P app.js"
  },
  "keywords": [],
  "author": "",
  "license": "ISC",
  "dependencies": {
    "fastify": "^3.0.0",
    "fastify-autoload": "^3.10.0",
    "fastify-cli": "^2.15.0",
    "fastify-plugin": "^3.0.0",
    "fastify-sensible": "^3.1.2"
  },
  "devDependencies": {
    "tap": "^15.1.6"
  }
}
We need to add a new Fastify plugin that will handle static content for us. Making sure that our current working directory is the fastify-web-server folder we created in the previous chapter let's run the following command:
npm install --save-dev fastify-static
This will automatically update the devDependencies section of our package.json to look as follows:
"devDependencies": {
  "fastify-static": "^4.5.0",
  "tap": "^15.1.6"
}
We've deliberately installed fastify-static as a development dependency. It's generally bad practice to use Node.js for static file hosting in production. We need to think of this as a local development convenience only in most cases so we're going to apply constraints to ensure this isn't used in production.
The app.js file currently looks as follows (any comments are removed):
'use strict'

const path = require('path')
const AutoLoad = require('fastify-autoload')

module.exports = async function (fastify, opts) {

  fastify.register(AutoLoad, {
    dir: path.join(__dirname, 'plugins'),
    options: Object.assign({}, opts)
  })

  fastify.register(AutoLoad, {
    dir: path.join(__dirname, 'routes'),
    options: Object.assign({}, opts)
  })

  fastify.setNotFoundHandler((request, reply) => {
    if (request.method !== 'GET') {
      reply.status(405)
      return 'Method Not Allowed\n'
    }
    return 'Not Found\n'
  })

}
We need to register and configure fastify-static but not in production. Let's make our app.js look as follows:
'use strict'

const path = require('path')
const AutoLoad = require('fastify-autoload')

const dev = process.env.NODE_ENV !== 'production'

const fastifyStatic = dev && require('fastify-static')

module.exports = async function (fastify, opts) {
  if (dev) {
    fastify.register(fastifyStatic, {
      root: path.join(__dirname, 'public')
    })
  }
  fastify.register(AutoLoad, {
    dir: path.join(__dirname, 'plugins'),
    options: Object.assign({}, opts)
  })

  fastify.register(AutoLoad, {
    dir: path.join(__dirname, 'routes'),
    options: Object.assign({}, opts)
  })
  fastify.setNotFoundHandler((request, reply) => {
    if (request.method !== 'GET') {
      reply.status(405)
      return 'Method Not Allowed\n'
    }
    return 'Not Found\n'
  })
}
Serving Static Content with Fastify (2)
It is a typical convention when deploying an application to set an environment variable called NODE_ENV to 'production'. This would be managed by deployment infrastructure and is outside of scope here, other than to acknowledge that it's the convention most often used to determine whether a Node.js process is running in development mode or is deployed to production (or staging). By checking that NODE_ENV is not set to production we assume development mode, which makes our dev constant true.
We conditionally load fastify-static into the process if dev is true. Since fastify-static is a development dependency, if we didn't do this the server would throw on initialization due to an attempt to load a missing dependency.
Within the root plugin (the exported async function of app.js), we also conditionally register fastify-static with the fastify.register method. The first argument passed to fastify.register is the fastify-static plugin (fastifyStatic). The second argument is the options for the plugin. We set the root option to point to a folder named public in our project dir. This instructs fastify-static to only serve files from that folder, and not allow any files above that folder to be accessible.
We'll need to create this public folder next. Making sure that fastify-web-server is our current working directory, let's run the following in the terminal:
node -e "fs.mkdirSync('public')"
cd public
node -e "fs.openSync('index.html', 'w')"
node -e "fs.openSync('hello.html', 'w')"
cd ..
We'll also be replacing our routes with static HTML so let's delete routes/hello.js and routes/root.js:
cd routes
node -e "fs.unlinkSync('root.js')"
node -e "fs.rmdirSync('hello', {recursive: true})"
cd ..
The project file and folder structure should now be as follows:
.gitignoreapp.jspublic/index.htmlpublic/hello.htmlroutes/README.mdplugins/README.mdplugins/support.jstest/helper.jstest/routes/example.test.jstest/plugins/support.test.jstest/routes/root.test.js
Our final step is to add the contents of the index.html and hello.html files in the public folder.
The index.html file should contain the following content:
<html>
<head>
<style>
body { background: #333; margin: 1.25rem }
a { color: yellow; font-size: 2rem; font-family: sans-serif }
</style>
</head>
<body>
<a href='/hello.html'>Hello</a>
</body>
</html>
Note that the contents of index.html differ from the string of HTML in our root route from the previous section in one key place: the anchor link (<a/>) points to /hello.html instead of /hello.
The hello.html file should contain the following content:
<html>
  <head>
    <style>
     body { background: #333; margin: 1.25rem }
     h1 { color: #EEE; font-family: sans-serif }
    </style>
  </head>
  <body>
    <h1>Hello World</h1>
  </body>
</html>
Now we can start our server:
npm run dev
Serving Static Content with Fastify (3)
If we navigate in a browser to http://localhost:3000 we should see something like the following:

This root route delivers the same HTML as in the previous chapter, the difference is that fastify-static is loading public/index.html instead of us defining a route and manually sending the content. If we navigate to http://localhost:3000/index.html we'll get the same outcome because the root route (/) is special-cased to load an index.html file.
If we click the link we'll navigate to http://localhost:3000/hello.html, which should result in something similar to the following:


The fastify-static module also decorates the reply object with sendFile method. We can use this to create a route that manually responds with the contents of hello.html if we wanted to alias /hello.html to /hello.
Let's finish this section off by doing just that. We need to recreate the hello folder in the routes directory with an index.js file. Let's run the following commands to create the desired structure:
cd routes
node -e "fs.mkdirSync('hello')"
cd hello
node -e "fs.openSync('index.js', 'w')"
cd ..
cd ..
Let's write the following code into routes/hello/index.js:
'use strict'

module.exports = async (fastify, opts) => {
  fastify.get('/', async (request, reply) => {
    return reply.sendFile('hello.html')
  })
}
Adding routes/hello/index.js automatically causes fastify-autoload to mount any routes registered in that file at the /hello URL path. We register a GET / route (which is therefore the /hello route since the route path is set by the folder path) and we call reply.sendFile('hello.html'). This causes fastify-static to respond to the request with contents of the public/hello.html file. The sendFile method knows to load the hello.html file from the public folder because we configure the root option passed to fastifyStatic in app.js to point to the public folder. If we restart the server (npm run dev) and navigate to http://localhost:3000/hello, we should now see the same page as http://localhost:3000/hello.html.
Using Templates with Fastify (1)
While the primary and original focus of Fastify was for building data services, view rendering capability is available with a little bit of set up.
Building off our example Fastify server in the prior section, let's add template rendering for dynamic content generation.
In the terminal, with fastify-web-server as the current working directory let's run the following command in order to install a template engine and Fastify's view rendering plugin:
npm install point-of-view handlebars
Handlebars is one of the template engines that point-of-view supports. See more about Handlebars at http://handlebarsjs.com.
Now we can set up and configure view rendering, we need to modify our app.js file to look as follows:
'use strict'

const path = require('path')
const AutoLoad = require('fastify-autoload')

const pointOfView = require('point-of-view')
const handlebars = require('handlebars')

module.exports = async function (fastify, opts) {

  fastify.register(pointOfView, {
    engine: { handlebars },
    root: path.join(__dirname, 'views'),
    layout: 'layout.hbs'
  })

  fastify.register(AutoLoad, {
    dir: path.join(__dirname, 'plugins'),
    options: Object.assign({}, opts)
  })

  fastify.register(AutoLoad, {
    dir: path.join(__dirname, 'routes'),
    options: Object.assign({}, opts)
  })
  fastify.setNotFoundHandler((request, reply) => {
    if (request.method !== 'GET') {
      reply.status(405)
      return 'Method Not Allowed\n'
    }
    return 'Not Found\n'
  })

}
We've removed fastify-static which we introduced in the prior section, and with it the dev constant which we won't need for this case because our server will now be performing on-the-fly dynamic rendering.
We loaded the two modules that we installed and then at the top of the exported async function we use fastify.register to register point-of-view (referenced as pointOfView). In the options object passed to fastify.register we set the engine to handlebars. Note that the engine option expects an option with the key being the name of the engine and the value being the engine library itself. We used a shorthand property { handlebars }, which creates an object with the shape { handlebars: handlebars }. We set the root option to path.join(__dirname, 'views'); we'll be creating a views folder in the project folder shortly. We've also set a layout option assigned to layout.hbs, we're also going to create a layout template in the views folder.
Let's create a views folder by running the following command:
node -e "fs.mkdirSync('views')"
We'll also create three files in the views folder: index.hbs, hello.hbs, and layout.hbs:
cd views
node -e "fs.openSync('index.hbs', 'w')"
node -e "fs.openSync('hello.hbs', 'w')"
node -e "fs.openSync('layout.hbs', 'w')"
cd ..
We'll also delete the public folder since we won't be using that any more:
node -e "fs.rmdirSync('public', {recursive: true})"
The views/layout.hbs file should contain the following:
<html>
  <head>
    <style>
     body { background: #333; margin: 1.25rem }
     h1 { color: #EEE; font-family: sans-serif }
     a { color: yellow; font-size: 2rem; font-family: sans-serif }
    </style>
  </head>
  <body>
    {{{ body }}}
  </body>
</html>
Using Templates with Fastify (2)
We've mixed the styles together from the index.html and hello.html files we created in the previous section and we interpolate a special template local called body inside of the <body> opening and closing tags. Using three braces to denote an interpolation point is Handlebars syntax that instructs the template engine to conduct raw interpolation. In other words, if the body template local contains HTML syntax the content will not be escaped whereas using two braces would cause HTML syntax to be escaped (for instance < would be escaped to <). This should never be used when interpolating (uncleaned) user input into templates but when building a layout we need to inject raw HTML. The body local is created automatically by point-of-view when rendering a view because we specified the layout option.
In views/index.hbs we'll add the following content:
<a href='/hello'>Hello</a><br>
<a href='/hello?greeting=Ahoy'>Ahoy</a>
The views/hello.hbs file should contain the following:
<h1>{{ greeting }} World</h1>
Finally, we need to set up our routes to render our views. Let's recreate the routes/root.js that we removed in the last section:
cd routes
node -e "fs.openSync('root.js', 'w')"
The routes/root.js file should contain the following:
'use strict'

module.exports = async (fastify, opts) => {
  fastify.get('/', async (request, reply) => {
    return reply.view('index.hbs')
  })
}
The point-of-view plugin that we registered in app.js decorated the reply instance with a view method. When we registered point-of-view, we set the root option to the views folder. Therefore, when we pass 'index.hbs' to reply.view it knows to look for index.hbs in the view folder. Similarly, the layout option that we set to 'layout.hbs' indicates to point-of-view that the layout template can be found in views/layout.hbs. So when we use reply.view here point-of-view first renders both the views/index.hbs file and then interpolates the rendered output into views/layout.hbs and sends the final rendered output of both files combined as the response. The return value of the reply.view method must be returned from the async function passed as the route handler so that Fastify knows when the route handler has finished processing the request.
For our hello pages, the routes/hello/index.js file should be updated to contain the following:
'use strict'

module.exports = async (fastify, opts) => {
  fastify.get('/', async (request, reply) => {
    const { greeting = 'Hello '} = request.query
    return reply.view(`hello.hbs`, { greeting })
  })
}
The reply.view method can take a second parameter, an object which sets the values of the template locals. Recall that views/hello.hbs contains a greeting template local, we pass an object with a property called greeting and a value defaulting to 'Hello' or else the value of a URL query string key named greeting. For instance, a request to /hello?greeting=Ahoy would result in the greeting constant being set to 'Ahoy' for that request and so the object passed as the second argument to reply.view would contain a property named greeting with a value of 'Ahoy'. This in turn would make reply.view render views/hello.hbs with Ahoy World text instead of Hello World.
For the purposes of understanding we're using a query string key-value and sending it back to the client as content. As discussed, the template engine will automatically clean the input (because we interpolate greeting with just two braces) however always exercise caution when handling user input. If there's another way to achieve a goal without directly reflecting content back to the client that is a more secure approach. See "Cross Site Scripting (XSS)" by OWASP for more information.
Using Templates with Fastify (3)
Let's try it out. If everything went according to plan we should be able to run the following to successfully start the server:
npm run dev
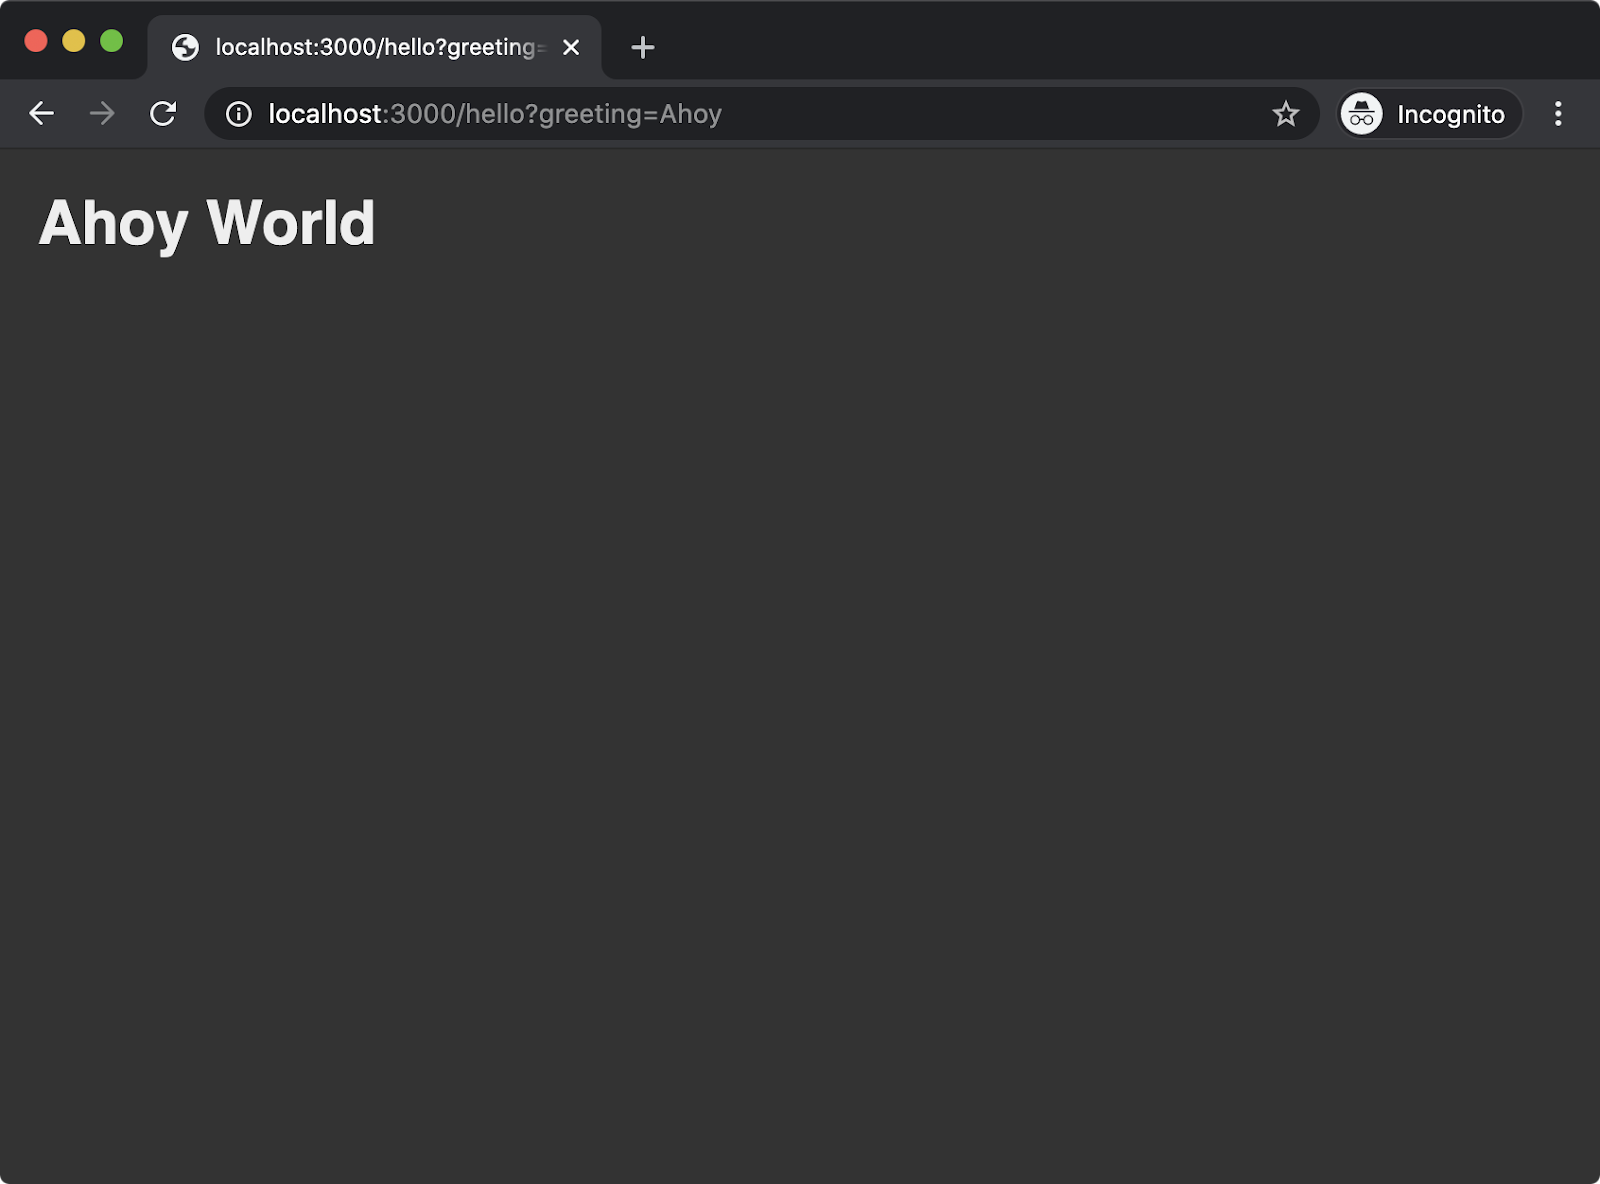
Once the server has started, we should be able to navigate to http://localhost:3000 and see something similar to the following:
Clicking the Hello link should take us to the following screen:

Going back to http://localhost:3000 and clicking the Ahoy link should display the following:

We've now served dynamic content with Fastify. For more details on the point-of-view plugin see https://github.com/fastify/point-of-view.
Serving Static Content and Using Templates with Express (1)
The original focus of the Fastify framework was on building RESTful JSON services, whereas Express is more geared towards template rendering (and static serving static content). Therefore Express has these pieces built into its core whereas in Fastify template rendering is an add-on.
In this section we'll use the express-generator command-line utility to generate a new project with view rendering and static asset serving preconfigured.
Let's install express-generator:
npm install -g express-generator@4
This will install a globally available command-line executable named express. We can use this executable to generate an express project.
Let's run the following command:
express --hbs express-web-server
This will generate a folder named express-web-server with an Express project that is set up to render Handlebar templates from the views folder.
Let's change our working directory to express-web-server and install the project dependencies:
cd express-web-server
npm install
The express-generator generated the following files and folders:
app.jspackage.jsonroutes/index.jsroutes/users.jspublic/imagespublic/javascriptspublic/stylesheets/style.cssviews/error.hbsviews/index.hbsviews/layout.hbs
Let's take a look at the top 20 lines of the app.js file:
var createError = require('http-errors');
var express = require('express');
var path = require('path');
var cookieParser = require('cookie-parser');
var logger = require('morgan');

var indexRouter = require('./routes/index');
var usersRouter = require('./routes/users');

var app = express();

// view engine setup
app.set('views', path.join(__dirname, 'views'));
app.set('view engine', 'hbs');

app.use(logger('dev'));
app.use(express.json());
app.use(express.urlencoded({ extended: false }));
app.use(cookieParser());
app.use(express.static(path.join(__dirname, 'public')));
On the last line of this snippet from app.js we can see that the express.static method is called, being passed the directory path to the public folder. The result of this is immediately passed to app.use. So the express instance has a method named static which returns Express middleware that will serve requests that match up with any files in the public folder. Notably this will serve files both in development and production environments which is recommended against. To reinforce this point, let's alter the the last line in our snippet from app.js to the following:
if (process.env.NODE_ENV !== 'production') {
  app.use(express.static(path.join(__dirname, 'public')));
}
Now static hosting will only occur in development and production static hosting is left as a deployment infrastructure problem.
Around the middle of our code snippet from app.js we can see the view engine configuration:
// view engine setup
app.set('views', path.join(__dirname, 'views'));
app.set('view engine', 'hbs');
In Express the app.set method can be used to store state as key-values. In this specific case the 'views' key and the 'view engine' key are both special-cased key names that instruct Express to load views from a particular path and use a particular view engine respectively.
We already have a views/index.hbs and a views/layout.hbs, we just need to create a views/hello.hbs file. Let's create it now:
cd views
node -e "fs.openSync('hello.hbs', 'w')"
cd ..
Serving Static Content and Using Templates with Express (2)
Let's alter the views/layout.hbs file to contain the following:
<html>
  <head>
    <style>
     body { background: #333; margin: 1.25rem }
     h1 { color: #EEE; font-family: sans-serif }
     a { color: yellow; font-size: 2rem; font-family: sans-serif }
    </style>
  </head>
  <body>
    {{{ body }}}
  </body>
</html>
The views/index.hbs should be altered to contain the following code:
<a href='/hello'>Hello</a><br>
<a href='/hello?greeting=Ahoy'>Ahoy</a>
The views/hello.hbs file should contain the following:
<h1>{{ greeting }} World</h1>
Finally, we need to configure our routes. Let's rename routes/users.js to routes/hello.js:
cd routes
node -e "fs.renameSync('users.js', 'hello.js')"
cd ..
The routes/index.js file should have the following content:
var express = require('express');
var router = express.Router();

/* GET home page. */
router.get('/', function(req, res, next) {
  res.render('index');
});

module.exports = router;
This is exactly as it was when generated by express-generator except we've removed the template locals object ({ title: 'Express' }) from being passed as the second argument to the res.render invocation. Express has res.render built-in to its core and it works in essentially the same way as reply.view added by the point-of-view plugin when registered in a Fastify server - although at the time of writing Express v4 renders at about half the speed of Fastify's point-of-view in production.
The routes/hello.js file should have the following content:
var express = require('express');
var router = express.Router();

router.get('/', function(req, res, next) {
  var greeting = 'greeting' in req.query ?
    req.query.greeting :
    'Hello';
  res.render('hello', { greeting: greeting });
});

module.exports = router;
Before we can start the server we now need to go back to app.js and configure the application to use routes/hello.js and to stop using routes/users.js which no longer exists.
Underneath the registration of express.static middleware we can find the routing setup:
app.use('/', indexRouter);
app.use('/users', userRouter);
Let's change the /users mount point to /hello and rename userRouter to helloRouter. Those two lines should look as follows:
app.use('/', indexRouter);
app.use('/hello', helloRouter);
Serving Static Content and Using Templates with Express (3)
At the top of app.js the last two require statements are:
var indexRouter = require('./routes/index');
var userRouter = require('./routes/user');
We also need to update that to load routes/hello.js and update the variable name. Those two lines should look as follows:
var indexRouter = require('./routes/index');
var helloRouter = require('./routes/hello');
If everything was completed correctly, we should now be able to start our Express server with the following command:
npm start
This will start the process and keep it open. Navigating to http://localhost:3000 in the browser should show the following:

Clicking the Hello link should take us to the following screen:

Going back to http://localhost:3000 and clicking the Ahoy link should display the following:
We've now achieved development-only static-hosting and served dynamic content with Express.
Streaming Content with Fastify (1)
The HTTP specification has a header called Transfer-Encoding which can be set to chunked. This means that chunks of data can be sent over HTTP and in many cases browser-clients can begin parsing immediately. Node.js Streams also allow for chunked reading, processing and writing of data. This affinity between Node.js Streams means we can serve content in a highly efficient way: instead of waiting for the server to prepare and process all data and then sending the response, the client can begin parsing some HTML (or theoretically any structured data) we've sent before the server has even finished preparing it for sending.
For this example we'll be using a package that provides a stream of Hacker News content, called hn-latest-stream.
Let's work in our fastify-web-server folder from where we left off in the "Using Templates with Fastify" section.
Making sure that fastify-web-server is the current working directory, run the following command to install hn-latest-stream:
npm install hn-latest-stream
Now we'll create a new routes folder called routes/articles and add an index.js file to it:
cd routes
node -e "fs.mkdirSync('articles')"
cd articles
node -e "fs.openSync('index.js', 'w')"
cd ..
cd ..
The contents of routes/articles/index.js should be as follows:
'use strict'

const hnLatestStream = require('hn-latest-stream')

module.exports = async (fastify, opts) => {
  fastify.get('/', async (request, reply) => {
    const { amount = 10, type = 'html' } = request.query

    if (type === 'html') reply.type('text/html')
    if (type === 'json') reply.type('application/json')
    return hnLatestStream(amount, type)
  })
}
The hnLatestStream function accepts two parameters, amount and type and then returns a Node.js Stream. The amount is the number of most recent Hacker News articles we want to load and the type describes whether the stream should send HTML chunks or JSON chunks. In our route handler, we set a default amount of 10 and a default type of 'html' while also allowing these to be overridden by query string arguments. Depending on the desired type we also use the reply.type method to set the correct Content-Type HTTP header for the content.
Returning the stream (the result of calling hnLatestStream) from the route handler instructs Fastify to safely pipe the stream to the response. The reply.send method can also be passed a stream and Fastify behaves in the same way - by piping the stream as the HTTP response.
Let's see it in action. First we need to start the server with the following command:
npm run dev
Next we can navigate to http://localhost:3000/articles and we should see output similar to but not the same as, the following:

Streaming Content with Fastify (2)
This will load different articles each time and there should be ten articles in total. The hn-latest-stream module uses the Hacker News API to fetch the content. It has to first lookup the latest story IDs and then for each ID it has to make a separate HTTP request to fetch the article and then push either JSON or HTML content to the stream that it returns. As such, it should be easy to observe the content being parsed and rendered by the browser incrementally in that there's a visible delay between each article rendering in the browser. This shows the power of streams in action for long running tasks. The server hasn't retrieved all the data yet, but we can still fill the above-the-fold (the part of the page that's first seen when a page loads) with the latest articles while more articles continue to load on the server, and then sent to the client to be displayed beneath the fold.
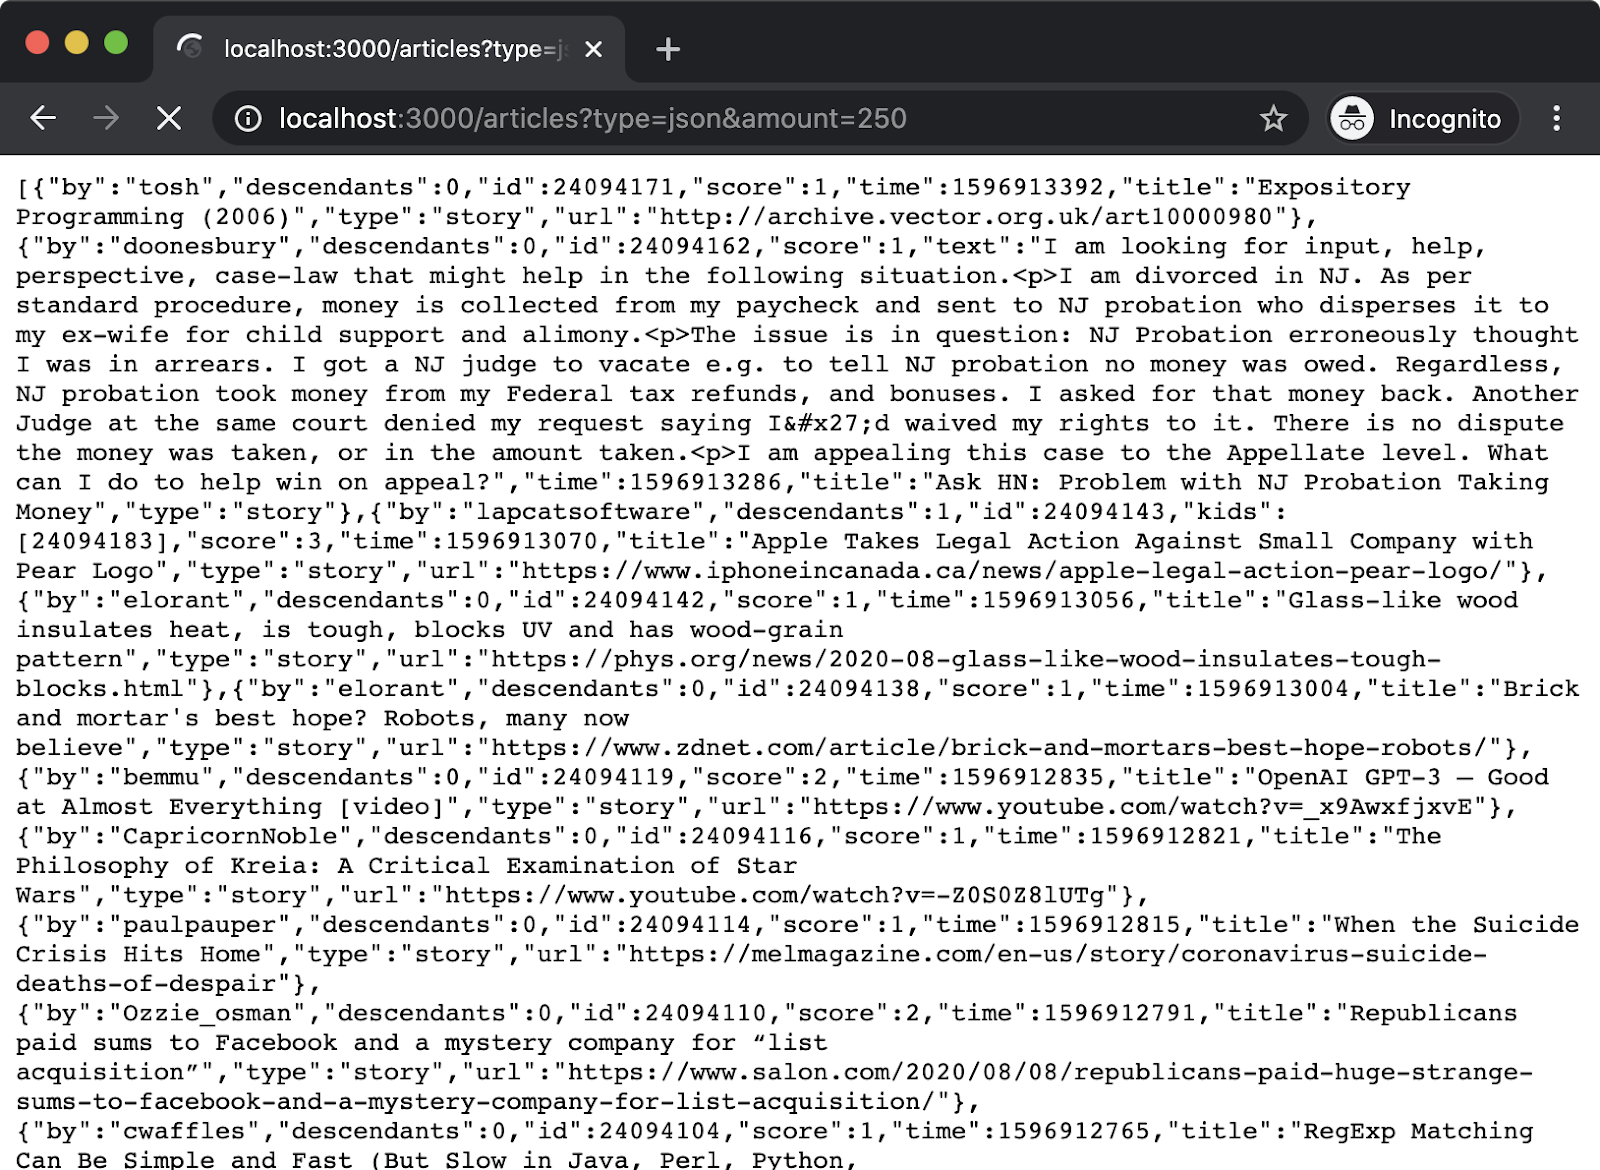
Let's try out the query string parameters as well. In the browser let's try navigating to the URL: http://localhost:3000/articles?type=json&amount=250. This will load the JSON data for the latest 250 Hacker News stories. We should again be able to observe short delays between each JSON object being received by the browser. When navigating to this URL we should see something similar to the following, but with different content:
In the next chapter, we'll look at creating JSON services in more detail, this section was more to illustrate how streams can be a useful tool in constrained scenarios and how to use streams with the Fastify framework.
One final note about error handling before wrapping up. Due to Fastify handling the stream for us, any errors in the stream will be handled and propagated. If we disconnect from the Internet and then attempt to access http://localhost:3000/articles, we'll see something like the following:
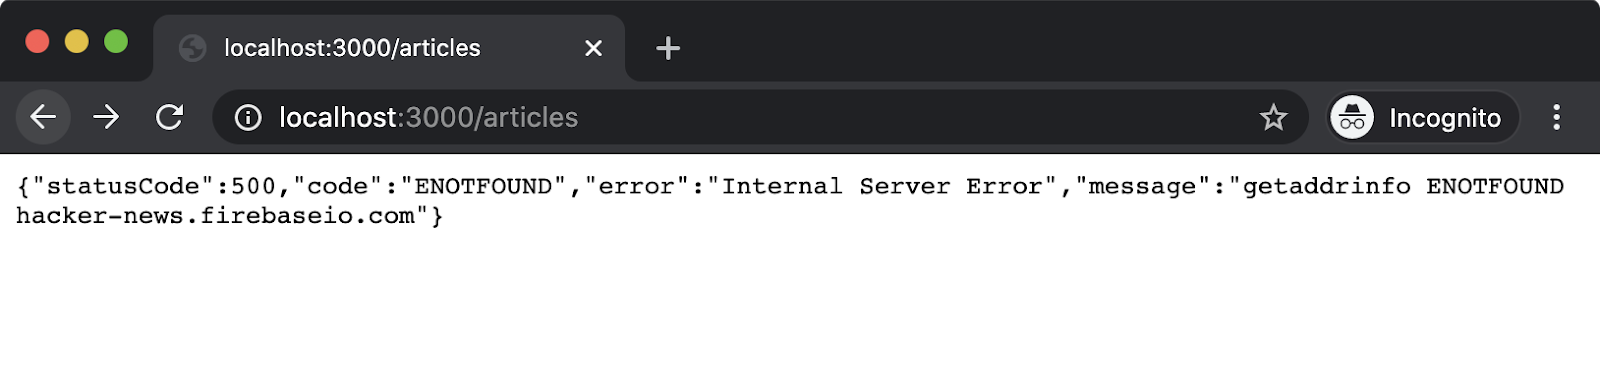
We caused an error in the stream, which Fastify then handled and responded to our request with a 500 status code along with information about the error.
In the next and final section, we'll discuss how to use streams with Express, which will require more glue around error handling.
Node.js Streams is a large topic. A chapter is dedicated to streams in the course for the companion certification to Node.js Services Development - the Node.js Application Development (LFW211) course.
Streaming Content with Express (1)
Express does not have native support for streams in the same way that Fastify does. However Express decorates the native HTTP IncomingMessage object (the response object, res). The res object is a writable stream, so this means we can essentially roll our own streaming response. However there are some complexities around this. For instance, when one stream is piped to another it will automatically end the destination stream when the source stream has ended. But in the case of an error, we don't want to end the response, we need to instead propagate the error back into Express so it can handle it centrally according to the configuration in app.js.
Making sure that our current working directory is the express-web-server folder as we left in the "Serving Static Content and Using Templates with Express" section, let's install hn-latest-stream:
npm install hn-latest-stream
Now, we'll create a new route:
cd routes
node -e "fs.openSync('articles.js', 'w')"
We need to register the router we'll be creating for routes/articles.js in the app.js file.
Near the top of the file there's currently two routers imported:
var indexRouter = require('./routes/index');
var helloRouter = require('./routes/hello');
We need to add an articlesRouter to this, that small section of app.js should be updated to look as follows:
var indexRouter = require('./routes/index');
var helloRouter = require('./routes/hello');
var articlesRouter = require('./routes/articles');
Around the middle of app.js the routers are registered. This currently looks as follows:
app.use('/', indexRouter);
app.use('/hello', helloRouter);
We need to add the articlesRouter mounted at the /articles route. That section should be updated to look like so:
app.use('/', indexRouter);
app.use('/hello', helloRouter);
app.use('/articles', articlesRouter);
The content of routes/articles.js should be as follows:
var express = require('express');
var router = express.Router();
var hnLatestStream = require('hn-latest-stream')
var finished = require('stream').finished

router.get('/', function(req, res, next) {
  const { amount = 10, type = 'html' } = req.query

  if (type === 'html') res.type('text/html')
  if (type === 'json') res.type('application/json')

  const stream = hnLatestStream(amount, type)

  stream.pipe(res, {end: false})

  finished(stream, (err) => {
    if (err) {
      next(err)
      return
    }
    res.end()
  })

});

module.exports = router;
The logic of the router handler is the same as in the previous section. We have a default amount of 10 and a default type of 'html' although this can be overridden by the query string of the incoming request URL. We also set the Content-Type HTTP header based on the type.
From there the code is slightly more complicated because we have to manually propagate errors and handle the dance of sending data without ending the response too soon.
The stream.pipe(res, {end: false}) line tells the stream (our Hacker News stream) to write all data it receives to the res object (which is also a stream). The second parameter, an object with a property named end set to false prevents pipe from performing its default behavior of endings the destination stream (res) when the source stream (stream) has ended. This is important because without this, if there is an error in the source stream then res will be ended before our server can send an appropriate error response.
Streaming Content with Express (2)
We use the finished function from the core stream module to determine when our Hacker News stream (stream) has ended. Using finished saves a lot of code, otherwise we would have to listen to the end, close and error events (plus handle some other obscure scenarios in older versions of Node). The first argument passed to finished is the stream, the second is a callback function which is called when the stream has ended in some way. If there was an error in stream the callback will be passed an error object (the err parameter). So if the err parameter is truthy (e.g. not null or undefined) then we call next and pass it the err. The next function is the third parameter of the route handler, and passes control back to Express allowing it to handle the error as per the configuration in app.js.
One final note. Express applications tend to be legacy applications which means they may be built against older versions of Node and for various reasons may be stuck on that outdated version. In this case the core stream module may not have a finished function. However the readable-stream module can be installed into old Node versions to provide the latest core stream functionality.
Let's try out our implementation. We can start the server using the following command:
npm start
Now we can navigate to http://localhost:3000/articles and we should see output similar to but not the same as, the following:

We can also, as in the prior section, try navigating to the URL http://localhost:3000/articles?type=json&amount=250 to see some streamed JSON output:
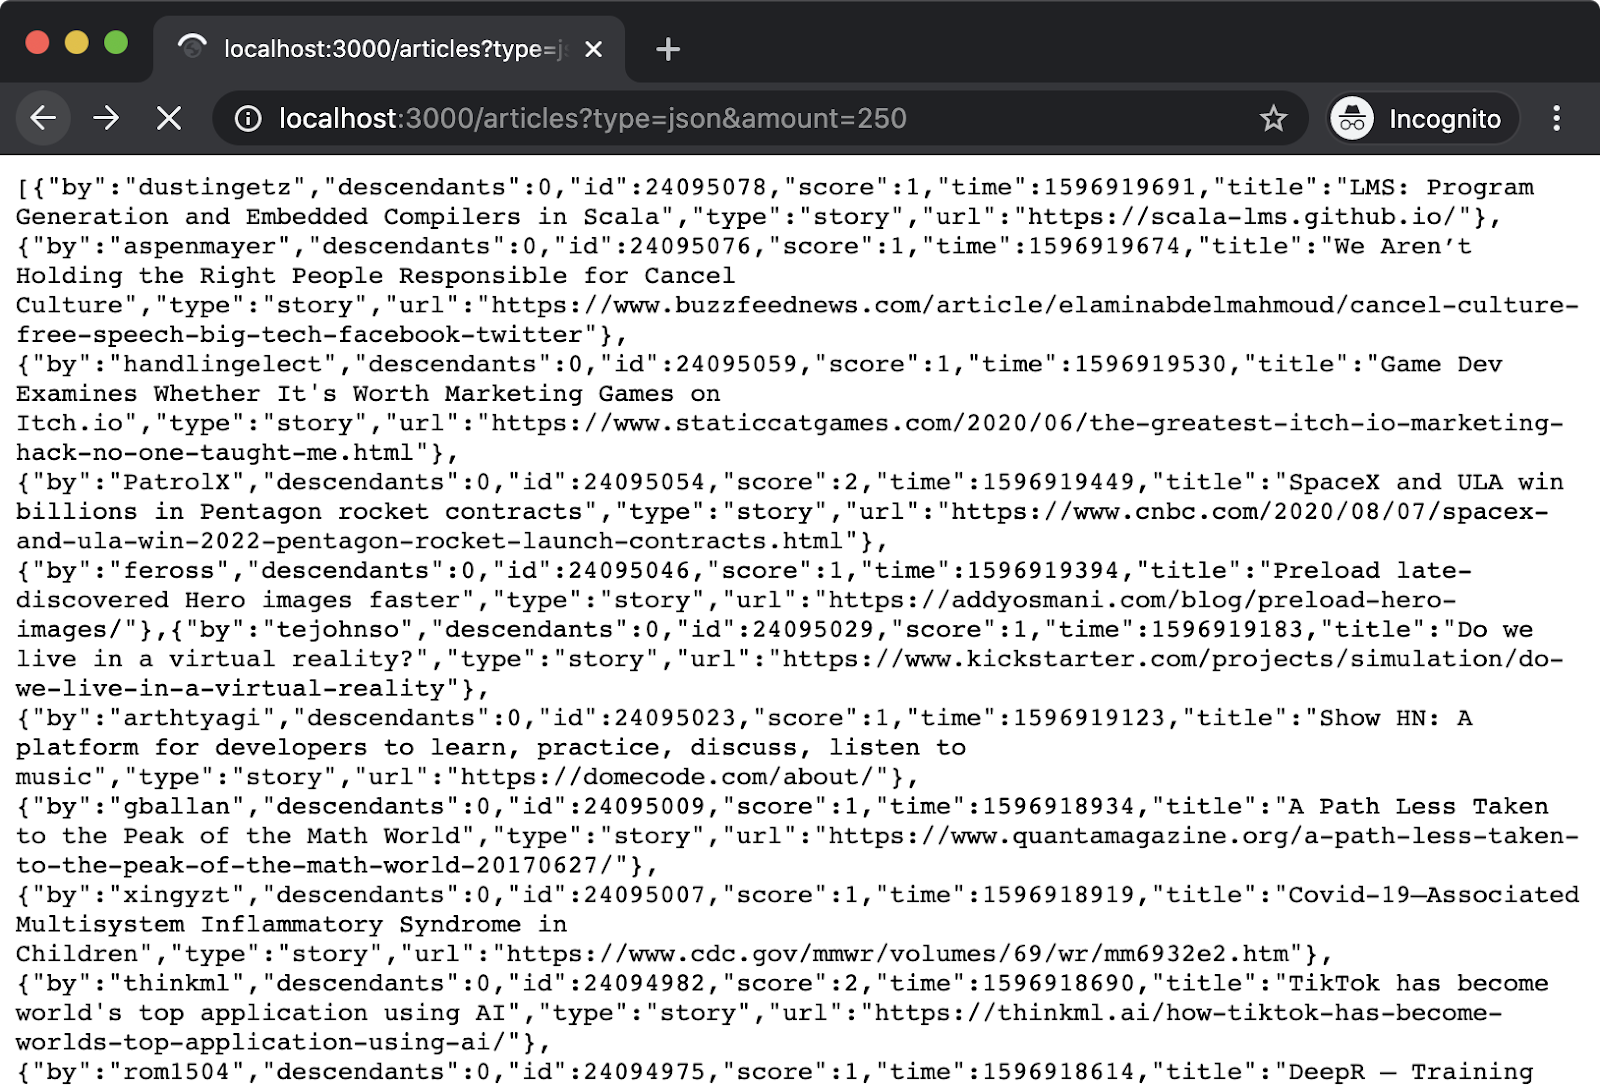
Finally, let's make sure stream errors are propagated and handled as appropriately as server errors. If we disconnect Internet access on our local machine and then navigate to http://localhost:3000/articles we should see something similar to the following:

Notice the difference between the default way that Express displays errors versus Fastify. Fastify sets the HTTP status code to 500 and outputs some JSON that describes the error. Express likewise sets an HTTP 500 status code, and then renders a view in order to respond with HTML describing the error. In development it includes the stack trace but when the NODE_ENV environment variable is set to production it only outputs the error message.
Lab Exercises
Lab 4.1 - Render a View
Using either Fastify or Express, create a project with a /me route. Render a view that uses the layout.hbs that was created in this chapter to create a small profile page. The HTML content is unimportant, just make sure to render a view.
The labs-1 folder contains a file named validate.js. Make sure the server that the /me route was added to is running in another terminal, then with the current working directory set to the labs-1 folder, run the following to check the implementation:
node validate
If successful the following output should be seen:
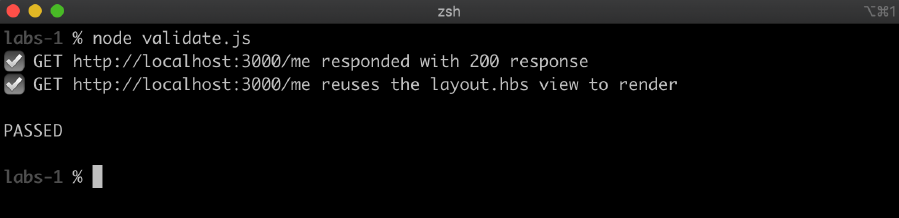
Lab 4.2 - Stream Some Content
The following code creates a stream with a built in delay when the stream function is called:
'use strict'

const { Readable, Transform } = require('stream')

function stream () {
  const readable = Readable.from([
    'this', 'is', 'a', 'stream', 'of', 'data'
  ].map((s) => s + '<br>'))
  const delay = new Transform(({
    transform (chunk, enc, cb) {
      setTimeout(cb, 500, null, chunk)
    }
  }))
  return readable.pipe(delay)
}

module.exports = stream
Using either Fastify or Express, create a new route at path /data and send the data from this stream to the response when the /data route is requested.
The labs-2 folder contains a file named validate.js. Make sure the server that the /data route was added to is running in another terminal, then with the current working directory set to the labs-2 folder, run the following to check the implementation:
node validate
If successful the following output should be the result of this command:
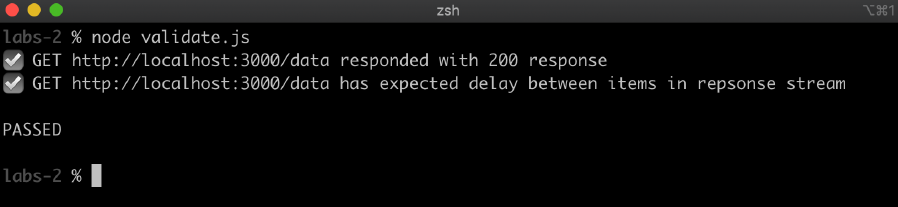
5 - Creating RESTful JSON Services
Introduction
Chapter Overview
There are many ways to construct a service, and various ways to implement how those services communicate. Interoperability between services and between services and clients is a question of architectural style. This training and the Node Services Developer Certification Examination itself focuses on one of the most commonly used architectural styles for web-facing systems: RESTful services. It also focuses on one of the most common data interchange formats: JSON.
This chapter is about implementing RESTful JSON services, a basic understanding of REST and JSON is assumed. For more information see the JSON specification and the original dissertation "Architectural Styles and the Design of Network-based Software Architectures" (in particular Chapter 5) that outlined the REST architectural style. Alternatively, you can review the more easily digestible Wikipedia article - "Representational State Transfer".
Learning Objectives
By the end of this chapter, you should be able to:
- Understand common conventions for building and deploying RESTful JSON services.
- Ascertain how to implement a service that can handle a JSON GET to specific resources.
- Identify the fundamental minimum functional criteria that a RESTful JSON service should satisfy.
Creating RESTful JSON Services
Implementing a RESTful JSON GET with Fastify (1)
REST stands for REpresentational State Transfer, and it's an architectural style that seeks to make the most of the features of HTTP/1.1. Data is communicated via HTTP response bodies, metadata is communicated through HTTP headers, and operation outcomes are communicated with HTTP status codes. The State Transfer part of REST is about shuffling state from clients to server-backends. A REST service should be stateless, an intermediate layer between a browser and a database and it should boil down to performing one or more CRUD operations (Create, Read, Update, Delete).
In this section we'll focus on implementing a Read, which maps to the HTTP GET method.
Let's create a folder called my-service and make it our current working directory:
node -e "fs.mkdirSync('my-service')"
cd my-service
Now let's generate a new Fastify project:
npm init fastify
Once the project is generated we need to install dependencies:
npm install
One of the included dependencies in a generated Fastify project is fastify-sensible. The fastify-sensible plugin adds some useful "sane defaults" to Fastify, including the convenience functions for HTTP status codes and messages. This plugin is not registered in the app.js file but the generated project contains a plugins/sensible.js file that registers fastify-sensible. The plugins/sensible.js file looks as follows:
'use strict'
const fp = require('fastify-plugin')
/**
* This plugins adds some utilities to handle http errors
*
* @see https://github.com/fastify/fastify-sensible
*/
module.exports = fp(async function (fastify, opts) {
fastify.register(require('fastify-sensible'), {
errorHandler: false
})
})
The app.js file loads all plugins in the plugins folder, using this piece of code:
fastify.register(AutoLoad, {
  dir: path.join(__dirname, 'plugins'),
  options: Object.assign({}, opts)
})
So the plugins/sensible.js file contains a method call of fastify.register with the fastify-sensible module being passed as the first argument. The second argument sets the options for fastify-sensible, errorHandler is set to false by default. In production mode (for instance, when process.env.NODE_ENV is set to production) it makes sense to set this to true as the fastify-sensible error handler produces lower-information error messages ("Something went wrong") which is better for public facing services.
A fairly typical situation would be to integrate a RESTful service with some kind of database such as MariaDB, Redis, Postgres, MongoDB and so forth. In every case the service is reading data from an external data source. In our case we're going to contrive a model that conceptually plays the role of a database but that stores state in-process. It's important to acknowledge that this actually violates the Statelessness constraint of REST, in that state shouldn't be held in the process that handles the HTTP request. However the model we'll create is a placeholder for teaching purposes that should be thought of in an abstract sense as a database connection.
Let's create a file which we'll call model.js:
node -e "fs.openSync('model.js', 'w')"
The contents of model.js should be as follows:
'use strict'

module.exports = {
  bicycle: bicycleModel()
}

function bicycleModel () {
  const db = {
    1: { brand: 'Veloretti', color: 'green' },
    2: { brand: 'Batavus', color: 'yellow' }
  }

  return {
    read
  }

  function read (id, cb) {
    if (!(db.hasOwnProperty(id))) {
      const err = Error('not found')
      setImmediate(() => cb(err))
      return
    }
    setImmediate(() => cb(null, db[id]))
  }
}
Not only is the code in model.js contrived, the error handling is subpar. Ideally there would be a code property on the errors and a map of error constants to check against. However the point here is to emulate more real-world scenarios where integrating with libraries can be messy and less than ideal. Note that the read function uses setImmediate; this is to simulate asynchronous operations. I/O operations should always be asynchronous when dealing with requests.
Our GET route must:
- Respond with a valid JSON payload.
- Respond with an
application/jsonContent-Typeheader. - Respond with 200 status code when successful.
- Respond with a 404 status when a requested resource is not available. This would be when the
readfunction inmodel.jsresponds with an error with message 'not found'. - Respond with a 400, 404 or 405 for unsupported methods. For instance a POST to our server should respond with one of these codes, it doesn't matter which as the specification is ambiguous on these points and it can come down to implementation goals or wider policy.
- Respond with a 500 status for unknown errors.
Implementing a RESTful JSON GET with Fastify (2)
Let's create a route called bicycle. In Fastify all we need to do is create a directory in routes called bicycle and place an index.js file in it:
cd routes
node -e "fs.mkdirSync('bicycle')"
cd bicycle
node -e "fs.openSync('index.js', 'w')"
cd ..
cd ..
The fact that the API we need to work with is callback-based allows us an opportunity to explore the various ways to integrate with callback-based API's (as opposed to promise-based) in Fastify.
While the response can be returned from an async function (which is to say, a promise can be returned which resolves to the response), the reply.send method can be used in a callback-based approach instead.
Let's make our routes/bicycle/index.js file look as follows:
'use strict'

const { bicycle } = require('../../model')

module.exports = async (fastify, opts) => {
  fastify.get('/:id', (request, reply) => {
    const { id } = request.params
    bicycle.read(id, (err, result) => {
      if (err) {
        if (err.message === 'not found') reply.notFound()
        else reply.send(err)
      } else reply.send(result)
    })
  })
}
Now, if we start our server (npm start or npm run dev) and navigate to http://localhost:3000/bicycle/1 in the browser we should see the following output:
{"brand":"Veloretti","color":"green"}
However, if we navigate to http://localhost:3000/bicycle/3 we should see:
{"statusCode":404,"error":"Not Found","message":"Not Found"}
We set the route up with fastify.get('/:id', ...). The :id part of the route creates a parameter, which can then be accessed on request.params.id. So a request to /bicycle/1 will mean that request.params.id is 1. Recall that folder name is causing the route to mount at /bicycle which is why the route is specified as /:id and not /bicycle/:id.
This id is passed to bicycle.read which calls the callback provided to it passing either an err object as the first argument or a result object as the second argument. If the err argument is falsy (e.g. null) then reply.send(result) is called. The result argument would hold a JavaScript object, so Fastify would know to set the response Content-Type header to application/json.
If there is an error, the err object will be populated. If the message is 'not found' then reply.notFound is called. This is a method added by the fastify-sensible plugin, it sets the response status code to 404 and generates some JSON output describing the Not Found error. If the error is something else, this is assumed to be a server error, and the err object is passed to reply.send. This causes Fastify to generate a 500 response and output the error message.
Note that the function passed as the route handler to fastify.get is not an async function. This is because an async function would return a promise that would resolve immediately and the route would fail as it tries to process a response value of undefined. Or if we did return something from it, that would be the response and the call to reply.send would be too late and result in an error regarding writing to a response that has ended.
If we wanted to use a callback API inside an async route handler the following approach could instead be taken. Let's modify routes/bicycle/index.js to the following:
'use strict'

const { bicycle } = require('../../model')

module.exports = async (fastify, opts) => {
  fastify.get('/:id', async (request, reply) => {
    const { id } = request.params
    bicycle.read(id, (err, result) => {
      if (err) {
        if (err.message === 'not found') reply.notFound()
        else reply.send(err)
      } else reply.send(result)
    })
    await reply
  })
}
This can be a useful approach when mixing callback-based API's and promise-based API's in a route handler. If the await reply line is removed it results in an error message:
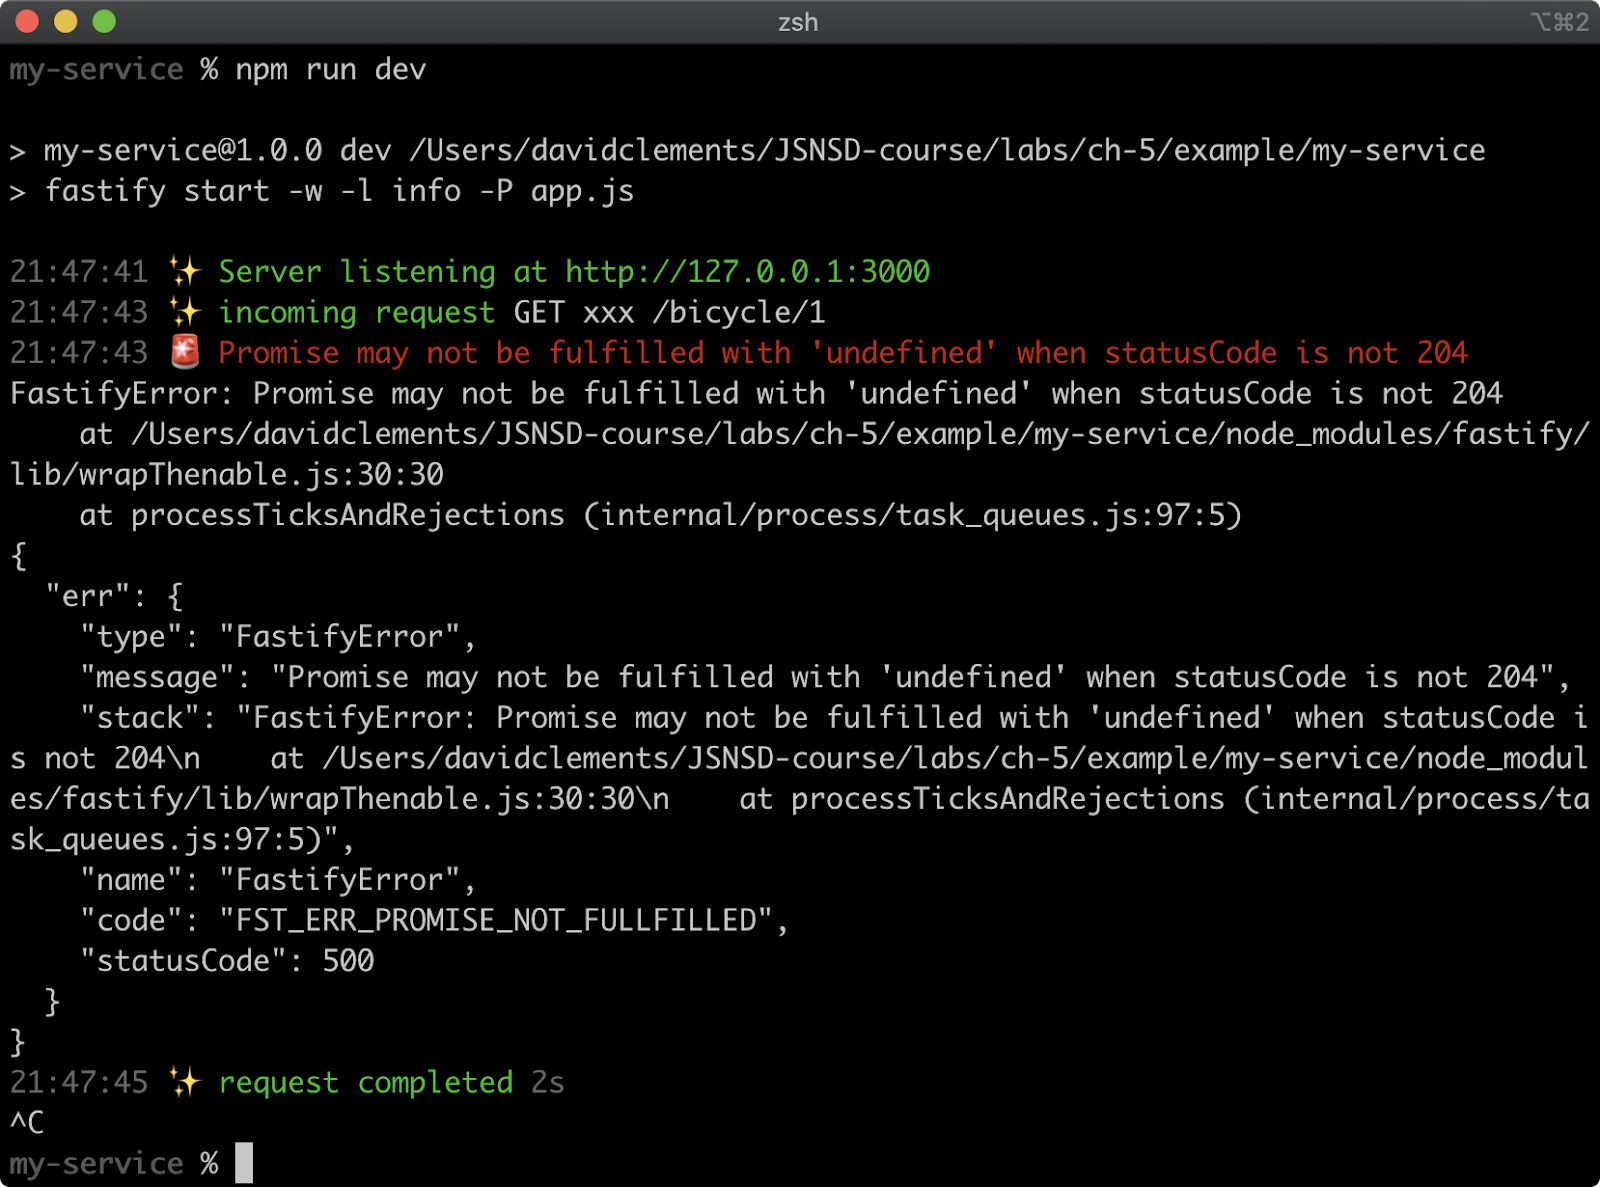
Implementing a RESTful JSON GET with Fastify (3)
The other approach to using callback-based APIs in an async function is to promisify the API.
Let's wrap up by altering index.js again to look as follows:
'use strict'
const { promisify } = require('util')
const { bicycle } = require('../../model')
const read = promisify(bicycle.read)

module.exports = async (fastify, opts) => {
  const { notFound } = fastify.httpErrors

  fastify.get('/:id', async (request, reply) => {
    const { id } = request.params
    try {
      return await read(id)
    } catch (err) {
      if (err.message === 'not found') throw notFound()
      throw err
    }
  })
}
This will yield the same behavior again. Passing bicycle.read to util.promisify causes a new function to be returned, which we assign to read. When called this will return a promise that resolves with the result or rejects with the error depending on the outcome.
Note that to generate a 404 Not Found HTTP Status we throw fastify.httpErrors.notFound instead of using reply.notFound. We also throw the caught err instead of passing err to reply.send. This is extremely useful as any unexpected throw in an async route handler will result in 500 status.
All three forms of routes/bicycle/index.js behave the same way, all of them meet the requirements for our GET route.
Let's check that our GET route is operating according to our requirements.
We know that navigating to /bicycle/{id} with an existing ID provides a JSON payload, but we have not yet validated if the Content-Type header is correct. With our server running in one terminal (npm start or npm run dev to start the server), in another terminal we can use the following command to check the response headers:
node -e "http.get('http://localhost:3000/bicycle/1', ({headers}) => console.log(headers))"
This should output something similar to the following:

We can see that there is a 'content-type' property in the response headers, with a value of 'application/json; charset=utf-8'. The Fastify framework has detected that the response is JSON and set the headers appropriately.
Now let's verify that the status codes are appropriate. The following command can be used to verify a 200 response:
node -e "http.get('http://localhost:3000/bicycle/1', ({statusCode}) => console.log(statusCode))"
This should output: 200.
We can check a 404 with the same but with a non-existent ID:
node -e "http.get('http://localhost:3000/bicycle/9', ({statusCode}) => console.log(statusCode))"
This should output: 404. For this case the model.js read function responded with an error with the message 'not found' and the fastify-sensible notFound method was used to generate a 404 response.
Let's try a POST request to a valid GET route and see what happens:
node -e "http.request('http://localhost:3000/bicycle/1', { method: 'post'}, ({statusCode}) => console.log(statusCode)).end()"
Implementing a RESTful JSON GET with Fastify (4)
For Fastify the default behavior in this scenario is to respond with a 404 as well, so this will output: 404. Other acceptable response status codes would be 405 Method not Allowed and 400 Bad Request. The reason that a 405 is not the default for this scenario is that a 404 gives less information than a 405, so for public facing services this is a more secure approach.
Finally, let's check whether the server responds with a 500 status code for an unknown error. We'll have to modify the models.js file for this one. Let's temporarily alter the read function in models.js to look as follows:
function read (id, cb) {
  setImmediate(() => cb(Error()))
}
To make sure this change is applied, restart the server (Ctrl+C and then npm run dev or npm start), then in another terminal run the following command:
node -e "http.get('http://localhost:3000/bicycle/1', ({statusCode}) => console.log(statusCode))"
The route now has an error that doesn't relate to an ID not existing, so the output of this command should now be: 500. In the async function route example, any error that doesn't have the message 'not found' is re-thrown inside the catch block. This propagates the error so that it's handled by Fastify, which auto-generates a 500 Server Error status code. In the callback-based examples of the route handler, any error that doesn't have the message 'not found' is passed to reply.send which recognizes that it's been passed an error object and from there generates a 500 Server Error status code.
The criteria for our GET route is:
- Respond with a valid JSON payload
- Respond with an
application/json Content-Typeheader - Respond with 200 status code when successful
- Respond with a 404 status when a requested resource is not available. This would be when the read function in
model.jsresponds with an error with message'not found' - Respond with a 400, 404 or 405 for unsupported methods. For instance a POST to our server should respond with one of these codes, it doesn't matter which as the specification is ambiguous on these points and it can come down to implementation goals or wider policy.
- Respond with a 500 status for unknown errors
We've now verified that our implementation matches all of the criteria we set for our RESTful JSON GET route. In the next section we're going to do the same again with Express.
Implementing a RESTful JSON GET with Express (1)
For the sake of comparison, we'll concisely reimplement our RESTful JSON GET route in Express.
Recall that the requirements for our GET route are as follows:
- Respond with a valid JSON payload
- Respond with an
application/json Content-Typeheader - Respond with 200 status code when successful
- Respond with a 404 status when a requested resource is not available. This would be when the
readfunction inmodel.jsresponds with an error with message'not found' - Respond with a 400, 404 or 405 for unsupported methods. For instance a POST to our server should respond with one of these codes, it doesn't matter which as the specification is ambiguous on these points and it can come down to implementation goals or wider policy. Respond with a 500 status for unknown errors
In a previous chapter we installed express-generator package globally so an express command-line executable on our machine, if not we can install it with npm install -g express-generator.
Let's generate an Express project with the following command:
express my-express-service
Next, we'll set our working folder to my-express-service and install the project dependencies:
cd my-express-service
npm install
Now, let's add the model.js file to the project root and create a routes/bicycle.js file:
node -e "fs.openSync('model.js', 'w')"
cd routes
node -e "fs.openSync('bicycle.js', 'w')"
cd ..
The contents of the model.js file should be:
'use strict'

module.exports = {
  bicycle: bicycleModel()
}

function bicycleModel () {
  const db = {
    1: { brand: 'Veloretti', color: 'green' },
    2: { brand: 'Batavus', color: 'yellow' }
  }

  return {
    read
  }

  function read (id, cb) {
    if (!(db.hasOwnProperty(id))) {
      const err = Error('not found')
      setImmediate(() => cb(err))
      return
    }
    setImmediate(() => cb(null, db[id]))
  }
}
The routes/bicycle.js file should look as follows:
var express = require('express');
var router = express.Router();
var model = require('../model');

router.get('/:id', function(req, res, next) {
  model.bicycle.read(req.params.id, (err, result) => {
    if (err) {
      if (err.message === 'not found') next();
      else next(err);
    } else {
      res.send(result);
    }
  });

});

module.exports = router;
Finally, we need to modify the app.js file to include our routes/bicycle.js router. Around line 9 of app.js we need to add the following:
var bicycleRouter = require('./routes/bicycle');
Around line 25 of app.js, above the error handling middleware we need to register the router at the /bicycle route like so:
app.use('/bicycle', bicycleRouter);
Implementing a RESTful JSON GET with Express (2)
Now if we start the service with npm start and navigate to http://localhost:3000/bicycle/1 the response body should be:
{"brand":"Veloretti","color":"green"}
In a separate terminal to the where the server is running, we can use the following command to check the response headers:
node -e "http.get('http://localhost:3000/bicycle/1', ({headers}) => console.log(headers))"
This should output something similar to the following:

We can see that there is a 'content-type' property in the response headers, with a value of 'application/json; charset=utf-8'. The Express framework has detected that the response is JSON because res.send was passed an object, and set the headers appropriately.
The following command can be used to verify a 200 response:
node -e "http.get('http://localhost:3000/bicycle/1', ({statusCode}) => console.log(statusCode))"
This should output: 200.
We can check a 404 with the same but with a non-existent ID:
node -e "http.get('http://localhost:3000/bicycle/9', ({statusCode}) => console.log(statusCode))"
This should output: 404. For this case the model.js read function responded with an error with the message 'not found' and the next function in the route handler was called without writing anything to the response. This caused Express to move to the next piece of middleware in the app.js file which is:
app.use(function(req, res, next) {
  next(createError(404));
});
If any route calls the next callback without an error a 404 error is generated by this small middleware function in app.js. Since this middleware passes this error to its own next callback, this will fall through to the error handling middleware in app.js which is:
app.use(function(err, req, res, next) {
  // set locals, only providing error in development
  res.locals.message = err.message;
  res.locals.error = req.app.get('env') === 'development' ? err : {};

  // render the error page
  res.status(err.status || 500);
  res.render('error');
});
While this meets our criteria by responding with a 404 status code, this error-handling middleware does not output JSON, it outputs HTML. We can see this HTML rendered in the browser by navigating to http://localhost:3000/bicycle/9:
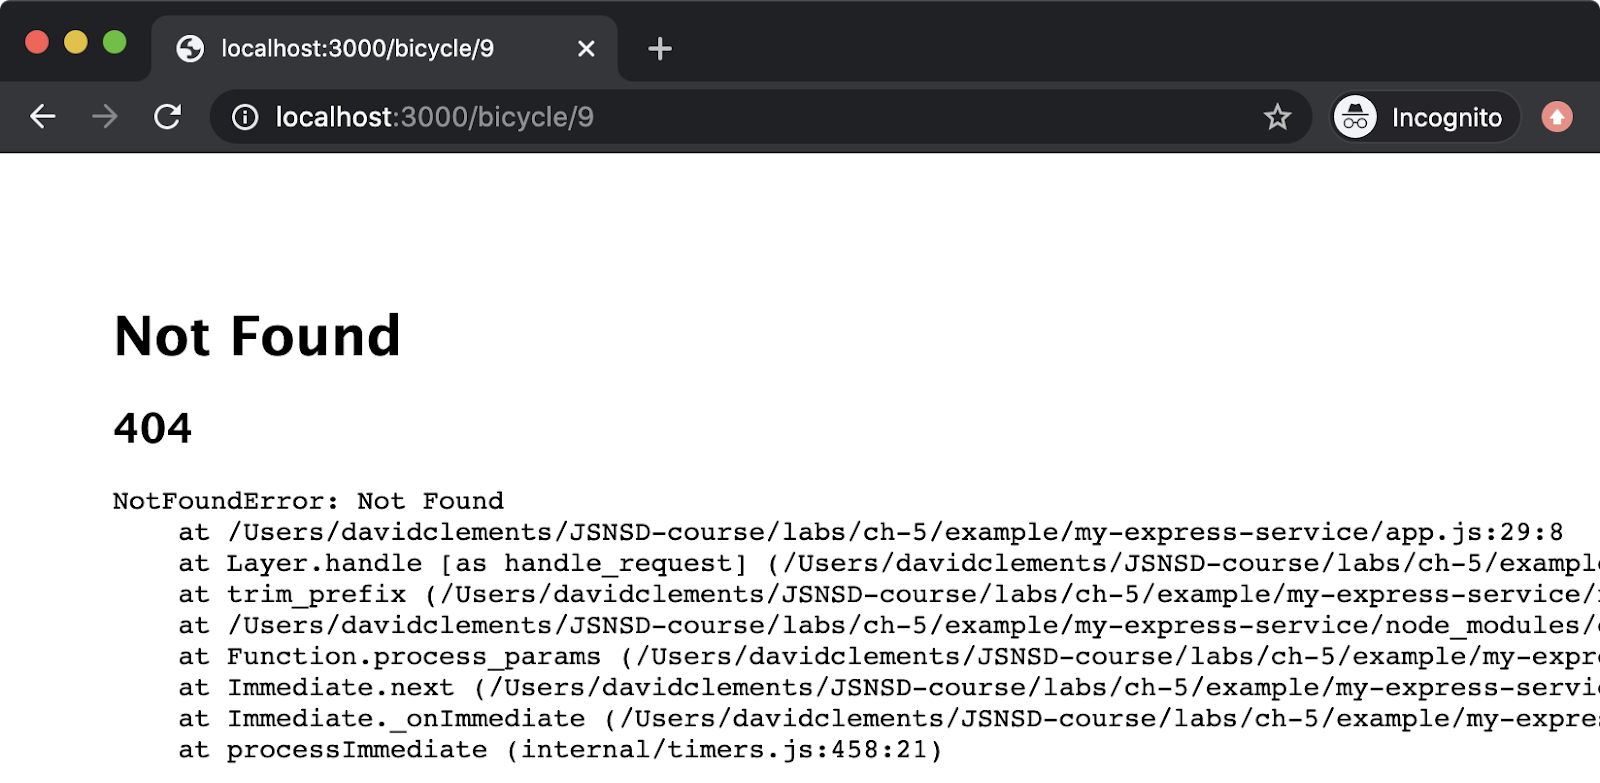
Implementing a RESTful JSON GET with Express (3)
While Fastify is geared towards building RESTful services, Express defaults to serving HTML as it was primarily for dynamic content generation. The error handling middleware can be modified to the following to produce a JSON response when errors occur:
app.use(function(err, req, res, next) {
  res.status(err.status || 500);
  res.send({
    type: 'error',
    status: err.status,
    message: err.message,
    stack: req.app.get('env') === 'development' ? err.stack : undefined
  });
});
Restarting the server and navigating to http://localhost:3000/bicycle/9 will now produce something like the following:
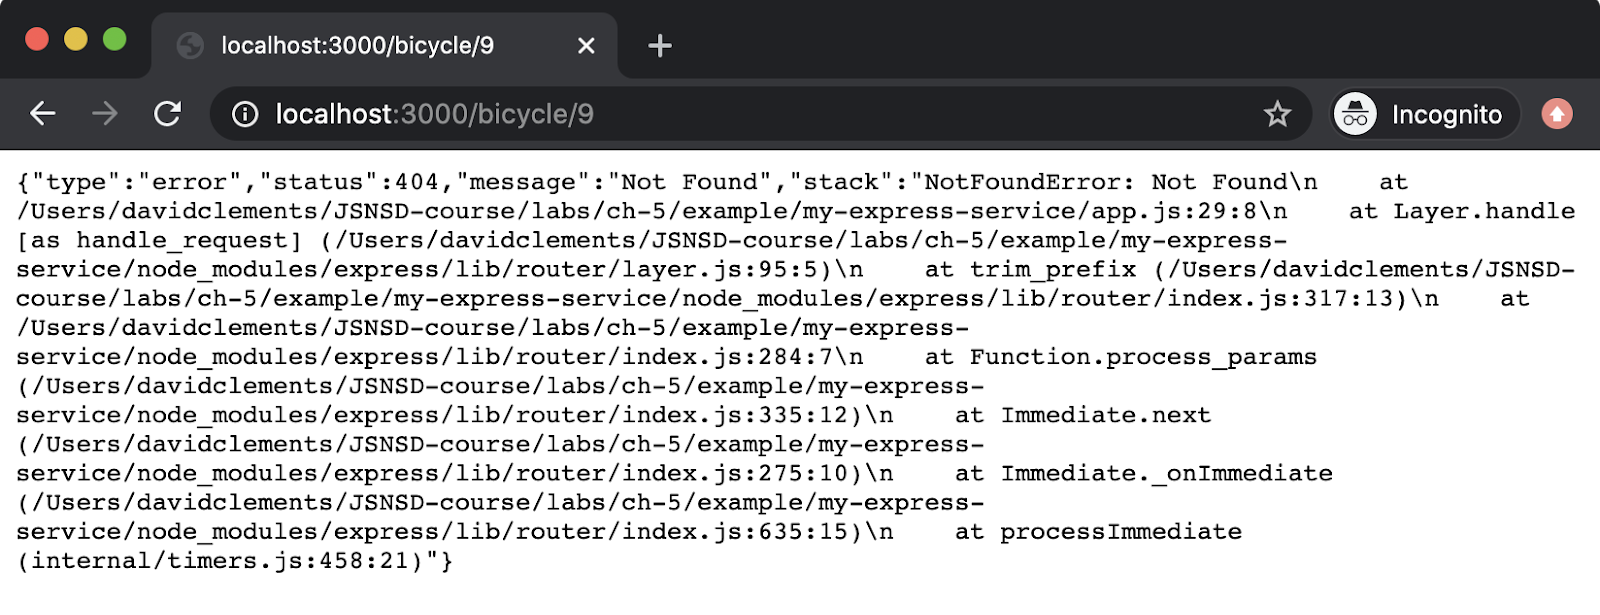
Let's try a POST request to a valid GET route and see what happens:
node -e "http.request('http://localhost:3000/bicycle/1', { method: 'post'}, ({statusCode}) => console.log(statusCode)).end()"
For Express the default behavior in this scenario is to respond with a 404 as well, so this will output: 404.
Finally let's check whether the server responds with a 500 status code for an unknown error. Let's temporarily alter the read function in models.js to look as follows:
function read (id, cb) {
  setImmediate(() => cb(Error()))
}
To make sure this change is applied, restart the server (Ctrl+C and then npm start), then in another terminal run the following command:
node -e "http.get('http://localhost:3000/bicycle/1', ({statusCode}) => console.log(statusCode))"
The route now has an error that doesn't relate to an ID not existing, so the output of this command should now be: 500.
The criteria for our GET route is:
- Respond with a valid JSON payload
- Respond with an
application/json Content-Typeheader - Respond with 200 status code when successful
- Respond with a 404 status when a requested resource is not available. This would be when the
readfunction inmodel.jsresponds with an error with message 'not found' - Respond with a 400, 404 or 405 for unsupported methods. For instance a POST to our server should respond with one of these codes, it doesn't matter which as the specification is ambiguous on these points and it can come down to implementation goals or wider policy.
- Respond with a 500 status for unknown errors
We've now verified that our implementation matches all of the criteria we set for our RESTful JSON GET route.
Lab Exercises
Lab 5.1 - Implement a RESTful JSON GET
The labs-1 folder contains the following files:
model.jspackage.jsonvalidate.js
The start field of the package.json file looks as follows:
"start": "echo \"Error: start script not specified\" && exit 1",
The model.js file contains the following:
'use strict'

module.exports = {
  boat: boatModel()
}

function boatModel() {
  const db = {
    1: { brand: 'Chaparral', color: 'red' },
    2: { brand: 'Chaparral', color: 'blue' }
  }

  return {
    uid,
    create,
    read,
    update,
    del
  }

  function uid() {
    return Object.keys(db)
      .sort((a, b) => a - b)
      .map(Number)
      .filter((n) => !isNaN(n))
      .pop() + 1 + ''
  }

  function create(id, data, cb) {
    if (db.hasOwnProperty(id)) {
      const err = Error('resource exists')
      err.code = 'E_RESOURCE_EXISTS'
      setImmediate(() => cb(err))
      return
    }
    db[id] = data
    setImmediate(() => cb(null, id))
  }

  function read(id, cb) {
    if (id === 'c060') {
      setImmediate(() => cb(Error('unknown')))
    }
    if (!(db.hasOwnProperty(id))) {
      const err = Error('not found')
      err.code = 'E_NOT_FOUND'
      setImmediate(() => cb(err))
      return
    }
    setImmediate(() => cb(null, db[id]))
  }

  function update(id, data, cb) {
    if (!(db.hasOwnProperty(id))) {
      const err = Error('not found')
      err.code = 'E_NOT_FOUND'
      setImmediate(() => cb(err))
      return
    }
    db[id] = data
    setImmediate(() => cb())
  }

  function del(id, cb) {
    if (!(db.hasOwnProperty(id))) {
      const err = Error('not found')
      err.code = 'E_NOT_FOUND'
      setImmediate(() => cb(err))
      return
    }
    delete db[id]
    setImmediate(() => cb())
  }
}
Use either Fastify or Express to implement a RESTful HTTP server so that when the command npm start is executed, a server is started that listens on process.env.PORT.
If implementing in Fastify, remember that running npm init fastify -- --integrate in the labs-1 folder will set up the project npm start is executed the server will automatically listen on process.env.PORT.
The server should support a GET request to a single route: /boat/{id} where {id} is a placeholder for any given ID - for instance /boat/2.
The GET /boat/{id} route should respond with a JSON payload. The route should also respond with the correct headers for a JSON response (Content-Type: application/json).
The server should only support this GET route. That means that any other routes or any other verbs should be handled according to the HTTP specification. Thankfully Express and Fastify will do most of this for us.
The following cases must be successfully handled:
- A successful request should respond with a 200 status code. Express and Fastify do this automatically.
- The response should have the correct mime type header. In this case we need to make sure the
Content-Typeheader is set toapplication/json. - A GET request to a route that does not exist should respond with a 404 status code. Fastify does this automatically and the typical Express configuration also handles this by default.
- If a given boat ID isn't found in the model the server should respond with a 404 status code. The response body can contain anything, but it's important that the response status is set to 404.
- Unexpected errors in the model should cause the server to respond with a 500 status code. This means that if the
readmethod of the model passed an Error object to the callback that was unexpected or unrecognized, that error needs to be propagated to the framework we're using in some way so that the framework can automatically generate a 500 response. - In the HTTP specification there is some ambiguity over how to handle unsupported HTTP methods. Any HTTP method other than GET should be responded to with either a 400, 404 or 405 status code. Again Fastify and Express will respond to unsupported methods with one of these status codes.
Do not edit the model.js file, it will be overwritten by the validation process anyway. The model.js file is deliberately noisy, providing methods that we don't need for this exercise. This reflects the philosophical approach of the certification to provide occasionally messy API's to integrate with in order to better reflect real-world scenarios.
Once the server has been implemented, the following command can be executed to validate the implementation:
node validate.js
When correctly implemented the result of this command should be as follows:
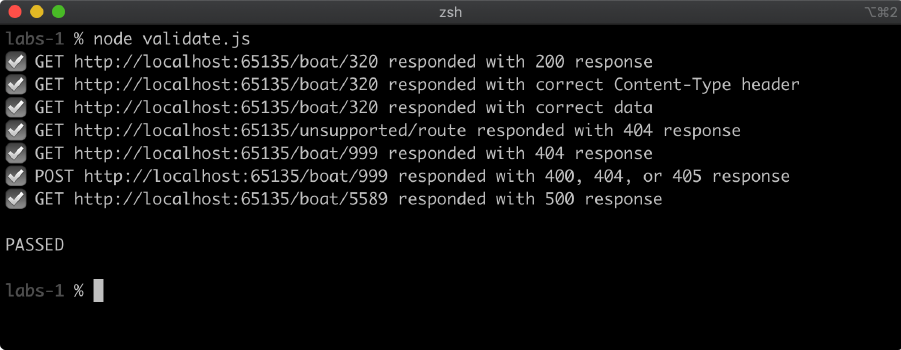
6 - Manipulating Data with RESTful Services
Introduction
Chapter Overview
In the prior chapter we covered some conventions to use when creating Node.js services and set up a JSON GET route. In this chapter we're going to extend the services we built, with support for POST, PUT and DELETE HTTP methods.
Learning Objectives
By the end of this chapter, you should be able to:
- Learn how to implement
POSTrequest functionality for creating and updating data entries. - Understand how to implement
PUTrequest for creating and updating data entries as well as the differences betweenPOSTandPUT. - Learn how to implement
DELETErequests for removing data entries.
Manipulating Data with RESTful Services
Implementing POST, PUT and DELETE with Fastify (1)
In the previous chapter we created a folder called my-service and generated a Fastify project in that folder using the npm init fastify command. In addition, we added a model.js file with a read method, which we'll adapt in a moment and the routes/bicycle/index.js file which ended up looking as follows:
'use strict'
const { promisify } = require('util')
const { bicycle } = require('../../model')
const read = promisify(bicycle.read)

module.exports = async (fastify, opts) => {
  const { notFound } = fastify.httpErrors

  fastify.get('/:id', async (request, reply) => {
    const { id } = request.params
    try {
      return await read(id)
    } catch (err) {
      if (err.message === 'not found') throw notFound()
      throw err
    }
  })
}
We're going to add new routes to integrate with new model capabilities. Let's update the model.js file to the following:
'use strict'

module.exports = {
  bicycle: bicycleModel()
}

function bicycleModel () {
  const db = {
    1: { brand: 'Veloretti', color: 'green' },
    2: { brand: 'Batavus', color: 'yellow' }
  }

  return {
    create, read, update, del, uid
  }

  function uid () {
    return Object.keys(db)
      .sort((a, b) => a - b)
      .map(Number)
      .filter((n) => !isNaN(n))
      .pop() + 1 + ''
  }

  function create (id, data, cb) {
    if (db.hasOwnProperty(id)) {
      const err = Error('resource exists')
      setImmediate(() => cb(err))
      return
    }
    db[id] = data
    setImmediate(() => cb(null, id))
  }

  function read (id, cb) {
    if (!(db.hasOwnProperty(id))) {
      const err = Error('not found')
      setImmediate(() => cb(err))
      return
    }
    setImmediate(() => cb(null, db[id]))
  }

  function update (id, data, cb) {
    if (!(db.hasOwnProperty(id))) {
      const err = Error('not found')
      setImmediate(() => cb(err))
      return
    }
    db[id] = data
    setImmediate(() => cb())
  }

  function del (id, cb) {
    if (!(db.hasOwnProperty(id))) {
      const err = Error('not found')
      setImmediate(() => cb(err))
      return
    }
    delete db[id]
    setImmediate(() => cb())
  }
}
Implementing POST, PUT and DELETE with Fastify (2)
Along with the read function there's now create, update and del functions and a function for calculating the next ID for an entry. Recall that the implementation is contrived, it's not meant to be real. However the interface (create, read, update, del) does conceptually reflect the sort of operations we would perform on a database.
The difference between a POST and PUT is nuanced. Both involve sending data from a client to a server but they are supposed to behave differently. The key difference is idempotency, which means that multiple identical operations should lead to the same result. POST is not idempotent whereas PUT is idempotent. So multiple identical POST requests would, for instance, create multiple entries with identical data, contrariwise multiple PUT requests should overwrite the same entry with the same data. This does not mean that PUT can't be used to create entries, or that POST can't be used to update, it's just that expected behavior is different. A POST request can be used to create an entry without supplying an ID, whereas a PUT request could be used to create an entry where a specific ID is desired. Using POST to update should be an explicitly separate route for updating versus creating whereas the ability to update or create with PUT can exist on the same route. With all that in mind let's implement POST functionality by updating routes/bicycle/index.js to look as follows:
'use strict'
const { promisify } = require('util')
const { bicycle } = require('../../model')
const { uid } = bicycle
const read = promisify(bicycle.read)
const create = promisify(bicycle.create)
const update = promisify(bicycle.update)

module.exports = async (fastify, opts) => {
  const { notFound } = fastify.httpErrors

  fastify.post('/', async (request, reply) => {
    const { data } = request.body
    const id = uid()
    await create(id, data)
    reply.code(201)
    return { id }
  })

  fastify.post('/:id/update', async (request, reply) => {
    const { id } = request.params
    const { data } = request.body
    try {
      await update(id, data)
      reply.code(204)
    } catch (err) {
      if (err.message === 'not found') throw notFound()
      throw err
    }
  })

  fastify.get('/:id', async (request, reply) => {
    const { id } = request.params
    try {
      return await read(id)
    } catch (err) {
      if (err.message === 'not found') throw notFound()
      throw err
    }
  })
}
We've now added two POST routes: POST /bicycle and POST /bicycle/:id/update. Let's study each in isolation. The first POST route is configured with the following route handler:
fastify.post('/', async (request, reply) => {
  const { data } = request.body
  const id = uid()
  await create(id, data)
  reply.code(201)
  return { id }
})
Implementing POST, PUT and DELETE with Fastify (3)
This route allows a new entry to be created by using the uid method exported from model.js to get a new ID and then passes that ID along with an expected data property in the request POST payload to the create method.
Note how there is no explicit error handling here, since the only known error would be regarding the resource already existing and since the uid function provides a new ID that won't be an issue. Any error therefore would be an unknown error, if create throws for any reason this will cause the async function route handler to throw and then be handled as a 500 Server Error by Fastify.
A successful request will respond with a 201 Created status code and send back a JSON object containing an id property with a value of the ID for the new entry.
By default Fastify supports application/json POST requests. The fastify-multipart plugin can be used to support multipart/formdata requests and fastify-formbody can be used to support application/x-www-form-urlencoded POST requests. Our goal is to support application/json so the core functionality is all we need.
Making sure that the server has been started in another terminal (npm run dev or npm start), the following command will perform a POST request to /bicycle and output the status code and the response body:
node -e "http.request('http://localhost:3000/bicycle', { method: 'post', headers: {'content-type': 'application/json'}}, (res) => res.setEncoding('utf8').once('data', console.log.bind(null, res.statusCode))).end(JSON.stringify({data: {brand: 'Gazelle', color: 'red'}}))"
The first time this is executed the output should be: 201 {"id":"3"}.
If it is executed again with the same data, the output would be: 201 {"id":"4"} because POST requests are meant to be non-idempotent.
We can check that the entry was added by hitting the GET route with the new ID:
node -e "http.get('http://localhost:3000/bicycle/3', (res) => res.setEncoding('utf8').once('data', console.log))"
This should output: {"brand":"Gazelle","color":"red"}. This is the data property of the object that we sent to the service in the POST request. Of course we could also just navigate to http://localhost:3000/bicycle/3 in a browser to see the same output.
Let's take a look at the handler for the second POST route:
fastify.post('/:id/update', async (request, reply) => {
  const { id } = request.params
  const { data } = request.body
  try {
    await update(id, data)
    reply.code(204)
  } catch (err) {
    if (err.message === 'not found') throw notFound()
    throw err
  }
})
This allows the client to make a POST request to, for example, /bicycle/3/update and the entry with an ID of 3 will be updated and the response will contain no data and have a status code of 204 No Content since there's nothing we really need to send back but the request was successfully processed. As a side note, this is the only case where a JSON service may respond without the application/json Content-Type header since there is no content, so there is no content-type.
If an entry for a given ID does not exist then a 404 response will result.
Let's try it out with the following command:
node -e "http.request('http://localhost:3000/bicycle/3/update', { method: 'post', headers: {'content-type': 'application/json'}}, (res) => console.log(res.statusCode)).end(JSON.stringify({data: {brand: 'Ampler', color: 'blue'}}))"
This should output 204. We can then see if the update worked with another GET request to http://localhost:3000/bicycle/3:
node -e "http.get('http://localhost:3000/bicycle/3', (res) => res.setEncoding('utf8').once('data', console.log))"
This command should now output: {"brand":"Ampler","color":"blue"}.
The following shows these requests and responses all together:
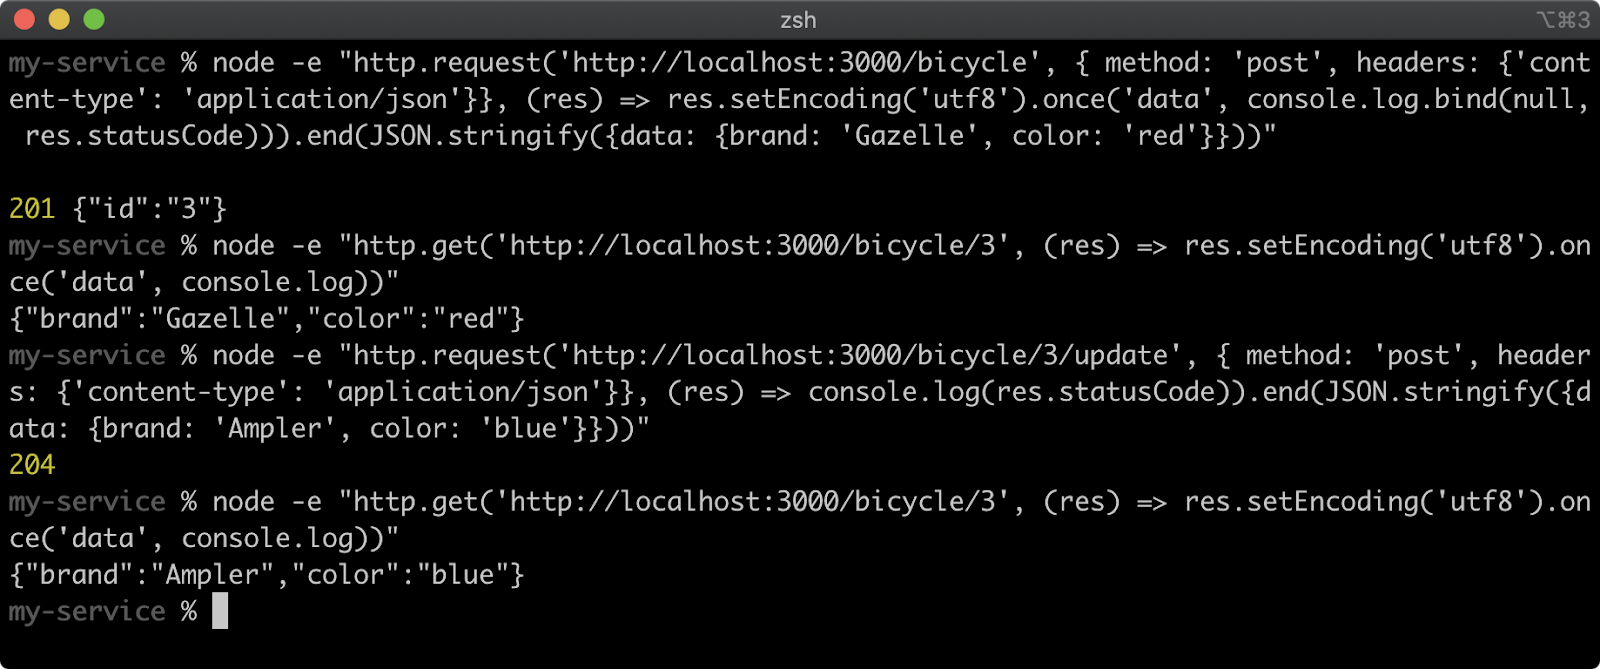
Implementing POST, PUT and DELETE with Fastify (4)
Typically a service would either use POST or PUT for both creation and updates, or sometimes less-advisedly, POST for creation and PUT for updates. However, for understanding purposes, we'll implement PUT for updating and creating entries as well.
Let's update routes/bicycle/index.js to the following:
'use strict'
const { promisify } = require('util')
const { bicycle } = require('../../model')
const { uid } = bicycle
const read = promisify(bicycle.read)
const create = promisify(bicycle.create)
const update = promisify(bicycle.update)

module.exports = async (fastify, opts) => {
  const { notFound } = fastify.httpErrors

  fastify.post('/', async (request, reply) => {
    const { data } = request.body
    const id = uid()
    await create(id, data)
    reply.code(201)
    return { id }
  })

  fastify.post('/:id/update', async (request, reply) => {
    const { id } = request.params
    const { data } = request.body
    try {
      await update(id, data)
      reply.code(204)
    } catch (err) {
      if (err.message === 'not found') throw notFound()
      throw err
    }
  })

  fastify.get('/:id', async (request, reply) => {
    const { id } = request.params
    try {
      return await read(id)
    } catch (err) {
      if (err.message === 'not found') throw notFound()
      throw err
    }
  })

  fastify.put('/:id', async (request, reply) => {
    const { id } = request.params
    const { data } = request.body
    try {
      await create(id, data)
      reply.code(201)
      return {}
    } catch (err) {
      if (err.message === 'resource exists') {
        await update(id, data)
        reply.code(204)
      } else {
        throw err
      }
    }
  })

}
The only addition is the fastify.put call at the bottom of the exported function. Let's take a close look:
fastify.put('/:id', async (request, reply) => {
  const { id } = request.params
  const { data } = request.body
  try {
    await create(id, data)
    reply.code(201)
    return {}
  } catch (err) {
    if (err.message === 'resource exists') {
      await update(id, data)
      reply.code(204)
    } else {
      throw err
    }
  }
})
Implementing POST, PUT and DELETE with Fastify (5)
This one route allows for both creation and updates of entries but the ID has to be specified for creation. The model.js create function will respond with an error when trying to create an entry with an ID that already exists, so our PUT route handler can simply try to create an entry and if that fails update the entry instead. Any other error is re-thrown, which would then be handled by Fastify as a 500 Server Error response.
If the entry is created, the response status code is set to 201 Created. The only legitimate case for responding with no data is when the status code is 204 No Content but since 201 Created applies far more strongly in the case of entry creation we send an empty object in response. If the entry is updated, we do respond with 204 No Content status code to indicate that the entry was updated but that there's no data to return.
We can try out our PUT route with the following command:
node -e "http.request('http://localhost:3000/bicycle/99', { method: 'put', headers: {'content-type': 'application/json'}}, (res) => console.log(res.statusCode)).end(JSON.stringify({data: {brand: 'VanMoof', color: 'black'}}))"
This command should output: 201. Since there won't be an entry with an ID of 99 this will create a new entry, which we can retrieve with a GET request to http://localhost:3000/bicycle/99:
node -e "http.get('http://localhost:3000/bicycle/99', (res) => res.setEncoding('utf8').once('data', console.log))"
This command should output: {"brand":"VanMoof","color":"black"}.
We can now hit the same route with different data to update it:
node -e "http.request('http://localhost:3000/bicycle/99', { method: 'put', headers: {'content-type': 'application/json'}}, (res) => console.log(res.statusCode)).end(JSON.stringify({data: {brand: 'Bianchi', color: 'pink'}}))"
This command should output: 204. We can verify that the update occurred with the following:
node -e "http.get('http://localhost:3000/bicycle/99', (res) => res.setEncoding('utf8').once('data', console.log))"
This should output: {"brand":"Bianchi","color":"pink"}.
The following shows these interactions with our PUT route:
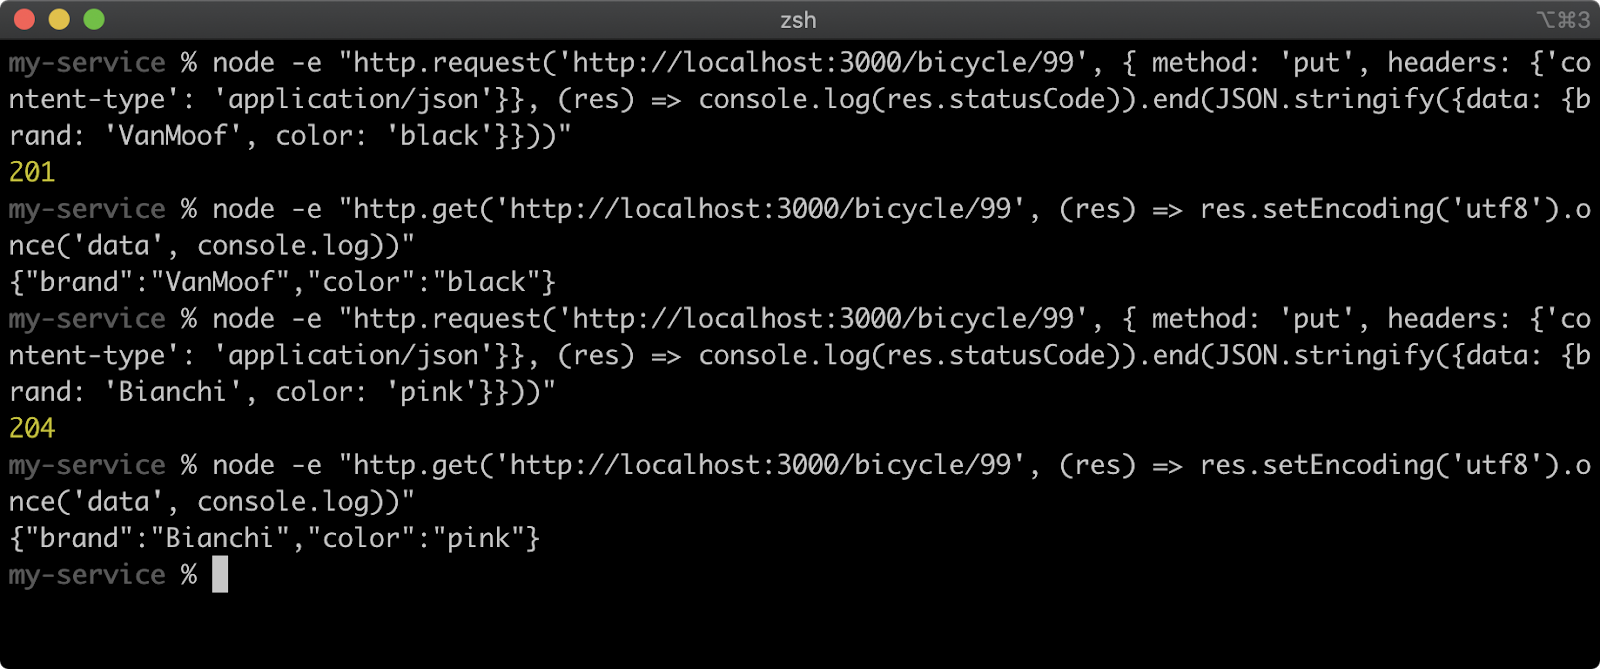
Finally, let's implement a DELETE route by altering routes/bicycle/index.js to the following:
'use strict'
const { promisify } = require('util')
const { bicycle } = require('../../model')
const { uid } = bicycle
const read = promisify(bicycle.read)
const create = promisify(bicycle.create)
const update = promisify(bicycle.update)
const del = promisify(bicycle.del)

module.exports = async (fastify, opts) => {
  const { notFound } = fastify.httpErrors

  fastify.post('/', async (request, reply) => {
    const { data } = request.body
    const id = uid()
    await create(id, data)
    reply.code(201)
    return { id }
  })

  fastify.post('/:id/update', async (request, reply) => {
    const { id } = request.params
    const { data } = request.body
    try {
      await update(id, data)
      reply.code(204)
    } catch (err) {
      if (err.message === 'not found') throw notFound()
      throw err
    }
  })

  fastify.get('/:id', async (request, reply) => {
    const { id } = request.params
    try {
      return await read(id)
    } catch (err) {
      if (err.message === 'not found') throw notFound()
      throw err
    }
  })

  fastify.put('/:id', async (request, reply) => {
    const { id } = request.params
    const { data } = request.body
    try {
      await create(id, data)
      reply.code(201)
      return { }
    } catch (err) {
      if (err.message === 'resource exists') {
        await update(id, data)
        reply.code(204)
      } else {
        throw err
      }
    }
  })

  fastify.delete('/:id', async (request, reply) => {
    const { id } = request.params
    try {
      await del(id)
      reply.code(204)
    } catch (err) {
      if (err.message === 'not found') throw notFound()
      throw err
    }
  })

}
Implementing POST, PUT and DELETE with Fastify (6)
At the top of the file we added const del = promisify(bicycle.del) to our other promisified model.js functions, and then at the bottom of the exported function we've added the fastify.delete call. Let's look at that in isolation:
fastify.delete('/:id', async (request, reply) => {
  const { id } = request.params
  try {
    await del(id)
    reply.code(204)
  } catch (err) {
    if (err.message === 'not found') throw notFound()
    throw err
  }
})
This enables an HTTP DELETE request for a given ID to remove the entry from the data set. If there is no entry, the del method in model.js will cause an error indicating that the entry is not found. The route handler catches this error and rethrows the fastify-sensible notFound error so that a 404 error is generated. Any unknown error is rethrown so that it propagates as a 500 status response.
As we know there is an entry with an ID of 1, let's fetch that entry with a GET request to start out with:
node -e "http.get('http://localhost:3000/bicycle/1', (res) => res.setEncoding('utf8').once('data', console.log))"
This should output {"brand":"Veloretti","color":"green"}.
Now let's make a DELETE request to the same route:
node -e "http.request('http://localhost:3000/bicycle/1', { method: 'delete', headers: {'content-type': 'application/json'}}, (res) => console.log(res.statusCode)).end()"
This command should output the status code 204, which indicates the record was successfully deleted.
If we attempt the same GET request we'll get a 404 response:
node -e "http.get('http://localhost:3000/bicycle/1', (res) => res.setEncoding('utf8').once('data', console.log))"
This should output: {"statusCode":404,"error":"Not Found","message":"Not Found"} which is the response body generated by the fastify-sensible notFound error.
If we attempt the same DELETE request again we'll likewise get a 404 response:
node -e "http.request('http://localhost:3000/bicycle/1', { method: 'delete', headers: {'content-type': 'application/json'}}, (res) => console.log(res.statusCode)).end()"
This will output 404 (because this command outputs the status code not the response body).
We now have a fully functioning RESTful service that performs backend Create, Read, Update and Delete (CRUD) operations.
One important thing to note: we haven't handled unexpected input. For instance, what if the POST body does not contain a data property? This scenario comes under the auspice of user input validation which is extremely important from a security perspective. We'll be revisiting our service in Chapter 9. Web Security: Handling User Input in order to apply user input validation to our routes.
In the next section we'll build our service again in Express.
Implementing POST, PUT and DELETE with Express (1)
In the previous chapter, we generated an Express project with the express command line executable provided by the express-generator globally installed module. This created a folder called my-express-service. After installing project dependencies with npm install we also added a model.js file with a read method, added a routes/bicycle/index.js file and updated the app.js file mount our /bicycle route and convert the error handler from generating an HTML response to generating a JSON response.
Let's update the model.js file in the my-express-service folder to the same code as model.js file in the previous section:
'use strict'

module.exports = {
  bicycle: bicycleModel()
}

function bicycleModel () {
  const db = {
    1: { brand: 'Veloretti', color: 'green' },
    2: { brand: 'Batavus', color: 'yellow' }
  }

  return {
    create, read, update, del, uid
  }

  function uid () {
    return Object.keys(db)
      .sort((a, b) => a - b)
      .map(Number)
      .filter((n) => !isNaN(n))
      .pop() + 1 + ''
  }

  function create (id, data, cb) {
    if (db.hasOwnProperty(id)) {
      const err = Error('resource exists')
      setImmediate(() => cb(err))
      return
    }
    db[id] = data
    setImmediate(() => cb(null, id))
  }

  function read (id, cb) {
    if (!(db.hasOwnProperty(id))) {
      const err = Error('not found')
      setImmediate(() => cb(err))
      return
    }
    setImmediate(() => cb(null, db[id]))
  }

  function update (id, data, cb) {
    if (!(db.hasOwnProperty(id))) {
      const err = Error('not found')
      setImmediate(() => cb(err))
      return
    }
    db[id] = data
    setImmediate(() => cb())
  }

  function del (id, cb) {
    if (!(db.hasOwnProperty(id))) {
      const err = Error('not found')
      setImmediate(() => cb(err))
      return
    }
    delete db[id]
    setImmediate(() => cb())
  }

}
Implementing POST, PUT and DELETE with Express (2)
The extensions to model.js were discussed in the previous section. We're going to update the routes/bicycle/index.js file to include the same POST, DELETE and PUT routes that we added to the Fastify project in the last section, but this time we'll do it all in one go. Let's update the routes/bicycle/index.js file to the following:
var express = require('express');
var router = express.Router();
var model = require('../model');

router.get('/:id', function(req, res, next) {
  model.bicycle.read(req.params.id, (err, result) => {
    if (err) {
      if (err.message === 'not found') next();
      else next(err);
    } else {
      res.send(result);
    }
  });
});

router.post('/', function(req, res, next) {
  var id = model.bicycle.uid();
  model.bicycle.create(id, req.body.data, (err) => {
    if (err) next(err);
    else res.status(201).send({ id });
  });
});

router.post('/:id/update', function(req, res, next) {
  model.bicycle.update(req.params.id, req.body.data, (err) => {
    if (err) {
      if (err.message === 'not found') next();
      else next(err);
    } else {
      res.status(204).send();
    }
  });
});

router.put('/:id', function(req, res, next) {
  model.bicycle.create(req.params.id, req.body.data, (err) => {
    if (err) {
      if (err.message === 'resource exists') {
        model.bicycle.update(req.params.id, req.body.data, (err) => {
          if (err) next(err);
          else res.status(204).send();
        });
      } else {
        next(err);
      }
    } else {
      res.status(201).send({});
    }
  });
});

router.delete('/:id', function(req, res, next) {
  model.bicycle.del(req.params.id, (err) => {
    if (err) {
      if (err.message === 'not found') next();
      else next(err);
    } else {
      res.status(204).send();
    }
  });
});

module.exports = router;
Each of the routes implement exactly the same logic as the routes in our Fastify service but we use callback-style instead of async/await. The reason for this is two-fold. Firstly, it reflects the code styles used in legacy services - and there are many legacy Express services in the wild. Secondly, using async/await with Express is recommended against. Express was built before async/await syntax was part of the JavaScript language and as a result it does not always behave as expected.
Implementing POST, PUT and DELETE with Express (3)
For instance, the following will cause a memory leaks:
//: WARNING NEVER DO THIS IN EXPRESS
router.get('/foo', async function(req, res, next) {
  throw Error('what happens?');
  res.send('hi'); // <- this is never reached
});
This is because Express does not handle the promise rejection that results from throwing in an async function, and therefore the request does not finish (for a while) and continues to hold state. This would be a source of performance, debugging and maintenance issues. Worse, the same scenario can occur without explicitly throwing:
//: WARNING NEVER DO THIS IN EXPRESS
router.get('/foo', async function(req, res, next) {
  res.dend('hi');
});
In this case a typo has been made, res.send is intended but it's written as res.dend. Since that method doesn't exist, this will cause an error to be thrown (because undefined is not a function) and will lead to the same scenario. There are ways around this, for instance monkey-patching the framework, or using try/catch blocks in every single route handler and then passing caught errors to the next callback. However both of these approaches can (and likely will) lead to footgun scenarios, technical debt and different forms of bugs - because they rely on hacks and/or depend on understood and enforced conventions across many people.
In short, use callback-based API's with Express.
Let's start the service in one terminal (npm start) and in another we'll test our new routes.
First, let's check the POST /bicycle route with the following command:
node -e "http.request('http://localhost:3000/bicycle', { method: 'post', headers: {'content-type': 'application/json'}}, (res) => res.setEncoding('utf8').once('data', console.log.bind(null, res.statusCode))).end(JSON.stringify({data: {brand: 'Gazelle', color: 'red'}}))"
This should output 201 {"id":"3"}. The means there were no errors in creating a new entry.
We can check that the entry was added by hitting the GET route with the new ID:
node -e "http.get('http://localhost:3000/bicycle/3', (res) => res.setEncoding('utf8').once('data', console.log))"
This should output: {"brand":"Gazelle","color":"red"}.
Now let's try the other POST route and make an update to the entry we just added:
node -e "http.request('http://localhost:3000/bicycle/3/update', { method: 'post', headers: {'content-type': 'application/json'}}, (res) => console.log(res.statusCode)).end(JSON.stringify({data: {brand: 'Ampler', color: 'blue'}}))"
We've sent a POST request to http://localhost:3000/bicycle/3/update with some new data, the handler for router.post('/:id/update', ...) made a call to models.bicycle.update, the update function checked that the entry existed (it did so no error passed back) and then it updated the entry based on the data property in the POST request body.
Let's check that the update worked with another GET request:
node -e "http.get('http://localhost:3000/bicycle/3', (res) => res.setEncoding('utf8').once('data', console.log))"
This should output: {"brand":"Ampler","color":"blue"}.
Now let's try to create a new entry with our PUT route, using the following command:
node -e "http.request('http://localhost:3000/bicycle/99', { method: 'put', headers: {'content-type': 'application/json'}}, (res) => console.log(res.statusCode)).end(JSON.stringify({data: {brand: 'VanMoof', color: 'black'}}))"
Implementing POST, PUT and DELETE with Express (4)
This command should output: 201. Since there won't be an entry with an ID of 99 this will create a new entry, which we can retrieve with a GET request to http://localhost:3000/bicycle/99:
node -e "http.get('http://localhost:3000/bicycle/99', (res) => res.setEncoding('utf8').once('data', console.log))"
This command should output: {"brand":"VanMoof","color":"black"}.
We can now hit the same route with different data to update it:
node -e "http.request('http://localhost:3000/bicycle/99', { method: 'put', headers: {'content-type': 'application/json'}}, (res) => console.log(res.statusCode)).end(JSON.stringify({data: {brand: 'Bianchi', color: 'pink'}}))"
This command should output: 204. We can verify the update occurred with the following:
node -e "http.get('http://localhost:3000/bicycle/99', (res) => res.setEncoding('utf8').once('data', console.log))"
This should output: {"brand":"Bianchi","color":"pink"}.
Finally, we'll check our DELETE route. Let's run the following command:
node -e "http.request('http://localhost:3000/bicycle/99', { method: 'delete', headers: {'content-type': 'application/json'}}, (res) => console.log(res.statusCode)).end()"
This should output 204 which means that we just added with PUT was successfully deleted. We can check with a GET request:
node -e "http.get('http://localhost:3000/bicycle/99', (res) => res.setEncoding('utf8').once('data', console.log))"
This should output a JSON object with a type property containing 'error', status property containing 404, and a stack property as per our changes to app.js in the previous chapter.
The following shows all of these commands and their output in order:
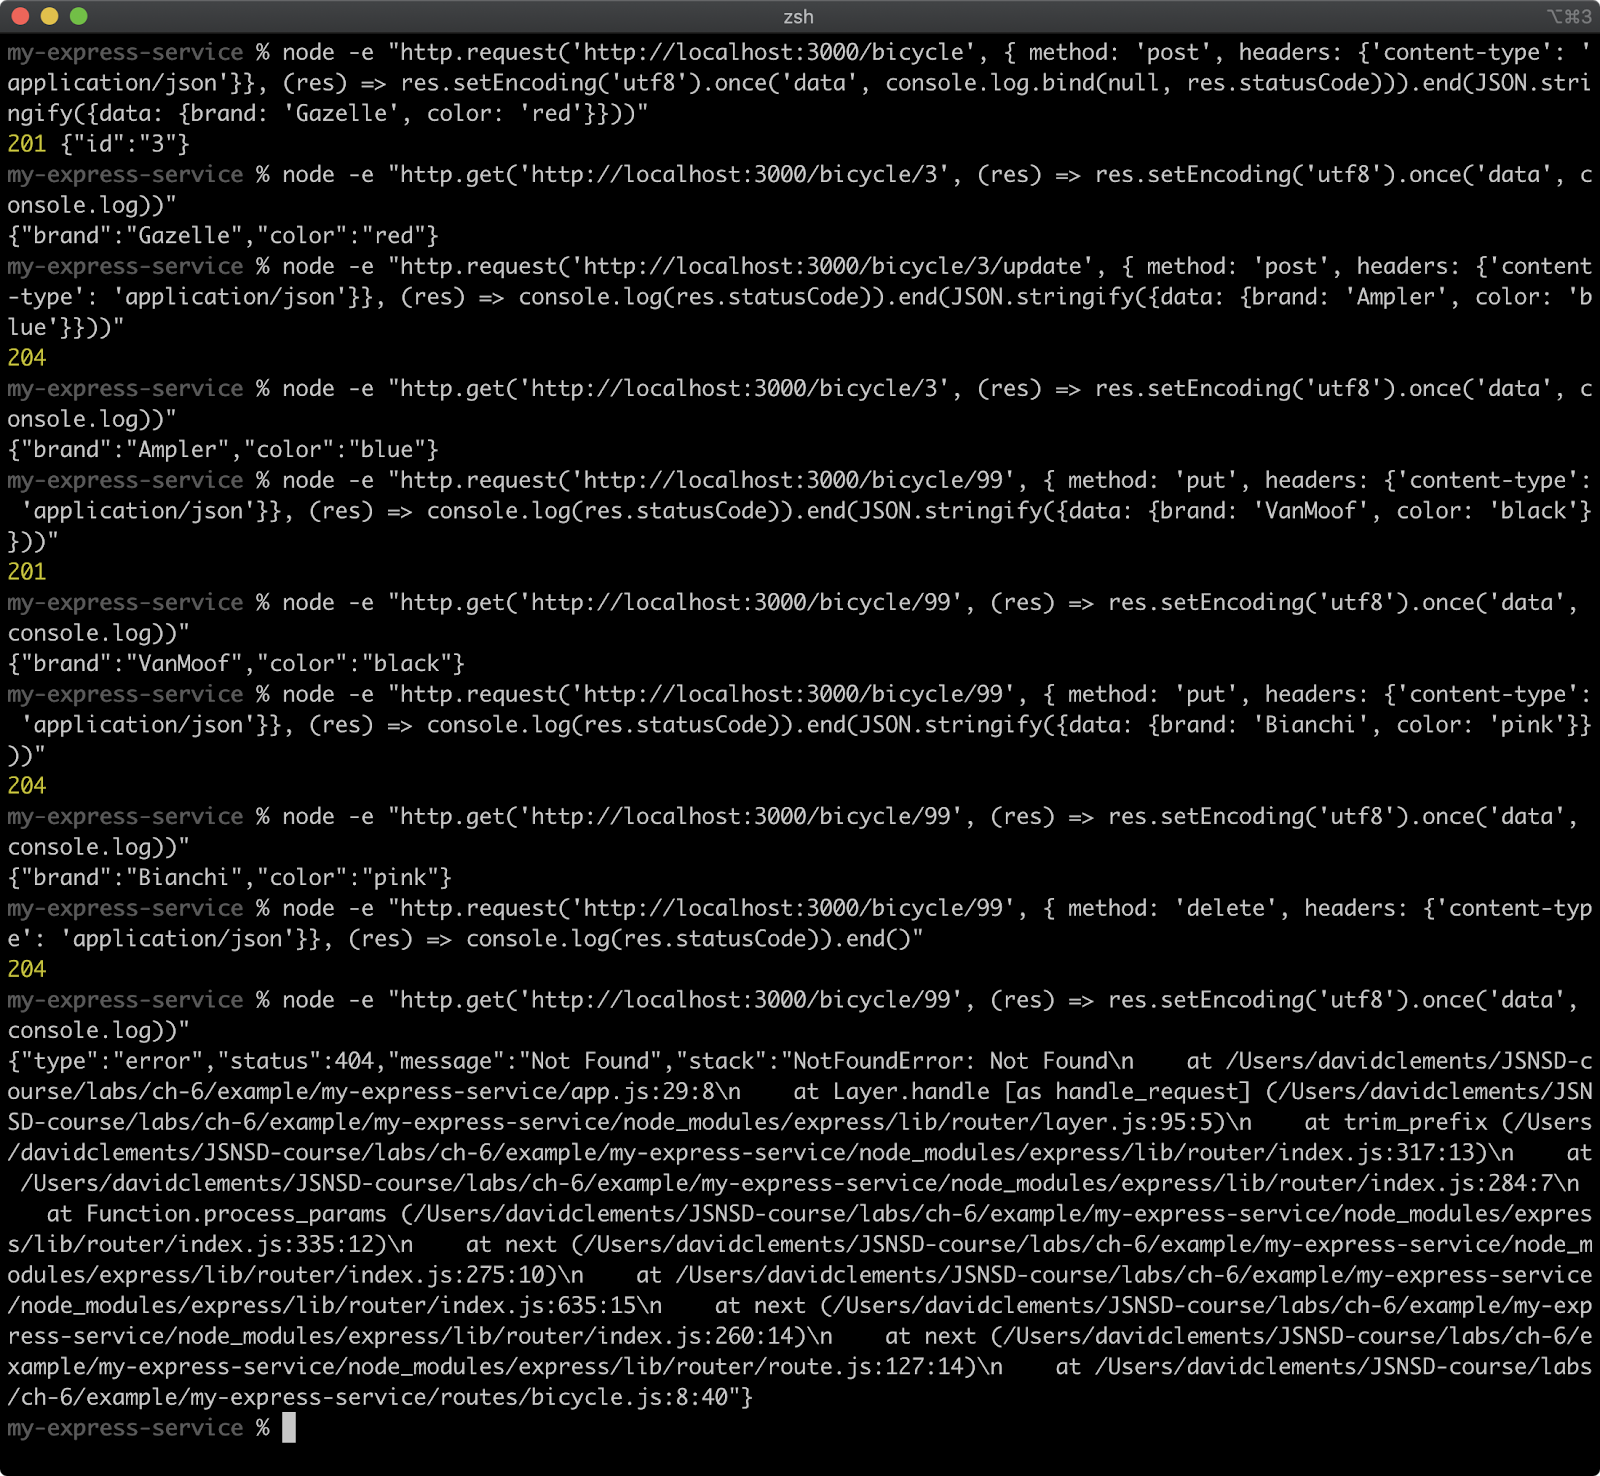
We now have a fully functioning RESTful service that performs backend Create, Read, Update and Delete (CRUD) operations. In the next two chapters we'll be focusing purely on Fastify as the scenarios discussed in these upcoming chapters are generally green-field cases as opposed to legacy/maintenance cases.
We'll be revisiting Express in Chapter 9. Web Security: Handling User Input to apply validation to our routes and Chapter 10. Web Security: Mitigating Attacks.
Lab Exercises
Lab 6.1 - Implement a RESTful JSON POST
The labs-1 folder contains the following files:
model.jspackage.jsonvalidate.js
The model.js file and the package.json file are exactly the same as the first lab exercise in the previous chapter.
The model.js file has the following content:
'use strict'

module.exports = {
  boat: boatModel()
}

function boatModel() {
  const db = {
    1: { brand: 'Chaparral', color: 'red' },
    2: { brand: 'Chaparral', color: 'blue' }
  }

  return {
    uid,
    create,
    read,
    update,
    del
  }

  function uid() {
    return Object.keys(db)
      .sort((a, b) => a - b)
      .map(Number)
      .filter((n) => !isNaN(n))
      .pop() + 1 + ''
  }

  function create(id, data, cb) {
    if (db.hasOwnProperty(id)) {
      const err = Error('resource exists')
      err.code = 'E_RESOURCE_EXISTS'
      setImmediate(() => cb(err))
      return
    }
    db[id] = data
    setImmediate(() => cb(null, id))
  }

  function read(id, cb) {
    if (!(db.hasOwnProperty(id))) {
      const err = Error('not found')
      err.code = 'E_NOT_FOUND'
      setImmediate(() => cb(err))
      return
    }
    setImmediate(() => cb(null, db[id]))
  }

  function update(id, data, cb) {
    if (!(db.hasOwnProperty(id))) {
      const err = Error('not found')
      err.code = 'E_NOT_FOUND'
      setImmediate(() => cb(err))
      return
    }
    db[id] = data
    setImmediate(() => cb())
  }

  function del(id, cb) {
    if (!(db.hasOwnProperty(id))) {
      const err = Error('not found')
      err.code = 'E_NOT_FOUND'
      setImmediate(() => cb(err))
      return
    }
    delete db[id]
    setImmediate(() => cb())
  }
}
The package.json file looks as follows:
{
  "name": "labs-1",
  "version": "1.0.0",
  "description": "",
  "scripts": {
    "start": "echo \"Error: start script not specified\" && exit 1",
    "test": "echo \"Error: no test specified\" && exit 1"
  },
  "keywords": [],
  "author": "",
  "license": "ISC"
}
Use either Fastify or Express to implement a RESTful HTTP server so that when the command npm start is executed it starts a server that listens on process.env.PORT.
The server should support a POST request to /boat that uses the model.js file to create a new entry. The route should only accept application/json mime-type requests and should respond with application/json content-type responses.
The POST request should expect JSON data to be sent in the following format:
{ data: { brand, color } }
A successful request should respond with a 201 Created status code. Unexpected errors should result in a 500 Server Error response.
The service must also support the same GET /boat/{id} route as implemented in the previous chapter.
It is not necessary to validate user input for this exercise.
Feel free to copy the files and folders from the labs-1 answer of the previous chapter into the labs-1 folder of this chapter and then build upon, or else start from scratch, as preferred.
Making sure that the labs-1 folder is the current working directory, run the following command to validate the completed exercise:
node validate
When correctly implemented, this command should output the following:
Lab 6.2 - Implement a RESTful JSON DELETE
The labs-2 folder contains the following files:
model.jspackage.jsonvalidate.js
The model.js file and the package.json file are exactly the same as the first lab exercise in this chapter and in the previous chapter.
The model.js file has the following content:
'use strict'

module.exports = {
  boat: boatModel()
}

function boatModel() {
  const db = {
    1: { brand: 'Chaparral', color: 'red' },
    2: { brand: 'Chaparral', color: 'blue' }
  }

  return {
    uid,
    create,
    read,
    update,
    del
  }

  function uid() {
    return Object.keys(db)
      .sort((a, b) => a - b)
      .map(Number)
      .filter((n) => !isNaN(n))
      .pop() + 1 + ''
  }

  function create(id, data, cb) {
    if (db.hasOwnProperty(id)) {
      const err = Error('resource exists')
      err.code = 'E_RESOURCE_EXISTS'
      setImmediate(() => cb(err))
      return
    }
    db[id] = data
    setImmediate(() => cb(null, id))
  }

  function read(id, cb) {
    if (!(db.hasOwnProperty(id))) {
      const err = Error('not found')
      err.code = 'E_NOT_FOUND'
      setImmediate(() => cb(err))
      return
    }
    setImmediate(() => cb(null, db[id]))
  }

  function update(id, data, cb) {
    if (!(db.hasOwnProperty(id))) {
      const err = Error('not found')
      err.code = 'E_NOT_FOUND'
      setImmediate(() => cb(err))
      return
    }
    db[id] = data
    setImmediate(() => cb())
  }

  function del(id, cb) {
    if (!(db.hasOwnProperty(id))) {
      const err = Error('not found')
      err.code = 'E_NOT_FOUND'
      setImmediate(() => cb(err))
      return
    }
    delete db[id]
    setImmediate(() => cb())
  }
}
The package.json file looks as follows:
{
  "name": "labs-1",
  "version": "1.0.0",
  "description": "",
  "scripts": {
    "start": "echo \"Error: start script not specified\" && exit 1",
    "test": "echo \"Error: no test specified\" && exit 1"
  },
  "keywords": [],
  "author": "",
  "license": "ISC"
}
Use either Fastify or Express to implement a RESTful HTTP server so that when the command npm start is executed it starts a server that listens on process.env.PORT.
The server should support a DELETE request to /boat/{id} where {id} is a placeholder for any given ID - for instance /boat/2.
A successful request should result in an empty response body with a 204 No Content status code. If the specified ID does not exist, the response should have a 404 status code. Any unexpected errors should result in a 500 Server Error response.
The service must also support the same GET /boat/{id} route as implemented in the previous chapter.
Feel free to copy the files and folders from the labs-1 answer into this labs-2 answer or start from scratch as preferred.
Making sure that the labs-2 folder is the current working directory, run the following command to
validate the completed exercise:
node validate
7 - Consuming and Aggregating Services
Introduction
Chapter Overview
A common case for Node.js services, and RESTful services in general, is to provide a mediation role sometimes known as the "front of the backend". These are services which sit between client requests, especially from a browser-client, and backend API's which may be SOAP, RPC, database or also other REST-based APIs. In this chapter we'll be implementing a service which consumes and aggregates data from other HTTP services. While this chapter will show examples using Fastify, the concepts and approaches translate to any framework.
Learning Objectives
By the end of this chapter, you should be able to:
- Learn ways to fetch data from other services.
- Understand how to handle upstream status codes and set appropriate downstream status codes.
- Determine ergonomic ways to combine data sources.
Consuming and Aggregating Services
Convention and Service Discovery
How one service discovers another service is a large subject from custom IP addresses to service meshes with DNS discovery and domain names, to solutions that incorporate Distributed Hash Tables; there are many ways for one service to discover another.
In most cases, supporting deployment infrastructure to inject values into the process at deployment-time allows for a certain degree of flexibility and reconfiguration possibilities.
A simple example would be where services are referenced with a URL that is injected as an environment variable.
If there was a Bicycle service and a Boat service that another service needs to talk to, it could determine the base URL for each of these services like so:
const { BICYCLE_SERVICE, BOAT_SERVICE } = process.env
It could then make a request to a service endpoint like so:
const http = require('http')
http.get(`${BICYLCE_SERVICE}/some/route`, (res) => {
  /* do something */
})
At deployment time, the operational infrastructure could then set the environment variables to the appropriate URLs. During local development the environment variables http://localhost:[port] where [port] is whatever port the relevant service has started on.
Another variation of this pattern is injecting the service port instead of a full URL. In which case the environment variable would be used like so:
const { BICYCLE_SERVICE_PORT, BOAT_SERVICE_PORT } = process.env
const http = require('http')
const bicycleSrv = `http://localhost:${BICYLCE_SERVICE_PORT}`
http.get(`${bicycleSrv}/some/route`, (res) => {
  /* do something */
})
The approach used is entirely dependent on deployment choices. However this chapter will be using the port number injection via environment variables.
Mock Services (1)
For our purposes we'll create two mock services that we can run locally so that we have some services to talk to.
Our first mock service serves bicycle data entities, and looks as follows:
'use strict'
const http = require('http')
const url = require('url')
const colors = ['Yellow', 'Red', 'Orange', 'Green', 'Blue', 'Indigo']
const MISSING = 2

const server = http.createServer((req, res) => {
  const { pathname } = url.parse(req.url)
  let id = pathname.match(/^\/(\d+)$/)
  if (!id) {
    res.statusCode = 400
    return void res.end()
  }

  id = Number(id[1])

  if (id === MISSING) {
    res.statusCode = 404
    return void res.end()
  }

  res.setHeader('Content-Type', 'application/json')

  res.end(JSON.stringify({
    id: id,
    color: colors[id % colors.length]
  }))
})

server.listen(process.env.PORT || 0, () => {
  const { port } = server.address()
  console.log('Bicycle service listening on localhost on port: ' + port)
})
Save this as bicycle-service.js.
Our second service serves brand names and looks as follows:
'use strict'
const http = require('http')
const url = require('url')
const brands = ['Gazelle', 'Batavus', 'Azor', 'Cortina', 'Giant','Sparta']
const MISSING = 3

const server = http.createServer((req, res) => {
  const { pathname } = url.parse(req.url)
  let id = pathname.match(/^\/(\d+)$/)

  if (!id) {
    res.statusCode = 400
    return void res.end()
  }

  id = Number(id[1])

  if (id === MISSING) {
    res.statusCode = 404
    return void res.end()
  }

  res.setHeader('Content-Type', 'application/json')

  res.end(JSON.stringify({
    id: id,
    name: brands[id % brands.length]
  }))
})

server.listen(process.env.PORT || 0, () => {
  const { port } = server.address()
  console.log('Brand service listening on localhost on port: ' + port)
})
Save this as brand-service.js.
Mock Services (2)
It should go without saying that this is not the recommended way to create services. Use a framework to create production services. The supplied code for the two mock-services is a self-contained, quick and easy way to get up and running with multiple services on a local machine that we can immediately start interacting with.
In one terminal start the bicycle service with the following command:
PORT=4000 node bicycle-service.js
In another terminal start the brand service with the following command:
PORT=5000 node brand-service.js
There should now be two terminals with two Node.js processes running, like so:
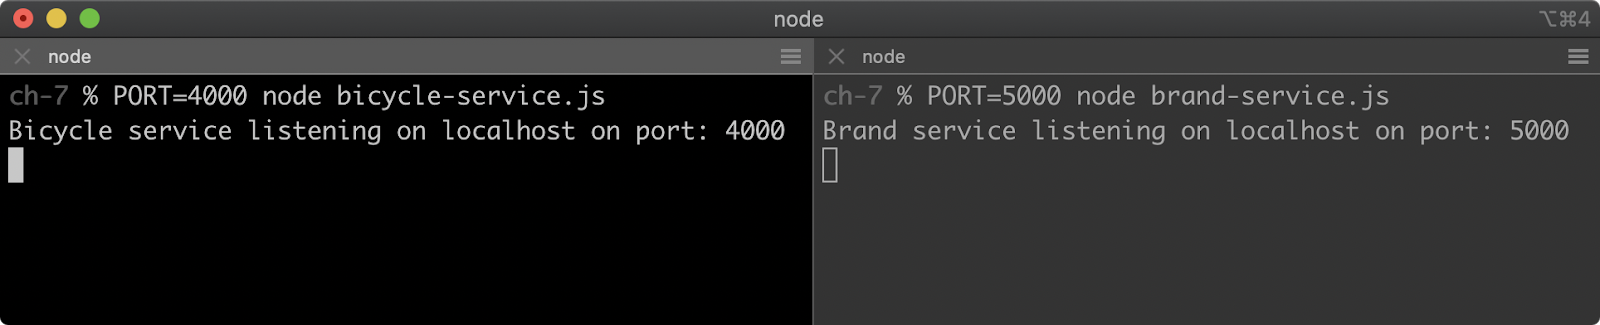
Navigating in a browser (or any HTTP client) to http://localhost:4000/1 should provide the following response body:
{"id":1,"color":"Red"}
Note that the id property is like an index ID in that it correlates data in each service. The brand corresponding to a bicycle with ID of 1 also has an ID of 1. It's important to acknowledge this is not a great data architecture: every bicycle entity has a one-to-one relationship with every brand entity. It's a simplified approach for our purposes.
Navigating to http://localhost:5000/5 should provide the following response:
{"id":1,"name":"Batavus"}
Great! Our mock services are now set up and running. In the next section, we'll create a new service and fetch data from one of the services.
The following sections will assume that the services are still running and bound to the ports we've specified in this section.
Fetching Data
Node.js comes with functionality for making HTTP requests in the core http module (and HTTPS requests in the https module). However when it comes to using async/await route handlers using the Node.js core modules for making requests can become ergonomically challenging.
There is a wide selection of HTTP request libraries in the Node.js ecosystem. We'll use the got module because it's well-scoped, well-engineered and has API's that are compatible with async/await functions that we'll be using as route handlers.
Let's set up a new service:
node -e "fs.mkdirSync('consuming-service')"
cd consuming-service
npm init fastify
When the npm init fastify command has finished generating our project, let's install package dependencies and install and add got to the dependencies:
npm install
npm install got@11
The routes folder generated by npm init fastify contains a root.js file which sets up a route for the root route. It currently looks as follows:
'use strict'

module.exports = async function (fastify, opts) {
  fastify.get('/', async function (request, reply) {
    return { root: true }
  })
}
Let's adapt it so that we use a route parameter so that a GET request can specify an ID and then use that ID to fetch data from the bicycle service we set up in the last section. Let's modify the routes/root.js file to the following:
'use strict'
const got = require('got')

const {
  BICYCLE_SERVICE_PORT = 4000
} = process.env

const bicycleSrv = `http://localhost:${BICYCLE_SERVICE_PORT}`

module.exports = async function (fastify, opts) {
  fastify.get('/:id', async function (request, reply) {
    const { id } = request.params
    const bicycle = await got(`${bicycleSrv}/${id}`).json()
    return bicycle
  })
}
In this case we've set a default port for the BICYCLE_SERVICE_PORT constant, this can be overridden by setting an environment variable named BICYCLE_SERVICE_PORT but since we've started our bicycle service on port 4000 there no need.
Let's start our consuming service with the following command:
npm run dev
If we navigate to http://localhost:3000/1 we should see the following response:
{"id":1,"color":"Red"}
The fact that we're returning an object from an async function (the route handler), means that Fastify will also set the Content-Type HTTP header to application/json.
We've now fetched data from one of our services and sent it to the response. At this point we're simply forwarding data from one service to another. In the next section we'll combine the data from both mock services together and in the final section we'll look at handling error cases, edge cases and availability issues.
Combining Data
We've already made a request to one service, let's extend the routes/root.js file to make a request to the other service and then send back both sets of data in a combined object.
Let's alter the contents of the routes/root.js file to the following:
'use strict'
const got = require('got')

const {
  BICYCLE_SERVICE_PORT = 4000, BRAND_SERVICE_PORT = 5000
} = process.env

const bicycleSrv = `http://localhost:${BICYCLE_SERVICE_PORT}`
const brandSrv = `http://localhost:${BRAND_SERVICE_PORT}`

module.exports = async function (fastify, opts) {
  fastify.get('/:id', async function (request, reply) {
    const { id } = request.params
    const bicycle = await got(`${bicycleSrv}/${id}`).json()
    const brand = await got(`${brandSrv}/${id}`).json()
    return {
      id: bicycle.id,
      color: bicycle.color,
      brand: brand.name,
    }
  })
}
We're now making a request to both services and returning an object that includes data from the responses of each service.
If we navigate to http://localhost:3000/1 we should get the following response body:
{"id":1,"color":"Red","brand":"Batavus"}
Notice that when we build the object that is returned, the value of the id property is taken from the bicycle object instead of from request.params.id. This is generally good hygiene and eliminates XSS reflected attacks. If at all possible, avoid sending back the same data that a user sent to the service. We will talk more about security in chapters 9 and 10.
Note that we make a request to one service, wait for the response and then make a request to another service. In our specific case we could perform both requests concurrently by altering the routes/root.js file to the following:
'use strict'
const got = require('got')

const {
  BICYCLE_SERVICE_PORT = 4000, BRAND_SERVICE_PORT = 5000
} = process.env

const bicycleSrv = `http://localhost:${BICYCLE_SERVICE_PORT}`
const brandSrv = `http://localhost:${BRAND_SERVICE_PORT}`

module.exports = async function (fastify, opts) {
  fastify.get('/:id', async function (request, reply) {
    const { id } = request.params
    const [ bicycle, brand ] = await Promise.all([
      got(`${bicycleSrv}/${id}`).json(),
      got(`${brandSrv}/${id}`).json()
    ])
    return {
      id: bicycle.id,
      color: bicycle.color,
      brand: brand.name,
    }
  })
}
With this adaption we're using the native Promise.all function to wait until all promises in the array passed to it are resolved. This way the requests start at about the same time so the total time for making requests would be whichever request takes longest, whereas when making the requests in serial the total time would be the combined time for all requests. When we await the Promise.all call the expression results in an array of results, which correspond to the promises passed in the array to Promise.all. We use array destructuring syntax to assign the corresponding results to the bicycle and brand constants and then return the same object as before from the route handler.
Making requests concurrently isn't always possible, there's often dependent data between services, where we need to get data from one service that we use in a request to another service.
If we navigate to http://localhost:3000/1 we should get the same response body as in the serial requests case:
{"id":1,"color":"Red","brand":"Batavus"}
We've now successfully made requests to two upstream services and sent a response containing data from both services.
Managing Status Codes (1)
So far we've implemented the happy path to fetching and combining data. But there's cases we haven't yet handled. For instance:
- What do we do if one of the services responds with a 404 status code?
- What if one of the services isn't available?
- What if either service responds with a status code that isn't 200?
- What about other 4XX or 5XX error codes?
This is a limited set of questions, we could go further but it's enough to get going with. In this section we're going to ensure that each of these cases is catered to in our implementation.
Let's start by checking the status code of a route that we know works successfully by running the following command:
node -e "http.get('http://localhost:3000/1', (res) => console.log(res.statusCode))"
This should output: 200.
Let's try this again with 2 as the ID instead:
node -e "http.get('http://localhost:3000/2', (res) => console.log(res.statusCode))"
This will output: 500. This means an error occurred in the route handler and Fastify has taken over and responded with a 500 server error. If we started the server with npm run dev this error will be logged out similar to the following:
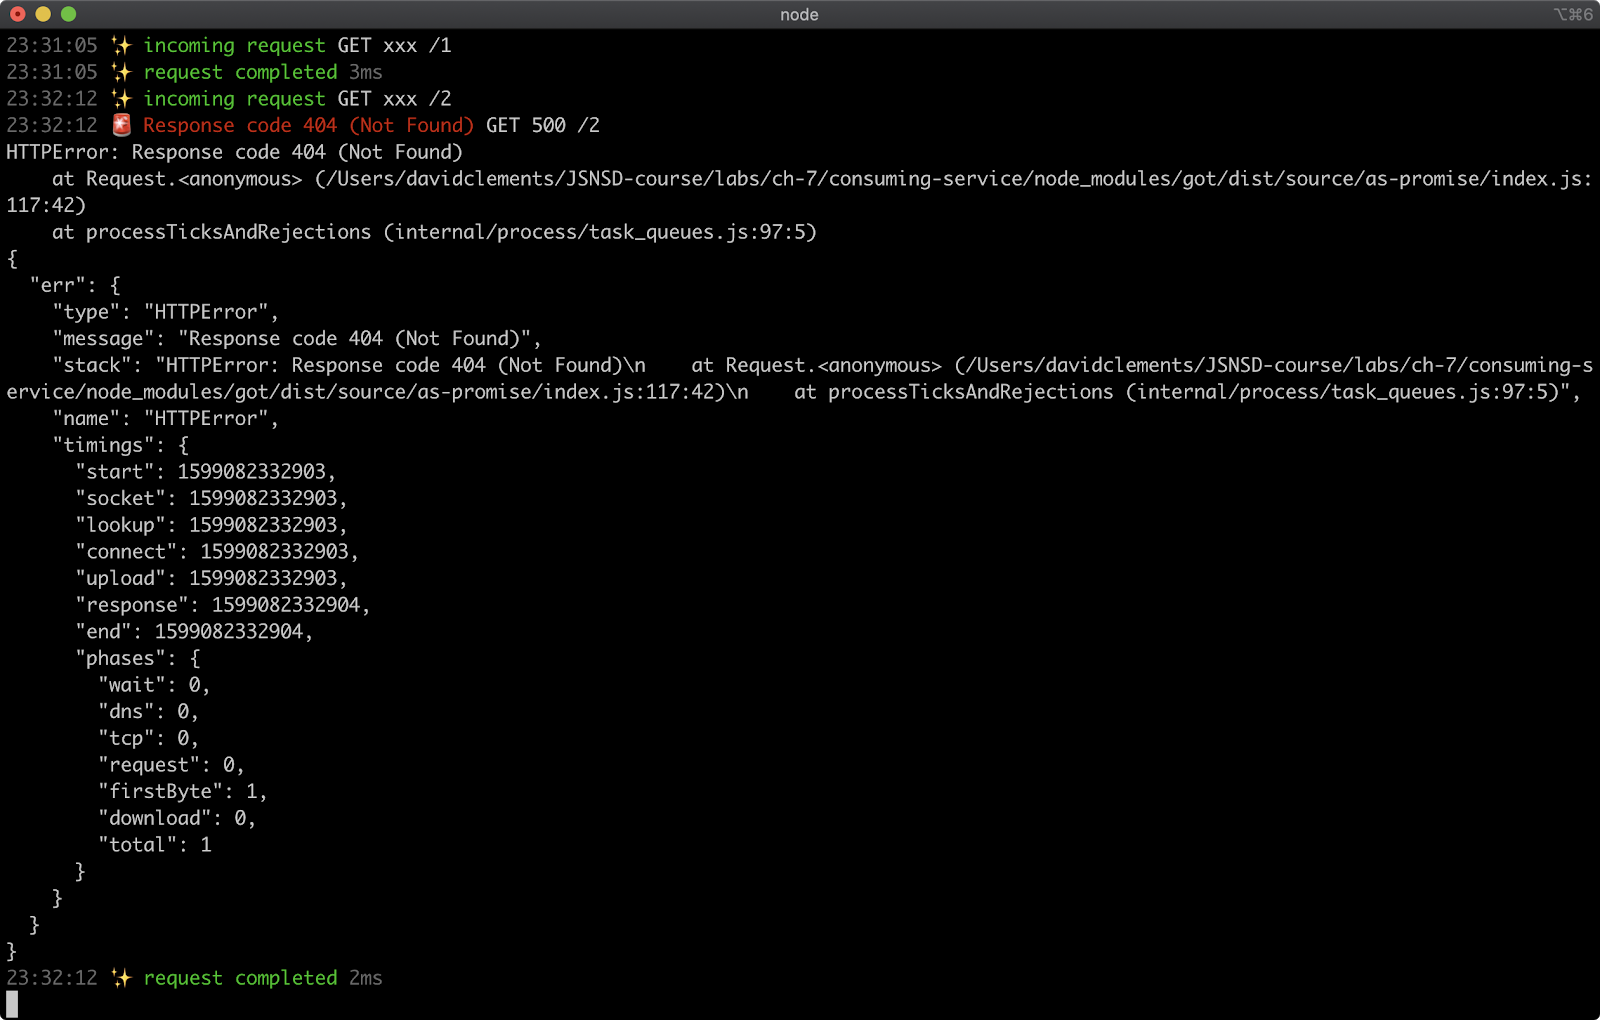
We can see that the error that occurred is an HTTPError. This is generated by the got library because one of the upstream services has responded with a 404 status code. But our server is currently translating that to a 500 status code. Is that the behavior we want? The answer to that is heavily dependent on the situation. We could forward the 404 status code, or we could ignore data from that service but return data from the other service. The answer on how to handle this depends on functional and non-functional requirements of the business context that the service is being implemented for.
We'll handle this scenario by forwarding the 404. In other words, if either upstream service has a 404 error, we'll send a 404 from our service.
Managing Status Codes (2)
Let's modify the routes/root.js file to the following:
'use strict'
const got = require('got')

const {
  BICYCLE_SERVICE_PORT = 4000, BRAND_SERVICE_PORT = 5000
} = process.env

const bicycleSrv = `http://localhost:${BICYCLE_SERVICE_PORT}`
const brandSrv = `http://localhost:${BRAND_SERVICE_PORT}`

module.exports = async function (fastify, opts) {
  const { httpErrors } = fastify
  fastify.get('/:id', async function (request, reply) {
    const { id } = request.params
    try {
      const [ bicycle, brand ] = await Promise.all([
        got(`${bicycleSrv}/${id}`).json(),
        got(`${brandSrv}/${id}`).json()
      ])
      return {
        id: bicycle.id,
        color: bicycle.color,
        brand: brand.name,
      }
    } catch (err) {
      if (!err.response) throw err
      if (err.response.statusCode === 404) {
        throw httpErrors.notFound()
      }
      throw err
    }
  })
}
We wrap the await of the request promises returned by the got invocations in a try/catch block. If the promise returned from either got invocation rejects, this will generate an error in the async function. The promises representing requests to upstream services will reject if the upstream service responds with a non-200 status code.
When got generates an error based on an upstream services response it adds a response property to the error object. If the err.response object is not there, then no response occurred but there was still an error. So we check that err.response is not falsy, and if it is, we throw the error immediately which will cause Fastify to generate a 500 response.
This is specific to got so if you are using another request library, check to see how it provides information about request errors. The err.response object has a statusCode which can be checked to see what status code of the upstream response was. If err.response.statusCode is 404 then we throw the result of the httpErrors.notFound function (which is supplied by the fastify-sensible which comes by default with npm init fastify).
Any other errors are just re-thrown, so if an upstream service replies with a status code that isn't 200-299 or 404 this results in a 500 error.
Let's run the following command again:
node -e "http.get('http://localhost:3000/2', (res) => console.log(res.statusCode))"
This time it should output 404.
Let's try the following command to perform a GET on our service with an invalid ID:
node -e "http.get('http://localhost:3000/foo', (res) => console.log(res.statusCode))"
This will output: 500.
If we check the server logs however, we'll see something similar to the following:
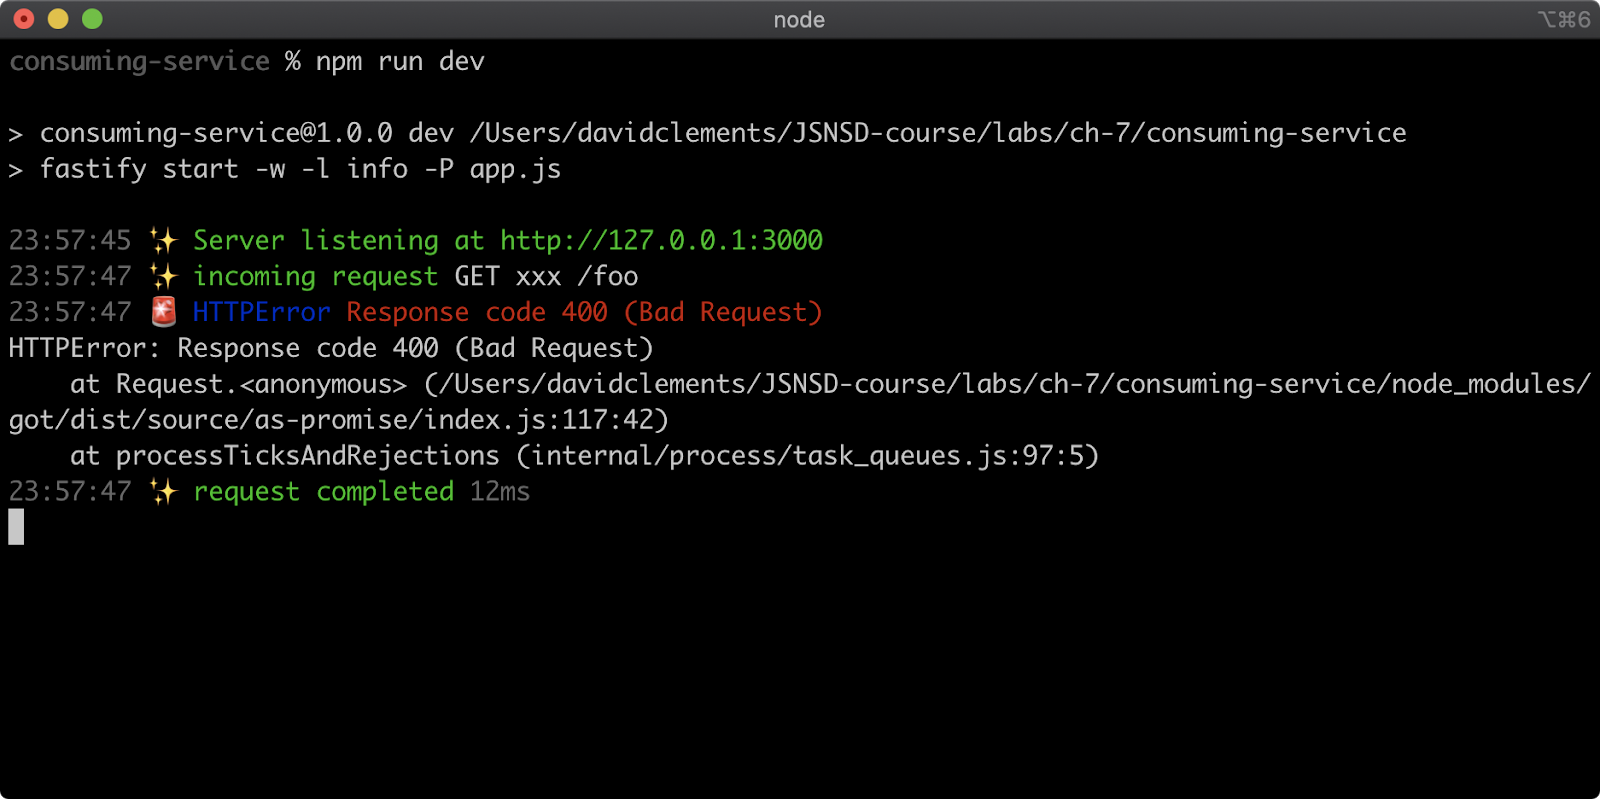
Managing Status Codes (3)
If the ID is not an integer, the upstream services respond with a 400 status code (Bad Request). Let's handle these the same way we handle the 404s. We can modify routes/root.js to the following:
'use strict'

const got = require('got')

const {
  BICYCLE_SERVICE_PORT = 4000, BRAND_SERVICE_PORT = 5000
} = process.env

const bicycleSrv = `http://localhost:${BICYCLE_SERVICE_PORT}`
const brandSrv = `http://localhost:${BRAND_SERVICE_PORT}`

module.exports = async function (fastify, opts) {
  const { httpErrors } = fastify
  fastify.get('/:id', async function (request, reply) {
    const { id } = request.params
    try {
      const [ bicycle, brand ] = await Promise.all([
        got(`${bicycleSrv}/${id}`).json(),
        got(`${brandSrv}/${id}`).json()
      ])
      return {
        id: bicycle.id,
        color: bicycle.color,
        brand: brand.name,
      }
    } catch (err) {
      if (!err.response) throw err
      if (err.response.statusCode === 404) {
        throw httpErrors.notFound()
      }
      if (err.response.statusCode === 400) {
        throw httpErrors.badRequest()
      }
      throw err
    }
  })
}
We've added another check in the catch block, the upstream services response code is 400 we throw http.badRequest.
Now both 400 and 404 status codes are forwarded to the response. All status codes in the 3xx, 4XX and 5XX ranges from the upstream services result in 500 status codes from our consumer service.
Implementing the handling of status codes in the 3XX range, which are more to do with redirection, is left as an exercise to the reader.
One final thing: what should we do if one of both of the services are down? In our case we should probably just respond with a 500 error. Let's kill one of the services that we started in the Mock Services section of this chapter. It doesn't matter which service we kill. An easy way to do this is to enter the terminal that the service is running in and press Ctrl and C. Now let's run the following command to make a GET request that we know usually works:
node -e "http.get('http://localhost:3000/1', (res) => console.log(res.statusCode))"
This will lead to a slight delay followed by outputting: 500. Looking at the server logs we should see something like the following:
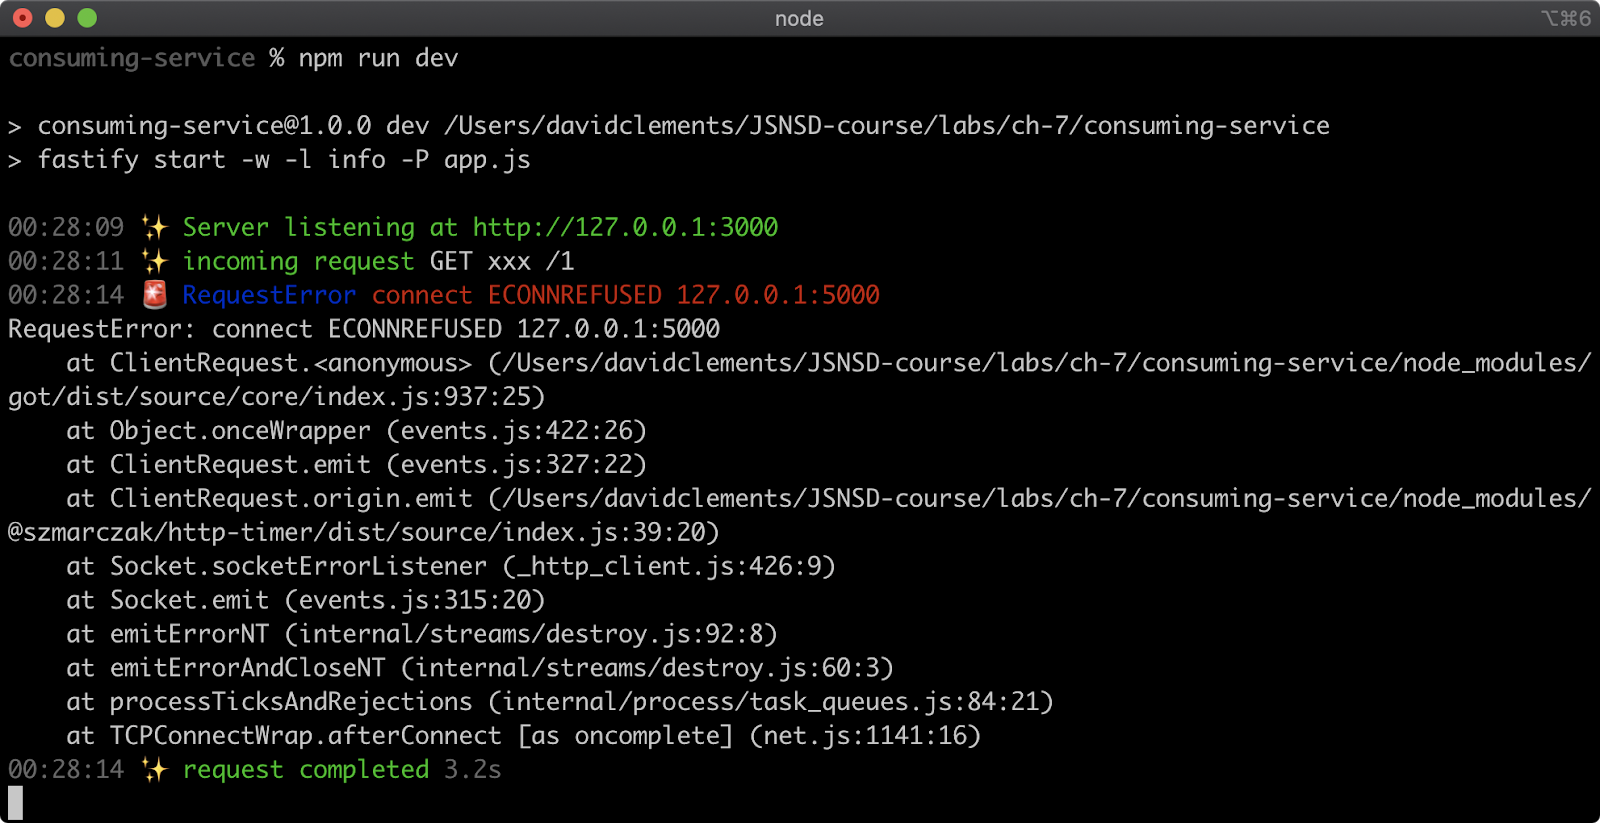
We can see that the error that occurred was to do with a connection being refused, that's because the service is down.
We've now covered the basics of handling various scenarios in service-to-service communication.
The idea of this section was to engender a mentality that imagines the scenarios that can occur with upstream services and considers reasonable ways to handle those cases.
Lab Exercises
Lab 7.1 - Implement a Data Aggregating Service
The labs-1 folder contains the following files:
package.jsonboat-service.jsbrand-service.jsvalidate.js
The package.json file has the following content:
{
  "name": "labs-1",
  "version": "1.0.0",
  "scripts": {
    "test": "echo \"Error: no test specified\" && exit 1",
    "start": "echo \"Error: start script not specified\" && exit 1"
  },
  "keywords": [],
  "license": "UNLICENSED"
}
Create a service that is started when the npm start command is executed that consumes two other HTTP services.
The service must bind to a port number defined by the PORT environment variable.
The services are provided with mock data in this project folder as boat-service.js and brand-service.js.
When started, each mock service outputs a port. This output can be used to set the BOAT_SERVICE_PORT and BRAND_SERVICE_PORT environment variables when starting the aggregating service.
For instance if the port of the Boat service is 3333 and the port of the Brand service is 3334 the server can be started like so:
PORT=3000 BOAT_SERVICE_PORT=3333 BRAND_SERVICE_PORT=3334 npm start
Be sure to use the BOAT_SERVICE_PORT and BRAND_SERVICE_PORT environment variables in the service to get the relevant port for each service. For example, the values of these environment variables could be loaded into the service implementation like so:
const {
  BOAT_SERVICE_PORT,
  BRAND_SERVICE_PORT
} = process.env
To make a request to the Brand service: http://localhost:[BRAND_SERVICE_PORT]/[id]
The Boat service responds with JSON data in the following format:
{
  "id": Number,
  "brand": Number,
  "color": String
}
A request to the Boat service: http://localhost:[BOAT_SERVICE_PORT]/[id]
The id and brand properties will only ever be Integers.
The Brand service responds with JSON data in the following format:
{
  "id": Number,
  "name": String
}
The brand property of the Boat service output corresponds to the id of the Brand service entities.
Create a service which accepts GET requests at http://localhost:[PORT]/[id]. Use the incoming id from the GET request to make a request to the Boat service and use data from the Boat service to make a request to the Brand service to retrieve associated brand data.
Combine the information from the two responses into a JSON payload and send that as a response. The JSON payload should have the following form:
{
  "id": Number,
  "color": String,
  "brand": String
}
The aggregating service should handle various scenarios in the following ways:
- For a normal successful request, respond with a 200 status code and the JSON payload of combined data
({id, color, brand})as the response body. TheContent-Typeheader must beapplication/json. - Respond with a 404 status code if either service responds with a 404 status.
- If either service is not available, respond with a 500 status code with any response body.
- If either service responds with a non-200 status code then respond with a 500 status code with any response body.
- If a request is made to the aggregating service with an ID that is not a valid integer, respond with a 400 status code, the response body is unimportant and can be anything.
- If either service responds with a 4XX status code that is not a 400 or 404 (401-403, 405-499) status code, then respond with a 500 status code with any response body.
- Be sure that if an upstream service is not available, that the service responds within 1250ms.
The validator code for this exercise starts the services automatically. Make sure that the services are not running and then run the following command in the labs-1 folder to check the implementation:
node validate.js
If the aggregating service is successfully implemented this should result in the following output:
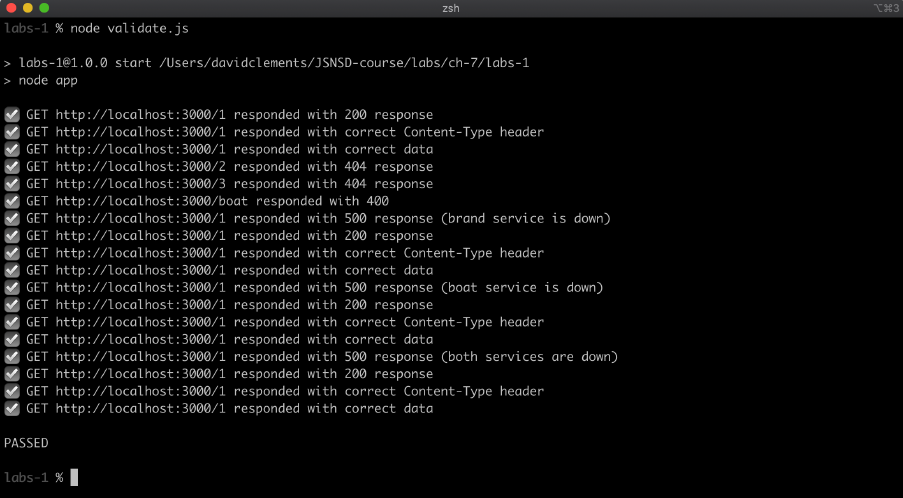
8 - Proxying HTTP Requests
Introduction
Chapter Overview
An HTTP Proxy is a server that forwards HTTP requests to backend services and then forwards responses to clients. As the system scales, at a certain point, the need for proxying tends to become inevitable. Generally speaking, proxying should be done with a specialized configurable piece of infrastructure, such as NGINX, Kong or proprietary cloud gateway services. However, sometimes there are complex requirements for a proxy that may be better met with a Node.js proxying service. Other times the requirements may be so simple (like proxying a single route) that it just makes sense to use what's already available instead of investing in something else. In other cases, a Node.js proxying service can be a stop-gap on the way to a more comprehensive infrastructural proxying solution. In this chapter, we'll explore proxying HTTP requests with Fastify, however the concepts translate to any web framework.
Learning Objectives
By the end of this chapter, you should be able to:
- Proxy HTTP requests for a single route.
- Modify data during proxying.
- Create a full proxying server.
Proxying HTTP Requests
Single-Route, Multi-Origin Proxy (1)
There may be some circumstances where we need to send data from another service via our service. In these cases, we could actually use an HTTP request library like got as explored in the prior chapter. However, using a proxying library is a viable alternative that provides a more configuration-based approach vs the procedural approach of using a request library.
Let's start by defining a route that will take a querystring parameter called url and then respond from whatever URL is specified in that parameter.
Let's initialize a new Fastify project:
node -e "fs.mkdirSync('my-route-proxy')"
cd my-route-proxy
npm init fastify
Now let's install the fastify-reply-from:
npm install fastify-reply-from
Then create a plugins/reply-from.js file with the following contents:
'use strict'

const fp = require('fastify-plugin')

module.exports = fp(async function (fastify, opts) {
  fastify.register(require('fastify-reply-from'), {
    errorHandler: false
  })
})
This code is very similar to plugins/sensible.js. The fastify-plugin library is used to apply the exported plugin application-wide.
Now, we'll modify the routes/root.js file to the following:
'use strict'

module.exports = async function (fastify, opts) {
  fastify.get('/', async function (request, reply) {
    const { url } = request.query
    try {
      new URL(url)
    } catch (err) {
      throw fastify.httpErrors.badRequest()
    }
    return reply.from(url)
  })
}
We take the url parameter from the query string by destructuring the url property from the request.query object provided by Fastify. Then we pass the url value into the global URL constructor in order to validate it.
The URL constructor can be used in a similar fashion to Node core's url.parse method. The main difference is that the protocol (e.g. http://) and origin (the domain) portions of a URL must be present. If the URL constructor throws, then the value of url is an invalid URL. In that case we rethrow fastify.httpErrors.badRequest (as provided by fastify-sensible) to create a 400 status code response. Otherwise we return the result of reply.from(url).
The reply.from method is supplied by the fastify-reply-from plugin and returns a promise that resolves once the response from the upstream URL has been sent as a response to the client. We return it so that the route handler knows when the request has finished being handled by reply.from.
Let's test out our implementation by starting a simple HTTP server that we can specify as the url parameter.
Now let's start our Fastify server with npm run dev, this will start a server that listens on port 3000.
In another terminal window run the following command:
node -e "http.createServer((_, res) => (res.setHeader('Content-Type', 'text/plain'), res.end('hello world'))).listen(5000)"
This will start an HTTP server on port 5000 that responds with "hello world" to all requests.
Single-Route, Multi-Origin Proxy (2)
Now if we navigate to http://localhost:3000/?url=http://localhost:5000 in a browser we should see hello world displayed. Most sites will trigger a redirect if they detect that a proxy server is being used (and the url query string parameter tends to give it away). For instance, if we navigate to http://localhost:3000/?url=http://google.com the browser will receive a 301 Moved response which will cause the browser to redirect to http://google.com directly. Therefore this approach is better suited when using URLs that are only accessible internally and this exposed route is a proxy to accessing them.
The fastify-reply-from plugin can also be configured so that it can only proxy to a specific upstream server using the base option. In this case reply.from would be passed a path instead of a full URL and then make a request to the base URL concatenated with the path passed to reply.from. This can be useful for mapping different endpoints to a specific upstream service.
More advanced proxying scenarios involve rewriting some aspect of the response from the upstream service while it's replying to the client. To finish off this section let's make our proxy server uppercase all content that arrives from the upstream service before sending it on to the client.
Let's update the routes/root.js file to the following:
'use strict'
const { Readable } = require('stream')
async function * upper (res) {
  for await (const chunk of res) {
    yield chunk.toString().toUpperCase()
  }
}
module.exports = async function (fastify, opts) {
  fastify.get('/', async function (request, reply) {
    const { url } = request.query
    try {
      new URL(url)
    } catch (err) {
      throw fastify.httpErrors.badRequest()
    }
    return reply.from(url, {
      onResponse (request, reply, res) {
        reply.send(Readable.from(upper(res)))
      }
    })
  })
}
The second argument passed to reply.from is the options object. It contains an onResponse function. If the onResponse function is provided in the options object, the fastify-reply-from plugin will call it and will not end the response, it becomes up to us to manually end the response (with reply.send) in this case. The onResponse function is passed the request and reply objects for the route handler and a third argument: res, which represents the response from the upstream service. This is the same core http.IncomingMessage object that's passed to the callback of an http.request call.
The other pieces of the implementation are Node core and JavaScript language related. We pass the res object to an upper function that we created at the top of the file. The upper function is an async generator function - notice the asterisk (*) in the function signature. See Mozilla Documentation for more information on async function generators.
The res object is an async iterable, which means it can be used with for await of syntax. This allows us to grab each chunk from the upstream services response, convert it to a string and then uppercase it. We yield the result from the upper function. The upper function in turn returns an async iterable object which can be passed to the Node core streams.Readable.from method which will convert the async iterable into a stream. The result is passed into reply.send which will take the data from the stream and send it to the response.
We could have instead buffered all content into memory, uppercased it, and then sent the entire contents to reply.send instead but this would not be ideal in a proxying situation: we don't necessarily know how much content we may be fetching. Instead our approach incrementally processes each chunk of data from the upstream service, sending it immediately to the client.
Let's ensure our command that starts the tiny "hello world" server is running from earlier, if it isn't we can run the following command to start it:
node -e "http.createServer((_, res) => (res.setHeader('Content-Type', 'text/plain'), res.end('hello world'))).listen(5000)"
Now, if we navigate to http://localhost:3000/?url=http://localhost:5000 in a browser the output should be HELLO WORLD.
Single-Origin, Multi-Route Proxy (1)
In the previous section we supplied the desired endpoint using a url query string parameter. If we had set the base option, we could instead support a path querystring parameter that can be used to request a specific path from the upstream service as specified by the base option.
However, instead of using a querystring parameter we can map every path (and indeed every HTTP method) made to our proxy service straight to the upstream service.
Let's initialize a new Fastify project and install fastify-http-proxy:
node -e "fs.mkdirSync('my-proxy')"
cd my-proxy
npm init fastify
npm install fastify-http-proxy
Now let's make the app.js look as follows:
'use strict'
const proxy = require('fastify-http-proxy')
module.exports = async function (fastify, opts) {
fastify.register(proxy, {
upstream: 'https://news.ycombinator.com/'
})
}
That's all we need to do. Let's start the server with npm run dev and navigate to http://localhost:3000 in the browser. We should see something similar to the following:

If we click any of the links along the top, for instance the new link, this will navigate to http://localhost:3000/newest which will then display the current Hacker News page of the newest articles.
The fastify-http-proxy library uses the fastify-reply-from plugin under the hood with a handler that takes all the requests, figures out the path and then passes them to reply.from.
Generally speaking the upstream option would be set to some internal service that is not accessible publicly and typically it's more likely that it would be a data service of some kind (for instance, providing JSON responses).
Single-Origin, Multi-Route Proxy (2)
As mentioned in the introduction to this chapter, typically proxying should be done by out-of-the-box gateway infrastructure software.
However for unique scenarios this simple example could be extended in ways that may be impossible or at least impractical with such ready-made solutions.
For instance, imagine a nascent authentication approach which isn't yet supported in larger projects. We can use the preHandler option supported by fastify-http-proxy to implement custom authentication logic.
Let's install fastify-sensible:
npm install fastify-sensible
Now let's update the app.js file to look as follows:
'use strict'

const proxy = require('fastify-http-proxy')
const sensible = require('fastify-sensible')
module.exports = async function (fastify, opts) {
  fastify.register(sensible)
  fastify.register(proxy, {
    upstream: 'https://news.ycombinator.com/',
    async preHandler(request, reply) {
      if (request.query.token !== 'abc') {
        throw fastify.httpErrors.unauthorized()
      }
    }
  })

}
Now if we make sure our server is running (npm run dev) and navigate to http://localhost:3000/ we should see {"statusCode":401,"error":"Unauthorized","message":"Unauthorized"}.
If we navigate to http://localhost:3000/?token=abc, we'll have access to the upstream site again.
The preHandler function we supplied to the options object can be an async function (and thus return a promise). If that promise rejects then the response is intercepted. In our case we throw the fastify.httpErrors.unauthorized error as supplied by fastify-sensible to create a 401 Unauthorized HTTP response.
Lab Exercises
Lab 8.1 - Implement an HTTP Route-Based Proxy
The labs-1 folder contains the following files:
package.jsonvalidate.js
The package.json file has the following content:
{
  "name": "labs-1",
  "version": "1.0.0",
  "scripts": {
    "test": "echo \"Error: no test specified\" && exit 1",
    "start": "echo \"Error: start script not specified\" && exit 1"
  },
  "keywords": [],
  "license": "UNLICENSED"
}
Create an HTTP service that initializes when npm start is executed and listens on whatever the PORT environment variable is set to.
The service must be a transparent reverse HTTP proxy server such that a request to http://localhost:{PORT}/?url={URL} will respond with:
- the status code of
{URL} - the headers provided at
{URL} - the contents of the body at
{URL}
The {URL} will only ever hold HTTP URLs, there's no need to proxy HTTPS URLs.
The service must meet the following conditions:
- A request to any route other than
/should respond with an HTTPNot Foundresponse. - A request to
/without a url query-string parameter should result in aBad RequestHTTP response. - The proxy only needs to support HTTP GET requests.
Run the following command to check whether the implementation was successful:
node validate.js
When successfully implemented the output should be similar to the following:
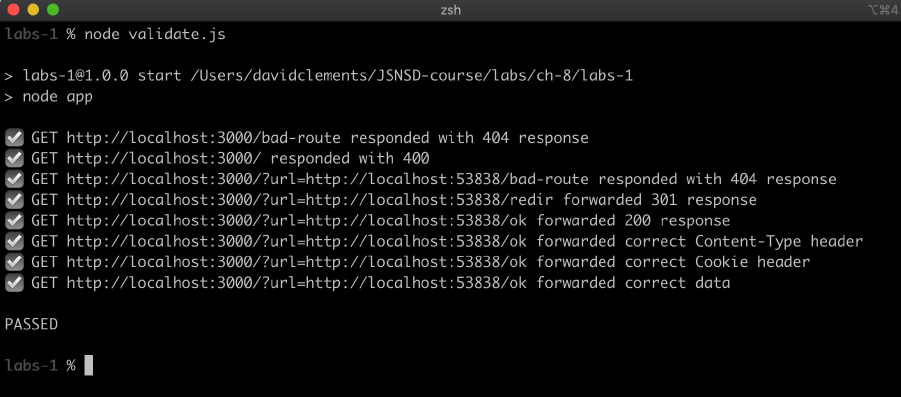
Lab 8.2 - Implement a Full Proxying Service
The labs-2 folder is completely empty. Create a service that listens on port 3000. The service must proxy all requests/responses to https://jsonplaceholder.typicode.com.
Use the following command to check whether the implementation was successful:
node -e "http.get('http://localhost:3000/todos/1', (res) => res.pipe(process.stdout))"
This should output something similar to the following:
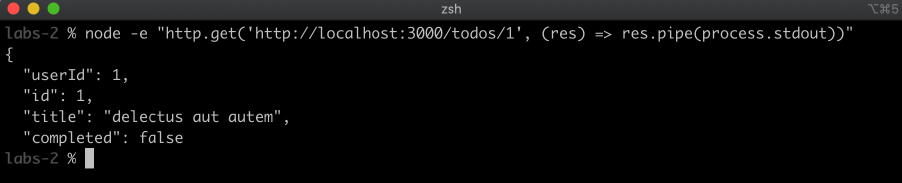
9 - Web Security: Handling User Input
Introduction
Chapter Overview
One of the most important things to consider when building public-facing services is that any user can theoretically be a malicious user. Even if it's just one user out of millions, the implications of a malicious user who is able to exploit insecure code can be significant. Therefore it is of paramount importance to always ensure that any external inputs to a service are sanitized in ways that prevent potential attackers from gaining any control of backend systems or from borrowing the authority of a site to exploit other users. The JSNSD exam tests for basic security knowledge. While there is an entire course-worth of scenarios from SQL-injection to CSRF and XSS attacks to timing and side-channel attacks that could be explored, this chapter will deal primarily with input validation on service routes and on lesser-known gotchas of receiving user input.
Learning Objectives
By the end of this chapter, you should be able to:
- Understand parameter pollution and how to avoid it.
- Learn about route validation in Express.
- Learn about route validation in Fastify.
Web Security: Handling User Input
Avoiding Parameter Pollution Attacks (1)
The parameter pollution exploits a bug that's often created by developers when handling query string parameters. Even when we know about the potential for the bug, it can still be easy to forget. The main aim of such an attack is to cause a service to either crash or slow down by generating an exception in the service. In cases where a crash occurs, it will be because of an unhandled exception. In cases where a slow down occurs it can be caused by generating an exception that's generically handled and the error handling overhead (for instance, stack generation for a new error object on every request) and then sending many requests to the server. Both of these are forms of Denial of Service attacks, we cover mitigating such attacks (in a limited fashion) in the next chapter.
Preventing the attack from occurring in the first place requires an awareness of how query-string parsing works.
A query-string is the first occurrence of the part of a URL starting with a question mark. For instance, given a URL: http://example.com/?name=bob the query string is ?name=bob. All mainstream Node.js frameworks (and the node core querystring module) parse ?name=bob into an object with a property of name and a value of 'bob', like so: {name: 'bob'}. However query-strings allow for an array-like concept. The following is a legitimate query string: ?name=bob&name=dave. In all popular Node frameworks (and Node core querystring) the parsed query-string will result in an object with a name key with a value of ['bob', 'dave'], like so: {name: ['bob', 'dave']}.
We can demonstrate this by running the following commands:
node -p "querystring.parse('name=bob')"
This will output: [Object: null prototype] { name: 'bob' }.
Whereas the following command:
node -p "querystring.parse('name=bob&name=dave')"
Will result in [Object: null prototype] { name: [ 'bob', 'dave' ] } as an output.
Express also supports a square-bracket denotation syntax in query-strings, so ?name[]=bob will result in an object: {name: ['bob']}. Neither Fastify nor the Node core native querystring module support this syntax.
Either way, if we don't consider that a query-string value can be parsed to either a string or an array, it can be all too easy to use String.prototype methods on a parsed query object which will result in an error when that value is an array.
Consider an Express route that looks as follows:
router.get('/', (req, res, next) => {
  someAsynchronousOperation(() => {
    if (!req.query.name) {
      var err = new Error('Bad Request')
      err.status = 400
      next(err)
      return
    }
    var parts = req.query.name.split(' ');
    var last = parts.pop();
    var first = parts.shift();
    res.send({first: first, last: last});
  })
});
The someAsynchronousOperation function doesn't exist, it's conceptually representing an asynchronous operation. It could be a database lookup, or a setTimeout or any kind of asynchronous work.
Avoiding Parameter Pollution Attacks (2)
Given a query-string ?name=David Mark Clements the response would be {"first": "David", "last": "Clements"}. However the following query-string will cause the entire service to crash: ?name=David Mark Clements&name=kaboom. This is because req.query will be an object with a name property containing an array, like so: {name: ['David Mark Clements', 'kaboom']}. So in this case, req.query.name.split will not exist, arrays do not have a split function. This will cause an Uncaught TypeError which will not be handled. Express has no way of catching unhandled exceptions that occur in asynchronous operations. This is why async/await syntax with Fastify is recommended, because even when errors occur in a Fastify route handler it will propagate as a promise rejection into Fastify core and result in a 500 Server Error instead of crashing the service.
The only way to avoid a parameter pollution attack is to ensure that any code written for query-string parameters can run without error against both strings and arrays. This can be as simple as a typeof check for string or conversely using Array.isArray method to determine if the value is an array and then handling the value accordingly. There's no right answer as to how to handle string value versus array values from parses query-strings, it all depends on context. However one solution to the above buggy-code is the following:
function convert (name) {
  var parts = name.split(' ');
  var last = parts.pop();
  var first = parts.shift();
  return {first: first, last: last};
}
router.get('/', (req, res, next) => {
  someAsynchronousOperation(() => {
    if (!req.query.name) {
      var err = new Error('Bad Request')
      err.status = 400
      next(err)
      return
    }
    if (Array.isArray(req.query.name)) {
      res.send(req.query.name.map(convert));
    } else {
      res.send(convert(req.query.name));
    }
  });
});
This solution responds to the cases where query-string values are arrays by responding with an array where each value is converted. However, again, the way to solve this issue is entirely context dependent.
For a working demonstration of this problem see the labs-1 exercise in this chapter.
In the next section we're going to look at the more generic problem of validating user input.
Route Validation with Fastify (1)
In Chapter 6: “Manipulating Data with RESTful Services” we implemented a RESTful CRUD service in both Fastify and Express. In this section, we'll apply route validation to that CRUD service and in the next section we'll apply route validation to the equivalent Express service.
In the Fastify service in Chapter 6 we created a folder named my-service. It was a typical Fastify service, as generated by npm init fastify.
The folder contained a model.js file which exported create, read, update, del and uid methods which we integrated our routes with in the routes/bicycle/index.js file, which looks as follows:
'use strict'
const { promisify } = require('util')
const { bicycle } = require('../../model')
const { uid } = bicycle
const read = promisify(bicycle.read)
const create = promisify(bicycle.create)
const update = promisify(bicycle.update)
const del = promisify(bicycle.del)

module.exports = async (fastify, opts) => {
  const { notFound } = fastify.httpErrors

  fastify.post('/', async (request, reply) => {
    const { data } = request.body
    const id = uid()
    await create(id, data)
    reply.code(201)
    return { id }
  })

  fastify.post('/:id/update', async (request, reply) => {
    const { id } = request.params
    const { data } = request.body
    try {
      await update(id, data)
      reply.code(204)
    } catch (err) {
      if (err.message === 'not found') throw notFound()
      throw err
    }
  })

  fastify.get('/:id', async (request, reply) => {
    const { id } = request.params
    try {
      return await read(id)
    } catch (err) {
      if (err.message === 'not found') throw notFound()
      throw err
    }
  })

  fastify.put('/:id', async (request, reply) => {
    const { id } = request.params
    const { data } = request.body
    try {
      await create(id, data)
      reply.code(201)
      return { }
    } catch (err) {
      if (err.message === 'resource exists') {
        await update(id, data)
        reply.code(204)
      } else {
        throw err
      }
    }
  })

  fastify.delete('/:id', async (request, reply) => {
    const { id } = request.params
    try {
      await del(id)
      reply.code(204)
    } catch (err) {
      if (err.message === 'not found') throw notFound()
      throw err
    }
  })

}
The recommended approach to route validation in Fastify is using the schema option which can be passed when declaring routes. Fastify supports the JSONSchema format for declaring the rules for incoming (and also outgoing) data. Not only is support of this common format useful as a standardized validation convention, it's also used by Fastify to compile route specific serializers which speed up parsing time, improving a services request-per-seconds performance. Often the goals of performance and security compete, in that performance can suffer due to security and vice versa. However, using JSONSchema with Fastify yields gains for both.
Route Validation with Fastify (2)
Let's take a look at the first POST route:
fastify.post('/', async (request, reply) => {
  const { data } = request.body
  const id = uid()
  await create(id, data)
  reply.code(201)
  return { id }
})
In the route handler we can observe that a data property is expected on request.body. In Chapter 6 we made requests to the service where the payload took the shape: { data: { brand, color } }. Let's make a schema for the POST body that enforces that shape by modifying the POST route to the following:
fastify.post('/', {
  schema: {
    body: {
      type: 'object',
      required: ['data'],
      additionalProperties: false,
      properties: {
        data: {
          type: 'object',
          required: ['brand', 'color'],
          additionalProperties: false,
          properties: {
            brand: {type: 'string'},
            color: {type: 'string'}
          }
        }
      }
    }
  }
}, async (request, reply) => {
  const { data } = request.body
  const id = uid()
  await create(id, data)
  reply.code(201)
  return { id }
})
We can see this has added some noise to the route declaration. As schemas grow or become relevant in multiple places they can be placed in separate variables or exported from separate files.
Up until now we've only seen route methods (as in, fastify.post) take two arguments: the route to serve as a string and the route handler function. A third options argument can be passed in between the route string and the route handler function. See https://www.fastify.io/docs/latest/Reference/Routes/#options for a full list of options.
We use the schema option so that we can declare a schema for our route. The schema option supports body, query, params, headers and response as schemas that can be declared for these areas of input (or output in the case of response). For our route, we declared the body schema.
We declare the schema.body.type as 'object' which will usually be the case, even if the service accepts alternative mime-types like multipart. This is because the schema is applied (conceptually) to the body after it has been parsed into a JavaScript object. We want to ensure that the data property exists on the incoming payload, so the schema.body.required array contains 'data'. Just specifying a required key is not enough, the property still needs to be described. We do so in the schema.body.properties object which we'll discuss in a moment.
By default the JSONSchema standard takes a lenient approach and allows additional properties beyond properties that are declared. We only want a data property on the POST body, so we opt-out of this default by setting the additionalProperties schema configuration option to false. Fastify is set up to strip additional properties. It will still allow the request, but remove extra properties if additionalProperties is false. This can be altered, along with other behaviors, see https://www.fastify.io/docs/latest/Reference/Validation-and-Serialization/#validator-compiler for information on configuring all possible validation behaviors.
The schema.body.properties has a data key, this declares that a data key is expected in the request body. The schema.body.properties.data key holds an object with a type key set to 'object', specifying that the POST body's data key should hold an object. We also want the color and brand keys in the POST data to be required, so we specify those in the schema.body.properties.data.required array. We also want to strip any extra properties, so we set schema.body.properties.data.additionalProperties to false. Finally, we declare the expected properties of the data object, schema.body.properties.data, properties.color and schema.body.properties.data, properties.brand. Both of these properties should be strings, so we set the type key of each to 'string'. There's more we could do, like limiting the length of the strings or only allowing strings that match particular values but this is fine for our purposes.
Route Validation with Fastify (3)
Our routes/bicycle/index.js file should now look as follows:
'use strict'
const { promisify } = require('util')
const { bicycle } = require('../../model')
const { uid } = bicycle
const read = promisify(bicycle.read)
const create = promisify(bicycle.create)
const update = promisify(bicycle.update)
const del = promisify(bicycle.del)

module.exports = async (fastify, opts) => {
  const { notFound } = fastify.httpErrors

  fastify.post('/', {
    schema: {
      body: {
        type: 'object',
        required: ['data'],
        additionalProperties: false,
        properties: {
          data: {
            type: 'object',
            required: ['brand', 'color'],
            additionalProperties: false,
            properties: {
              brand: {type: 'string'},
              color: {type: 'string'}
            }
          }
        }
      }
    }
  }, async (request, reply) => {
    const { data } = request.body
    const id = uid()
    await create(id, data)
    reply.code(201)
    return { id }
  })

  fastify.post('/:id/update', async (request, reply) => {
    const { id } = request.params
    const { data } = request.body
    try {
      await update(id, data)
      reply.code(204)
    } catch (err) {
      if (err.message === 'not found') throw notFound()
      throw err
    }
  })

  fastify.get('/:id', async (request, reply) => {
    const { id } = request.params
    try {
      return await read(id)
    } catch (err) {
      if (err.message === 'not found') throw notFound()
      throw err
    }
  })

  fastify.put('/:id', async (request, reply) => {
    const { id } = request.params
    const { data } = request.body
    try {
      await create(id, data)
      reply.code(201)
      return { }
    } catch (err) {
      if (err.message === 'resource exists') {
        await update(id, data)
        reply.code(204)
      } else {
        throw err
      }
    }
  })

  fastify.delete('/:id', async (request, reply) => {
    const { id } = request.params
    try {
      await del(id)
      reply.code(204)
    } catch (err) {
      if (err.message === 'not found') throw notFound()
      throw err
    }
  })

}
Route Validation with Fastify (4)
If we were to start this server (npm run dev) and then run the following command in another terminal:
node -e "http.request('http://localhost:3000/bicycle', { method: 'post', headers: {'content-type': 'application/json'}}, (res) => res.setEncoding('utf8').once('data', console.log.bind(null, res.statusCode))).end(JSON.stringify({data: {brand: 'Gazelle', color: 'red'}}))"
We would have made a successful request. The output of the command would be 201 {"id": "3"}. The payload for this request was {"data":{"brand":"Gazelle","color":"red"}}. If we change the payload to {"data":{"brand":"Gazelle","colors":"red"}} we should get a 400 Bad Request response. The following command tries to make a POST request with this invalid payload:
node -e "http.request('http://localhost:3000/bicycle', { method: 'post', headers: {'content-type': 'application/json'}}, (res) => res.setEncoding('utf8').once('data', console.log.bind(null, res.statusCode))).end(JSON.stringify({data: {brand: 'Gazelle', colors: 'red'}}))"
This will result in the following output: 400 {"statusCode":400,"error":"Bad Request","message":"body.data should have required property 'color'"}. Fastify has generated a message letting us know why the data is not valid.
If we include extra properties in the payload, they will be stripped. We can try sending the payload {"data":{"brand":"Gazelle","color":"red", "extra": "will be stripped"}} with the following command:
node -e "http.request('http://localhost:3000/bicycle', { method: 'post', headers: {'content-type': 'application/json'}}, (res) => res.setEncoding('utf8').once('data', console.log.bind(null, res.statusCode))).end(JSON.stringify({data: {brand: 'Gazelle', color: 'red', extra: 'will be stripped'}}))"
Running this command will result in 201 {"id":"4"} as output, the record was successfully created. However if we make a GET request to http://localhost:3000/bicycle/4 we will see that the extra key in the payload was not stored. The following command can make the GET request:
node -e "http.get('http://localhost:3000/bicycle/4', (res) => res.setEncoding('utf8').once('data', console.log))"
This will output {"brand":"Gazelle","color":"red"}, the extra key has not been stored because by the time we access request.body in the route handler the request.body.data.extra key doesn't even exist.
The body schema that we declared for the first POST route also applies to the second POST route, and to the PUT route in routes/bicycle/index.js so we can reuse the schema we've written. Fastify supports shared schemas that can be used with the JSONSchema $ref key, see https://www.fastify.io/docs/latest/Reference/Validation-and-Serialization/#adding-a-shared-schema.
Route Validation with Fastify (5)
However we can also just place the schema object into a variable and then reference for the routes where it applies. We can do this by modifying the routes/bicycle/index.js file to the following:
'use strict'
const { promisify } = require('util')
const { bicycle } = require('../../model')
const { uid } = bicycle
const read = promisify(bicycle.read)
const create = promisify(bicycle.create)
const update = promisify(bicycle.update)
const del = promisify(bicycle.del)

module.exports = async (fastify, opts) => {
  const { notFound } = fastify.httpErrors

  const bodySchema = {
    type: 'object',
    required: ['data'],
    additionalProperties: false,
    properties: {
      data: {
        type: 'object',
        required: ['brand', 'color'],
        additionalProperties: false,
        properties: {
          brand: {type: 'string'},
          color: {type: 'string'}
        }
      }
    }
  }

  fastify.post('/', {
    schema: {
      body: bodySchema
    }
  }, async (request, reply) => {
    const { data } = request.body
    const id = uid()
    await create(id, data)
    reply.code(201)
    return { id }
  })

  fastify.post('/:id/update', {
    schema: {
      body: bodySchema
    }
  }, async (request, reply) => {
    const { id } = request.params
    const { data } = request.body
    try {
      await update(id, data)
      reply.code(204)
    } catch (err) {
      if (err.message === 'not found') throw notFound()
      throw err
    }
  })

  fastify.get('/:id', async (request, reply) => {
    const { id } = request.params
    try {
      return await read(id)
    } catch (err) {
      if (err.message === 'not found') throw notFound()
      throw err
    }
  })

  fastify.put('/:id', {
    schema: {
      body: bodySchema
    }
  }, async (request, reply) => {
    const { id } = request.params
    const { data } = request.body
    try {
      await create(id, data)
      reply.code(201)
      return { }
    } catch (err) {
      if (err.message === 'resource exists') {
        await update(id, data)
        reply.code(204)
      } else {
        throw err
      }
    }
  })

  fastify.delete('/:id', async (request, reply) => {
    const { id } = request.params
    try {
      await del(id)
      reply.code(204)
    } catch (err) {
      if (err.message === 'not found') throw notFound()
      throw err
    }
  })
}
Route Validation with Fastify (6)
These routes also have another input that we haven't considered yet: the id route parameter. We can apply validation to route parameters with the schema.params option. The methods in models.js expect the ID to be an integer. Since the id parameter is specified for the second POST route, and the DELETE, GET and PUT routes, let's create a parameter schema underneath the bodySchema we just created. It should look as follows:
const paramsSchema = {
  id: {
    type: 'integer'
  }
}
Now we can use this in every route that has an :id placeholder in the route. Our routes/bicycle/index.js file would then look as follows:
'use strict'
const { promisify } = require('util')
const { bicycle } = require('../../model')
const { uid } = bicycle
const read = promisify(bicycle.read)
const create = promisify(bicycle.create)
const update = promisify(bicycle.update)
const del = promisify(bicycle.del)

module.exports = async (fastify, opts) => {
  const { notFound } = fastify.httpErrors

  const bodySchema = {
    type: 'object',
    required: ['data'],
    additionalProperties: false,
    properties: {
      data: {
        type: 'object',
        required: ['brand', 'color'],
        additionalProperties: false,
        properties: {
          brand: {type: 'string'},
          color: {type: 'string'}
        }
      }
    }
  }

  const paramsSchema = {
    id: {
      type: 'integer'
    }
  }

  fastify.post('/', {
    schema: {
      body: bodySchema
    }
  }, async (request, reply) => {
    const { data } = request.body
    const id = uid()
    await create(id, data)
    reply.code(201)
    return { id }
  })

  fastify.post('/:id/update', {
    schema: {
      body: bodySchema,
      params: paramsSchema
    }
  }, async (request, reply) => {
    const { id } = request.params
    const { data } = request.body
    try {
      await update(id, data)
      reply.code(204)
    } catch (err) {
      if (err.message === 'not found') throw notFound()
      throw err
    }
  })

  fastify.get('/:id', {
    schema: {
      params: paramsSchema
    }
  }, async (request, reply) => {
    const { id } = request.params
    try {
      return await read(id)
    } catch (err) {
      if (err.message === 'not found') throw notFound()
      throw err
    }
  })

  fastify.put('/:id', {
    schema: {
      body: bodySchema,
      params: paramsSchema

    }
  }, async (request, reply) => {
    const { id } = request.params
    const { data } = request.body
    try {
      await create(id, data)
      reply.code(201)
      return { }
    } catch (err) {
      if (err.message === 'resource exists') {
        await update(id, data)
        reply.code(204)
      } else {
        throw err
      }
    }
  })

  fastify.delete('/:id', {
    schema: {
      params: paramsSchema
    }
  }, async (request, reply) => {
    const { id } = request.params
    try {
      await del(id)
      reply.code(204)
    } catch (err) {
      if (err.message === 'not found') throw notFound()
      throw err
    }
  })
}
Route Validation with Fastify (7)
Prior to this change, making a GET or DELETE request to http://localhost:3000/something or a POST request to http://localhost:3000/update/something would result in a 404 Not Found response, which is technically valid because such an entry would (hopefully) not exist. However, now a GET or DELETE to http://localhost:3000/something or a POST to http://localhost:3000/update/something will result in a 400 Bad Request because "something" is not an integer. More importantly, a PUT to http://localhost:3000/something will result in a 400 Bad Request instead of attempting to store data by a non-integer ID. Validating the route parameter guards against potential bugs, and saves extra work on the storage-mechanism side.
Finally there's one more thing we can validate: the response. At first this can seem like an odd thing to do. However, in many enterprise architectures databases can be shared, in that multiple services may read and write to the same data storage. This means when retrieving data from a remote source, we cannot entirely trust that data even if it is internal. What if another service hasn't validated input? We don't want to send malicious state to the user.
There's only two cases where we send any state back. One is the first POST route, where we send back a new ID. The other is the GET route where we send the result of a read back.
In the first POST route the returned ID has the same rules as the id route parameter: it should be an integer. We can reuse the schema just for the ID by breaking it out of the paramsSchema:
const idSchema = { type: 'integer' }
const paramsSchema = { id: idSchema }
Then the first fastify.post route can be modified as follows:
fastify.post('/', {
  schema: {
    body: bodySchema,
    response: {
      201: {
        id: idSchema
      }
    }
  }
}, async (request, reply) => {
  const { data } = request.body
  const id = uid()
  await create(id, data)
  reply.code(201)
  return { id }
})
Note that the schema.response option differs slightly to others, in that we also need to specify the response code. This is because routes can respond with different response codes that send different data. If we wanted to apply a schema to all response codes from 200 to 299 we could set a key called 2xx on the schema.response object. Since our route should only respond with a 201 (unless there's an error) we specified just use a key named 201.
The read method responds with objects that contain a color and brand key, that's all we can store to it in fact. So we can reuse the bodySchema.properties.data object to validate the GET response. Let's break up the bodySchema object like so:
const dataSchema = {
  type: 'object',
  required: ['brand', 'color'],
  additionalProperties: false,
  properties: {
    brand: {type: 'string'},
    color: {type: 'string'}
  }
}

const bodySchema = {
  type: 'object',
  required: ['data'],
  additionalProperties: false,
  properties: {
    data: dataSchema
  }
}
Now we can alter the fastify.get route to the following:
fastify.get('/:id', {
  schema: {
    params: paramsSchema,
    response: {
      200: dataSchema
    }
  }
}, async (request, reply) => {
  const { id } = request.params
  try {
    return await read(id)
  } catch (err) {
    if (err.message === 'not found') throw notFound()
    throw err
  }
})
In the successful case our GET route responds with the default 200 OK status code, so we set a key named 200 on response.schema to validate 200 responses, setting the schema for responses to the dataSchema.
Route Validation with Fastify (8)
Now we can be certain that any data fetched meets our validation rules before we send it to the user. The routes/bicycle/index.js file should now look as follows:
'use strict'
const { promisify } = require('util')
const { bicycle } = require('../../model')
const { uid } = bicycle
const read = promisify(bicycle.read)
const create = promisify(bicycle.create)
const update = promisify(bicycle.update)
const del = promisify(bicycle.del)

module.exports = async (fastify, opts) => {
  const { notFound } = fastify.httpErrors

  const dataSchema = {
    type: 'object',
    required: ['brand', 'color'],
    additionalProperties: false,
    properties: {
      brand: {type: 'string'},
      color: {type: 'string'}
    }
  }

  const bodySchema = {
    type: 'object',
    required: ['data'],
    additionalProperties: false,
    properties: {
      data: dataSchema
    }
  }

  const idSchema = { type: 'integer' }
  const paramsSchema = { id: idSchema }

  fastify.post('/', {
    schema: {
      body: bodySchema,
      response: {
        201: {
          id: idSchema
        }
      }
    }
  }, async (request, reply) => {
    const { data } = request.body
    const id = uid()
    await create(id, data)
    reply.code(201)
    return { id }
  })

  fastify.post('/:id/update', {
    schema: {
      body: bodySchema,
      params: paramsSchema
    }
  }, async (request, reply) => {
    const { id } = request.params
    const { data } = request.body
    try {
      await update(id, data)
      reply.code(204)
    } catch (err) {
      if (err.message === 'not found') throw notFound()
      throw err
    }
  })

  fastify.get('/:id', {
    schema: {
      params: paramsSchema,
      response: {
        200: dataSchema
      }
    }
  }, async (request, reply) => {
    const { id } = request.params
    try {
      return await read(id)
    } catch (err) {
      if (err.message === 'not found') throw notFound()
      throw err
    }
  })

  fastify.put('/:id', {
    schema: {
      body: bodySchema,
      params: paramsSchema
    }
  }, async (request, reply) => {
    const { id } = request.params
    const { data } = request.body
    try {
      await create(id, data)
      reply.code(201)
      return { }
    } catch (err) {
      if (err.message === 'resource exists') {
        await update(id, data)
        reply.code(204)
      } else {
        throw err
      }
    }
  })

  fastify.delete('/:id', {
    schema: {
      params: paramsSchema
    }
  }, async (request, reply) => {
    const { id } = request.params
    try {
      await del(id)
      reply.code(204)
    } catch (err) {
      if (err.message === 'not found') throw notFound()
      throw err
    }
  })
}
Route Validation with Fastify (9)
While invalidation of input-related schemas (such as schema.body) will result in a 400 Bad Request, the invalidation of a response schema will result in a 500 Server Error result. We can try this out by temporarily modifying the GET route to respond with invalid data:
fastify.get('/:id', {
  schema: {
    params: paramsSchema,
    response: {
      200: dataSchema
    }
  }
}, async (request, reply) => {
  const { id } = request.params
  try {
    return {ka: 'boom'}
  } catch (err) {
    if (err.message === 'not found') throw notFound()
    throw err
  }
})
If we change the response from await read(id) to {ka: 'boom'} the response schema will invalidate the response. Running the modified server (npm run dev) and accessing http://localhost:3000/bicycle/1 will result in a 500 Server Error response because the response object no longer meets the schema.response definition for 200 OK responses.
As a matter of preference, there is also a Fluent-API library that can generate the JSONSchema objects for us. For instance, the dataSchema could be declared with fluent-schema as
S.object().prop('brand', S.string().required()).prop('color', S.string().required()).additionalProperties(false)
where S is the fluent-schema instance. See https://github.com/fastify/fluent-schema for more information.
Another important practice that can help to protect against exploitative input is to write rigorous tests for services. This is not covered in this training nor is it part of the JavaScript Services Developer Certification. It is instead a key part of the sibling JavaScript Application Developer Certification and associated training. However, for information on applying unit testing skills to Fastify services, see https://www.fastify.io/docs/latest/Guides/Testing/.
In this section we implemented validation to our service as per Fastify API's and recommendations. In other words, the approach described is typical to Fastify. In the next section we'll apply the same validation to the Express service we created in Chapter 6, in a way which is in-keeping with legacy Express projects found in the wild.
Route Validation with Express (1)
Express does not offer any validation primitives or abstractions as a core part of the framework. There are no particular validation practices recommended in the frameworks' documentation. As a result, approaches to Express validation in the wild vary significantly. While validation libraries do exist - for an example see https://express-validator.github.io/docs/ - there is no standard approach. It is even possible to use JSONSchema with Express via various middleware offerings but this is rarely seen in practice; possibly because the implementations available cause significant performance overhead. As a result the most common approach to validation in Express is to develop custom logic for the service as needed. This isn't exactly recommended, but when dealing with legacy services it's useful to understand this aspect of real-world legacy Express development.
So in this section we'll be looking at hand-rolled validation rules for the Express service that was created in Chapter 6.
In Chapter 6 an Express service was created in a my-express-service folder. The routes/bicycle.js file from that folder looked as follows:
var express = require('express');
var router = express.Router();
var model = require('../model');

router.get('/:id', function(req, res, next) {
  model.bicycle.read(req.params.id, (err, result) => {
    if (err) {
      if (err.message === 'not found') next();
      else next(err);
    } else {
      res.send(result);
    }
  });
});

router.post('/', function(req, res, next) {
  var id = model.bicycle.uid();
  model.bicycle.create(id, req.body.data, (err) => {
    if (err) next(err);
    else res.status(201).send({ id });
  });
});

router.post('/:id/update', function(req, res, next) {
  model.bicycle.update(req.params.id, req.body.data, (err) => {
    if (err) {
      if (err.message === 'not found') next();
      else next(err);
    } else {
      res.status(204).send();
    }
  });
});

router.put('/:id', function(req, res, next) {
  model.bicycle.create(req.params.id, req.body.data, (err) => {
    if (err) {
      if (err.message === 'resource exists') {
        model.bicycle.update(req.params.id, req.body.data, (err) => {
          if (err) next(err);
          else res.status(204).send();
        });
      } else {
        next(err);
      }
    } else {
      res.status(201).send({});
    }
  });
});

router.delete('/:id', function(req, res, next) {
  model.bicycle.del(req.params.id, (err) => {
    if (err) {
      if (err.message === 'not found') next();
      else next(err);
    } else {
      res.status(204).send();
    }
  });
});

module.exports = router;
Route Validation with Express (2)
Rather than applying validation to this file piece by piece, we'll look at the full file with validation rules that match those as applied to the Fastify service in the prior section and then we'll discuss various aspects of it. The following is the routes/bicycle.js with validation and sanitization applied:
var express = require('express');
var router = express.Router();
var model = require('../model');

function hasOwnProperty (o, p) {
  return Object.prototype.hasOwnProperty.call(o, p);
}

function validateData (o) {
  var valid = o !== null && typeof o === 'object';
  valid = valid && hasOwnProperty(o, 'brand');
  valid = valid && hasOwnProperty(o, 'color');
  valid = valid && typeof o.brand === 'string';
  valid = valid && typeof o.color === 'string';
  return valid && {
    brand: o.brand,
    color: o.color
  };
}

function validateBody (o) {
  var valid = o !== null && typeof o === 'object';
  valid = valid && hasOwnProperty(o, 'data');
  valid = valid && o.data !== null && typeof o.data === 'object';
  var data = valid && validateData(o.data);
  return valid && data && {
    data: data
  };
}

function isIdValid (n) {
  n = Number(n)
  var MAX_SAFE = Math.pow(2, 53) - 1
  return isFinite(n) && Math.floor(n) === n && Math.abs(n) <= MAX_SAFE
}

function isParamsValid (o) {
  var valid = o !== null && typeof o === 'object';
  valid = valid && hasOwnProperty(o, 'id');
  valid = valid && isIdValid(o.id);
  return valid;
}

function badRequest () {
  const err = new Error('Bad Request');
  err.status = 400;
  return err;
}

router.get('/:id', function (req, res, next) {
  if (isParamsValid(req.params)) {
    model.bicycle.read(req.params.id, (err, result) => {
      if (err) {
        if (err.message === 'not found') next();
        else next(err);
      } else {
        var sanitizedResult = validateData(result);
        if (sanitizedResult) {
          res.send(sanitizedResult);
        } else {
          next(new Error('Server Error'));
        }
      }
    });
  } else {
    next(badRequest());
  }
});

router.post('/', function (req, res, next) {
  var id = model.bicycle.uid();
  var body = validateBody(req.body);
  if (body) {
    model.bicycle.create(id, body.data, (err) => {
      if (err) {
        next(err);
      } else {
        if (isIdValid(id)) res.status(201).send({ id });
        else next(new Error('Server Error'));
      }
    });
  } else {
    next(badRequest());
  }
});

router.post('/:id/update', function (req, res, next) {
  if (isParamsValid(req.params)) {
    var body = validateBody(req.body);
    if (body) {
      model.bicycle.update(req.params.id, body.data, (err) => {
        if (err) {
          if (err.message === 'not found') next();
          else next(err);
        } else {
          res.status(204).send();
        }
      });
    } else {
      next(badRequest());
    }
  } else {
    next(badRequest());
  }
});

router.put('/:id', function (req, res, next) {
  if (isParamsValid(req.params)) {
    var body = validateBody(body);
    if (body) {
      model.bicycle.create(req.params.id, body.data, (err) => {
        if (err) {
          if (err.message === 'resource exists') {
            model.bicycle.update(req.params.id, body.data, (err) => {
              if (err) next(err);
              else res.status(204).send();
            });
          } else {
            next(err);
          }
        } else {
          res.status(201).send({});
        }
      });
    } else {
      next(badRequest());
    }
  } else {
    next(badRequest());
  }
});

router.delete('/:id', function (req, res, next) {
  if (isParamsValid(req.params)) {
    model.bicycle.del(req.params.id, (err) => {
      if (err) {
        if (err.message === 'not found') next();
        else next(err);
      } else {
        res.status(204).send();
      }
    });
  } else {
    next(badRequest());
  }
});

module.exports = router;
Route Validation with Express (3)
The code has been written using an older style, as is common (and in fact, recommended) in Express applications. The validation functions have been written in the routes/bicycle.js as they are quite specific to the route, but typically validation code would reside in a lib/validation.js file or be refactored into some custom middleware and placed into a middleware/validation folder. Let's take a look at the validation functions and utility functions at the top of routes/bicycle.js:
function hasOwnProperty (o, p) {
  return Object.prototype.hasOwnProperty.call(o, p);
}
The hasOwnProperty is a small utility function that will be found in various forms across all sorts of JavaScript projects, both frontend and backend. It is possible to call o.hasOwnProperty('foo') where o is an object and foo is an expected property on the object. However since the method name can be overwritten, it's safer to apply the Object.prototypeo.hasOwnProperty function (from which objects inherit), to an object using call (which sets o to the this context of the Object.prototype.hasOwnProperty function) and then wrap that in a utility function. We could use p in o to check if an object has a property but this will also check for prototype properties, for example 'toString' in {} evaluates to true even though it's an empty object. Now let's look at the next function:
function validateData (o) {
  var valid = o !== null && typeof o === 'object';
  valid = valid && hasOwnProperty(o, 'brand');
  valid = valid && hasOwnProperty(o, 'color');
  valid = valid && typeof o.brand === 'string';
  valid = valid && typeof o.color === 'string';
  return valid && {
    brand: o.brand,
    color: o.color
  };
}
The validateData function is for assessing whether req.body.data meets the validation constraints. That is: is req.body.data an object? Does it have a brand and color property and are the values of both of these properties strings? If not, the function will return false; otherwise, it returns an object with those two values. This provides a sanitized form of the input object, effectively stripping any extra properties.
function validateBody (o) {
  var valid = o !== null && typeof o === 'object';
  valid = valid && hasOwnProperty(o, 'data');
  valid = valid && o.data !== null && typeof o.data === 'object';
  var data = valid && validateData(o.data);
  return valid && data && {
    data: data
  };
}
Similar to validateData, the validateBody function is for assessing whether req.body meets the validation constraints. That is, is req.body an object, does it have a data property and is that data property an object. It also uses the validateData function to validate the data property of the input object (o). If either the body object or data object is invalid, the function will return false, otherwise it returns an object with a data property whose value is the sanitized data object. This provides a deeply sanitized form of the body. Now onto the next function:
function isIdValid (n) {
  n = Number(n)
  var MAX_SAFE = Math.pow(2, 53) - 1
  return isFinite(n) && Math.floor(n) === n && Math.abs(n) <= MAX_SAFE
}
The isIdValid function checks that the input is an integer, thus enforcing that IDs are always integers. In modern JavaScript it could be written as const isIdValid = (n) => Number.isSafeInteger(Number(n)) but this code is written in a legacy style more appropriate to the majority of Express services in production. Let's take a look at the next function:
function isParamsValid (o) {
  var valid = o !== null && typeof o === 'object';
  valid = valid && hasOwnProperty(o, 'id');
  valid = valid && isIdValid(o.id);
  return valid;
}
The isParamsValid function checks that params is an object (it should always be an object, but in case of accidental use on something other than req.params at least this would fail fast). Then it checks for the presence of the id property, and checks the value of the id property with isIdValid. Let's take a look at the final utility function at the top of routes/bicycle.js:
function badRequest () {
  const err = new Error('Bad Request');
  err.status = 400;
  return err;
}
This is a small convenience wrapper to create errors with a status property set to 400, to handle all the cases where validation fails in the routes.
Route Validation with Express (4)
It should be evident that we've recreated a hand-rolled function-based equivalent of the schemas we created in the previous chapter. Now let's see how these functions are used in each route. Let's start with the GET route:
router.get('/:id', function (req, res, next) {
  if (isParamsValid(req.params)) {
    model.bicycle.read(req.params.id, (err, result) => {
      if (err) {
        if (err.message === 'not found') next();
        else next(err);
      } else {
        var sanitizedResult = validateData(result);
        if (sanitizedResult) {
          res.send(sanitizedResult);
        } else {
          next(new Error('Server Error'));
        }
      }
    });
  } else {
    next(badRequest());
  }
});
The first conditional check is whether req.params is valid. If it is, we proceed to call model.bicycle.read. If not we call next(badRequest()) at the bottom of the route handler function.
We also pass the result object provided to the callback passed to model.bicycle.read to check that the result matches our data validation constraints and strip any extra properties from it. This is providing the same functionality as the schema.response with Fastify in the prior section. If the sanitizedResult variable is not false then it's the sanitized object, which is passed to res.send to complete the response. Otherwise the next function is called with new Error('Server Error'). This will propagate to the error handling middleware in the app.js file, which will automatically set the response status to 500 as it does for any error object without a status property. This means if the data fetched from the model does not meet validation constraints, a 500 server error will occur. Let's take a look at the first POST route with validation applied:
router.post('/', function (req, res, next) {
  var id = model.bicycle.uid();
  var body = validateBody(req.body);
  if (body) {
    model.bicycle.create(id, body.data, (err) => {
      if (err) {
        next(err);
      } else {
        if (isIdValid(id)) res.status(201).send({ id });
        else next(new Error('Server Error'));
      }
    });
  } else {
    next(badRequest());
  }
});
We assign a body variable to validateBody(req.body). If body is false, then we call next(badRequest()) at the end of the route handler function. Otherwise we pass body.data to the model.bicycle.create function. Before sending an object holding the ID of the newly created record, we pass the id variable to isIdValid, we send the ID in an object as the response or otherwise propagate an Error that will result in a 500 error. We could actually check the ID earlier (before calling model.bicycle.create) however for understanding purposes the behavior of this route intentionally maps as close as possible to the behavior of the equivalent route in the prior section: Fastify doesn't validate responses until the response is about to be sent.
Let's take a look at the second POST route:
router.post('/:id/update', function (req, res, next) {
  if (isParamsValid(req.params)) {
    var body = validateBody(req.body);
    if (body) {
      model.bicycle.update(req.params.id, body.data, (err) => {
        if (err) {
          if (err.message === 'not found') next();
          else next(err);
        } else {
          res.status(204).send();
        }
      });
    } else {
      next(badRequest());
    }
  } else {
    next(badRequest());
  }
});
This mixes validation elements from both the GET route and the POST route. We check that the params are valid with isParamsValid, if not we create an error with badRequest and pass it to next in the last else branch of the route handler function. We validate and sanitize req.body with validateBody, if body is false we create an error with badRequest and pass it to next in the penultimate else branch of the route handler function. Otherwise we pass body.data to model.bicycle.update. We can skip the PUT route as the validation for the PUT route is exactly the same as for this second POST route. Let's take a look at the final DELETE route:
router.delete('/:id', function (req, res, next) {
  if (isParamsValid(req.params)) {
    model.bicycle.del(req.params.id, (err) => {
      if (err) {
        if (err.message === 'not found') next();
        else next(err);
      } else {
        res.status(204).send();
      }
    });
  } else {
    next(badRequest());
  }
});
Here all we needed to do was validate the params, if they're invalid then we call next(badRequest()) at the bottom of the route handler function.
Route Validation with Express (5)
We can start our server with the updated routes/bicycle.js file (npm start) and then in another terminal check run some commands to check that it works as intended.
The following POST request should work successfully:
node -e "http.request('http://localhost:3000/bicycle', { method: 'post', headers: {'content-type': 'application/json'}}, (res) => res.setEncoding('utf8').once('data', console.log.bind(null, res.statusCode))).end(JSON.stringify({data: {brand: 'Gazelle', color: 'red'}}))"
The output of the command would be 201 {"id": "3"}. The payload for this request was {"data":{"brand":"Gazelle","color":"red"}}. If we change the payload to {"data":{"brand":"Gazelle","colors":"red"}} we should get a 400 Bad Request response. The following command tries to make a POST request with this invalid payload:
node -e "http.request('http://localhost:3000/bicycle', { method: 'post', headers: {'content-type': 'application/json'}}, (res) => res.setEncoding('utf8').once('data', console.log.bind(null, res.statusCode))).end(JSON.stringify({data: {brand: 'Gazelle', colors: 'red'}}))"
This will result in the following output: 400 {"type":"error","status":400,"message":"Bad Request","stack": "..."} where the actual stack is replaced with "...". Unlike the Fastify implementation with schemas no message has been generated as to why it was a 400 Bad Request response.
If we include extra properties in the payload, they will be stripped. We can try sending the payload {"data":{"brand":"Gazelle","color":"red", "extra": "will be stripped"}} with the following command:
node -e "http.request('http://localhost:3000/bicycle', { method: 'post', headers: {'content-type': 'application/json'}}, (res) => res.setEncoding('utf8').once('data', console.log.bind(null, res.statusCode))).end(JSON.stringify({data: {brand: 'Gazelle', color: 'red', extra: 'will be stripped'}}))"
Running this command will result in 201 {"id":"4"} as output, the record was successfully created. However if we make a GET request to http://localhost:3000/bicycle/4 we will see that the extra key in the payload was not stored. The following command can make the GET request:
node -e "http.get('http://localhost:3000/bicycle/4', (res) => res.setEncoding('utf8').once('data', console.log))"
This will output {"brand":"Gazelle","color":"red"}, the extra key has not been stored because the validateBody function in the POST request created a new object with only the brand and color keys, effectively stripping extra from the payload.
As mentioned in the prior section, rigorous testing of services is highly recommended. Not only that but it's this author's experience that many deployed Express services used in production by organizations around the world have no tests, or have inadequate tests. Testing is not covered in this training nor is it part of the JavaScript Services Developer Certification. It is instead a key part of the JavaScript Application Developer Certification and associated training. However, the supertest library is an excellent tool for testing Express services, see https://github.com/visionmedia/supertest for more information.
Lab Exercises
Lab 9.1 - Implement a Service That Is Not Vulnerable to Parameter Pollution
The labs-1 folder contains the following files:
package.jsonapp.jsvalidate.js
The package.json file contains the following:
{
  "name": "labs-1",
  "version": "1.0.0",
  "scripts": {
    "start": "node app.js"
  },
  "license": "UNLICENSED",
  "dependencies": {
    "express": "^4.17.1"
  }
}
Note that Express is a dependency of the project. Install the project dependency with the following command, executed within the labs-1 folder:
npm install
The app.js file contains the following:
'use strict'
const express = require('express')
const app = express()
const router = express.Router()
const { PORT = 3000 } = process.env

router.get('/', (req, res) => {
  setTimeout(() => {
    res.send((req.query.un || '').toUpperCase())
  }, 1000)
})

app.use(router)

app.listen(PORT, () => {
  console.log(`Express server listening on ${PORT}`)
})
This is a small Express service that uppercases any input sent via a un query string parameter, but it waits one second before sending the response.
This service is vulnerable to parameter pollution. A URL such as http://localhost:3000/?un=a&un=b will cause the service to crash, assuming the service is listening on port 3000.
Fix it, without changing any of the current functionality.
The parameter pollution attack may be handled as seen fit. For instance upper casing all forms, or sending a 400 Bad Request, or any kind of response. The only thing that must not happen is the service crashing and requests containing query-strings with a single un parameter must continue to respond with the uppercased version of that value.
Run the validate.js file as follows, to validate the fix:
node validate.js
If successful this should output something similar to the following:
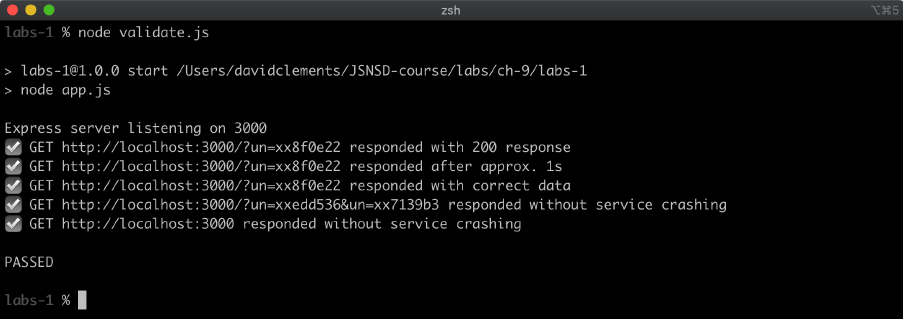
Lab 9.2 - Validate a POST Request
The labs-2 folder contains a Fastify service. Other than the typical Fastify directory structure, it has a model.js file, a routes/boat/index.js, a package-lock.json file and a validate.js file.
The model.js file is the same as from the labs of Chapters 5 and 6.
The routes/boat/index.js file supports the following routes:
POST /boatGET /boat/{id}DELETE /boat/{id}
Apply validation to the POST route request body so that any POST request bodies that do not have the shape { data: { brand, color }} are rejected with a 400 Bad Request status code. Additional properties are allowed, but should be stripped before being stored.
Do not remove or otherwise modify any of the routes.
Remember to run npm install in the labs-2 folder to install project dependencies.
Run the validate.js file as follows, to validate that the route validation was correctly implemented:
node validate.js
If successful this should output something similar to the following:
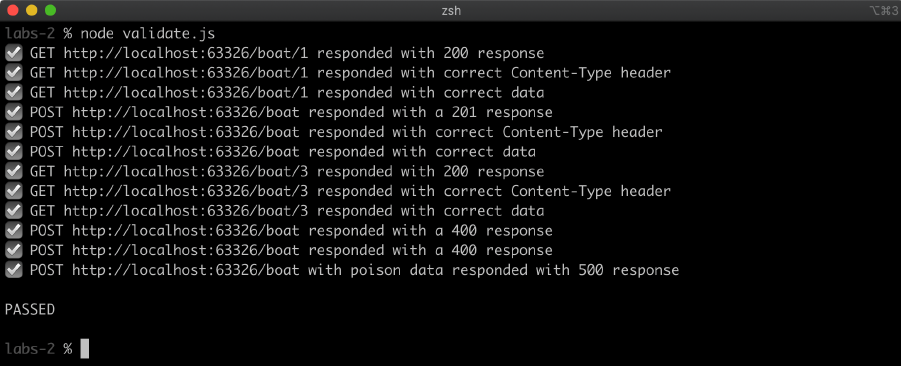
10 - Web Security: Mitigating Attacks
Introduction
Chapter Overview
Attacks can take various forms and have different goals. Sometimes it can be about stealing information, either from the server or from other users. Other times it can just be about causing disruption. The most prevalent example of disruption-focussed attacks is via a Denial of Service (DOS) attack. In the case of a Distributed Denial of Service (DDOS) attack this would mean automating a large amount of machines to each make a large amount of requests to a single service. Other Denial of Service (DOS) attacks may involve much fewer machines that make requests to an endpoint that has been identified as vulnerable to a payload (for instance one that decompresses to a much larger size). This topic in itself is extensive, and should mostly be handled by the infrastructure around a deployed Node.js service. In this short final chapter we will briefly explore quick fixes to such scenarios when, for whatever reason, a Node.js service needs to handle an active attack.
Learning Objectives
By the end of this chapter, you should be able to:
- Understand how to block an attackers IP in Express.
- Understand how to block an attackers IP in Fastify.
- Create plugins and use hooks in Fastify.
Web Security: Mitigating Attacks
Block an Attackers' IP Address with Express
As we discussed in the introduction, an attack can come from multiple machines, which tends to mean it can come from multiple IPs. However, once we know how to block one IP in a service we can block as many IPs as we like. In this section, we'll look at blocking a single attacking IP address in an Express service. To re-emphasize, this is not something that should normally be necessary, it's only a last-resort scenario in cases where deployment infrastructure is not handling these scenarios externally to our service.
Recall that Express is essentially a middleware pattern on top of Node's core http (and https) modules. The http (and https) modules use the net module for TCP functionality. Each req and res object that are provided to the request listener function (which is passed to http.createServer) have a socket property which is the underlying TCP socket for the request and response. So req.socket.remoteAddress will contain the IP address of the client making a request to an Express service.
Since Express passes the req and res objects to each piece of registered middleware in the order that they are registered, in order to block an attacking IP, all we need to do is register a middleware function before other middleware and check req.socket.remoteAddress.
Let's say we want to block the IP 127.0.0.1 (this is the localhost IP, so it's useful for testing purposes) in a typical Express application, that is one that was generated with the express CLI tool from express-generator. We would register the following before other middleware:
app.use(function (req, res, next) {
  if (req.socket.remoteAddress === '127.0.0.1') {
    const err = new Error('Forbidden');
    err.status = 403;
    next(err);
    return;
  }
  next();
});
If req.socket.remoteAddress was to match our target IP address, we generate a new error and set the status property of that error to 403 (the status code for Forbidden), then call next, passing it the error and then use return to exit the function early. If req.socket.remoteAddress does not match the IP address we simply call next to let Express execute the middleware registered after this one.
Remember that a typical Express application has the following error handler middleware at the end of all registered middleware:
// error handler
app.use(function(err, req, res, next) {
  // set locals, only providing error in development
  res.locals.message = err.message;
  res.locals.error = req.app.get('env') === 'development' ? err : {};

  // render the error page
  res.status(err.status || 500);
  res.render('error');
});
So by setting the status property of the err object we create in our IP blocking middleware, we cause the error handling middleware to call res.status(403) which results in a 403 Forbidden response from the service. When dealing with an adversarial opponent, it's sometimes better to misinform than to give valid feedback. For example, using a 404 Not Found status could be better than a 403 Forbidden status since a 404 is misleading. However, it's unlikely to fool many.
Registering the IP blocking middleware as early as possible makes sense since we don't want an attacker to be able to access any systems. However, it can also be argued that we want to register it after logging middleware. Either way the IP is blocked, but in the latter case the act of it being blocked is visible in the logs.
In the next section we'll learn how to block an IP address from accessing a Fastify service.
Block an Attackers' IP Address with Fastify
Conversely to Express, Fastify uses a plugin-based approach and provides an abstraction on top of the native req and res objects (request and reply) instead of adding directly to them as in Express. To get the IP address of a requesting client we use request.ip.
Fastify also provides a Hooks API, which allows us to intervene at various points of the request/response life-cycle.
Similar to using IP blocking middleware as soon as possible, we want to use a hook as soon as possible in the request/response life-cycle. The first hook in the life-cycle is the onRequest hook.
In a typical Fastify application (as in one created with npm init fastify), custom service configuration should be performed through plugins. To configure the server to block an IP, we could create a file named deny.js placed into the plugins folder. This will be automatically loaded (since the app.js file uses fastify-autoload to load all plugins in the plugins folder).
If we wanted to block the IP 127.0.0.1 (this is localhost, so good for local experimenting) the plugins/deny.js file would look as follows:
'use strict'

const fp = require('fastify-plugin')

module.exports = fp(async function (fastify, opts) {
  fastify.addHook('onRequest', async function (request) {
    if (request.ip === '127.0.0.1') {
      const err = new Error('Forbidden')
      err.status = 403
      throw err
    }
  })
})
The fastify-plugin module de-encapsulates a plugin, making it apply to the entire service because plugins are registered by fastify-autoload at the top level. So we pass our plugin function to fp (fastify-plugin) as we want the onRequest hook to apply to the service as a whole. For general information on plugins, please review Fastify's Documentation.
A Fastify plugin is a function that either returns a promise or calls a callback and accepts the service instance (which we call fastify) and options (opts). We use an async function so a promise is returned automatically. We call the addHook method on the service instance (fastify.addHook), the first argument is a string identifying the hook we'd like to register (onRequest) and the second argument is an async function which is called and passed the request object for every incoming request. It's also passed the reply object but we don't need that for our purposes. We check whether request.ip matches our target IP and then throw an error with a status code of 403 if it does. Fastify automatically sets the status code to the status property of a thrown error if it exists.
Alternatively, we could implement the plugins/deny.js plugin as follows:
'use strict'

const fp = require('fastify-plugin')

module.exports = fp(async function (fastify, opts) {
  fastify.addHook('onRequest', async function (request) {
    if (request.ip === '127.0.0.1') {
      throw fastify.httpErrors.forbidden()
    }
  })
})
This would have the same exact effect.
Lab Exercises
Lab 10.1 - Block an Attackers IP Address with Express
The labs-1 folder contains an Express application along with a validate.js file.
Imagine this is a deployed service, which is receiving a DoS attack from the IP address 111.34.55.211.
Edit the service so that this IP address, and only this IP address, receives a 403 Forbidden response from the service.
Execute the following command to check the mitigation step worked:
node validate.js
If successful, output similar to the following should be seen:
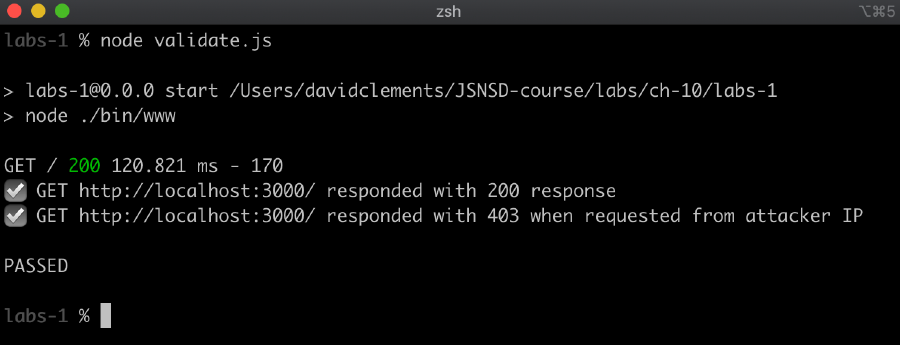
Lab 10.2 - Block an Attackers IP Address with Fastify
The labs-2 folder contains a Fastify application along with a validate.js file.
Imagine this is a deployed service, which is receiving a DoS attack from the IP address 211.133.33.113.
Edit the service so that this IP address, and only this IP address, receives a 403 Forbidden response from the service.
Execute the following command to check the mitigation step worked:
node validate.js
If successful, output similar to the following should be seen:
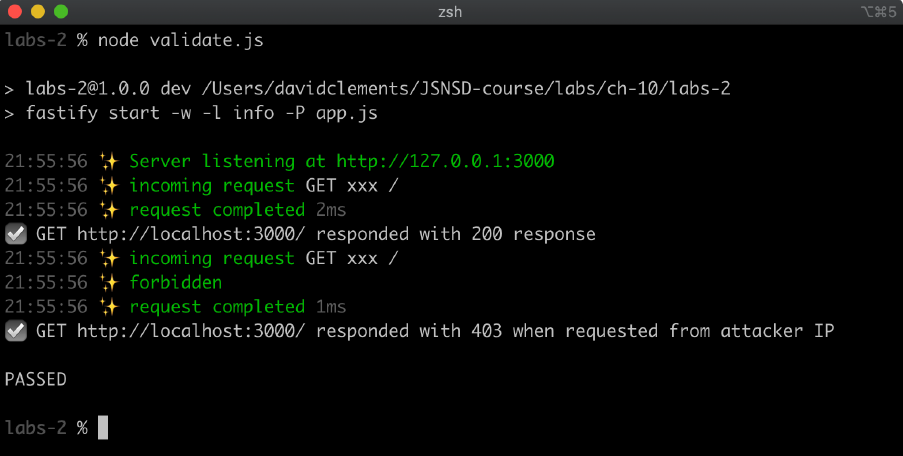
11 - Course Completion
Course Completion
Lab Exercises
Quizzes
2 - Setting up
2.1
- Question
- Answer
- Additional Details
What is the recommended approach to installing Node?
- (A) From the website
- (B) With an OS package manager
- (C) With a version manager
C
None
2.2
- Question
- Answer
- Additional Details
Which of the following commands displays the currently installed Node.js version?
- (A)
node -v - (B)
node -V - (C)
node --ver
A
None
2.3
- Question
- Answer
- Additional Details
Aside from the Node binary, what else does a Node installation provide?
- (A) A module package manager
- (B) Build tools
- (C) An IDE
A
None
3 - Creating a Web Server
3.1
- Question
- Answer
- Additional Details
How is an HTTP server initialized with Node's core http module?
- (A)
http.initServer - (B)
http.listen - (C)
http.createServer
C
None
3.2
- Question
- Answer
- Additional Details
In Express, what is middleware?
- (A) A unit of functionality represented by a function that takes request and response objects, and a callback function. The function is called on each request in the order that it was registered relative to other registered functions.
- (B) A unit of functionality represented by a function exported from a module that returns a promise or specifies a callback in its signature. The function is called only on initialization.
- (C) A piece of code which is inserted in the middle of a function to massage the data from a request before it is sent as a response by returning it from the function.
A
None
3.3
- Question
- Answer
- Additional Details
What happens when a value is returned from a Fastify route handler function?
- (A) Nothing, it's ignored
- (B) An error is thrown
- (C) It's processed and sent as the response
C
None
4 - Serving Web Content
4.1
- Question
- Answer
- Additional Details
What's the (generally) optimum way to serve static content?
- (A) With any Node.js framework
- (B) With Fastify
- (C) With a CDN/Infrastructure solution
C
None
4.2
- Question
- Answer
- Additional Details
When interpolating data into templates it's important to consider whether that data is being escaped for a given context. In the Handlebars view engine which syntax escapes a template local and which syntax interpolates the raw contents of a template local?
- (A)
{{ local }}escapes and{{{ local }}}is raw - (B)
{{{ local }}}escapes and{{ local }}is raw - (C) {
{ esc(local) }}escapes and{{ local }}is raw
A
None
4.3
- Question
- Answer
- Additional Details
Streams are excellent for improving user experiences by providing immediately available data while continuing to process remaining data on the server. However, handling streams, especially propagating errors in streams, can be tricky. Which framework automatically handles streams that are passed to it as a response?
- (A) Fastify
- (B) Express
- (C) Both Fastify and Express
A
None
5 - Creating RESTful JSON Services
5.1
- Question
- Answer
- Additional Details
What HTTP status code should be sent in response to a client requesting a non-existent resource?
- (A) 400
- (B) 404
- (C) 405
- (D) None of the above
answer
None
5.2
- Question
- Answer
- Additional Details
What HTTP status code should be sent in response to a client requesting a route with an unsupported HTTP method?
- (A) 400
- (B) 404
- (C) 405
- (D) Any of the above
D
None
5.3
- Question
- Answer
- Additional Details
What does npm init fastify -- --integrate do?
- (A) It's not important
- (B) Initializes a Fastify project but only if the current folder doesn't have a
package.jsonfile - (C) Initializes a Fastify project even if the current folder has a
package.jsonfile, extends the existingpackage.jsonscripts field to include a start script, while also supporting mapping of the PORT environment variable to the server's listening port. This would be extremely useful in scenarios where a server needs to be rapidly initialized while also meeting expected conventions.
C
None
6 - Manipulating Data with RESTful Services
6.1
- Question
- Answer
- Additional Details
What's the difference between POST and PUT?
- (A) POST is for creating entries, PUT is for updates
- (B) PUT must be idempotent, POST does not have to be
- (C) PUT is for creating entries and for updates, POST is only for creating entries
B
None
6.2
- Question
- Answer
- Additional Details
What does a 204 status code indicate?
- (A) Not Found
- (B) No Content
- (C) Created
B
None
6.3
- Question
- Answer
- Additional Details
Why is it not recommended to use async/await functions as route handlers in Express?
- (A) It's purely about style and preserving the code-style of legacy projects which use callback-based route handlers
- (B) It's totally fine to use async/await as route handlers with Express and there are no gotchas at all
- (C) The framework was not built to support them, since they did not exist when it was built
answer
None
7 - Consuming and Aggregating Services
7.1
- Question
- Answer
- Additional Details
What should we do if an upstream service is not available?
- (A) Respond with a 500 status code
- (B) Just leave that data out
- (C) It's definitely something that should be considered, but it depends on the situation as to what the right thing to do is
C
None
7.2
- Question
- Answer
- Additional Details
How should services discover each other?
- (A) Injecting a URL via an environment variable
- (B) Injecting a port via an environment variable
- (C) Injecting any data into a service via any method is one small piece of service discovery and the way to discover other services depends entirely on the situation
C
None
7.3
- Question
- Answer
- Additional Details
What request library should be used when fetching data from other services?
- (A) Always use got
- (B) Use got or the core http/https libraries
- (C) It depends on implementation and other requirements
C
None
8 - Proxying HTTP Requests
8.1
- Question
- Answer
- Additional Details
Ideally speaking should Node be used as a proxy?
- (A) Always
- (B) Never
- (C) Usually not, but it depends on the situation
C
None
8.2
- Question
- Answer
- Additional Details
What Fastify plugin can be used to create a route-based proxy?
- (A)
fastify-reply-from - (B)
fastify-http-proxy - (C)
fast-proxy
A
None
8.3
- Question
- Answer
- Additional Details
What does the native URL constructor do?
- (A) Constructs URLs
- (B) Validates a URL
- (C) Parses a URL into an object containing properties related to its parts
C
None
9 - Web Security: Handling User Input
9.1
- Question
- Answer
- Additional Details
What is a parameter pollution attack?
- (A) Making a request to a URL with a query-string parameter named
__proto__so that when parsed theObject.prototypecan be maliciously modified - (B) Making a request to a URL where two query-string parameters with the same name are set in hopes of exploiting a common developer error in order to crash or slow down a service
- (C) Making a request to a URL where a very large amount of parameters have been set in order to overwhelm the service
B
None
9.2
- Question
- Answer
- Additional Details
What frameworks could a parameter pollution attack affect?
- (A) Fastify
- (B) Express
- (C) All mainstream frameworks
C
None
9.3
- Question
- Answer
- Additional Details
By default, what effect does the JSONSchema additionalProperties keyword have when set to false as part of a schema used for Fastify route validation?
- (A) An object being validated will be sanitized so that only specified properties remain
- (B) If an object being validated has any extra properties, this will result in a 400 Bad Request response code, unless it's a response schema in which case it will result in a 500 Server Error response code
- (C) It becomes impossible to add any properties to an object after it has been validated
A
None
10 - Web Security: Mitigating Attacks
10.1
- Question
- Answer
- Additional Details
In Node core (and therefore in Express) how would we determine the IP address of a requesting client?
- (A)
req.ip - (B)
req.socket.remoteAddress - (C) Either
req.socket.iporreq.socket.remoteAddress
B
None
10.2
- Question
- Answer
- Additional Details
In Fastify how would we determine the IP address of a requesting client?
- (A)
reply.ip - (B)
request.ip - (C) Either
reply.iporrequest.ip
B
None
10.3
- Question
- Answer
- Additional Details
Which part of a deployed system should be responsible for considering and handling malicious attacks?
- (A) Each service
- (B) Security infrastructure
- (C) Every part
C
None